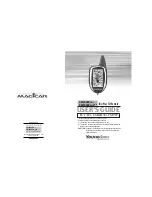
background image

P

OS CABLE AND

CLAMP

(RED)

N

EG CABLE AND

CLAMP

(BLACK)

8

FIGURE 2

2222....3333

JJJJUUU

UM

M

M

MPPPP----SSSSTTTTA

A

A

ARRRRTTTT PPPPRRRRO

O

O

OCCCCEEEEDD

D

DUUUURRRREEEE

1. Turn OFF ignition and all accessories before making cable connections.

2. Make sure the Compact Elite’s power safety switch is turned OFF.

3. Observe jump-starting negative or positive ground system, as follows:

Negative ground (negative battery terminal connected to chassis) - most common.

4. Connect positive (+) red clamp to vehicle’s positive battery terminal.

5. Connect negative (-) black clamp to chassis or a solid, non-moving, metal vehicle

component or chassis part, make sure cables are not in path of moving belts or fan.

6. Turn ON unit’s power safety switch.

7. Start vehicle (crank engine in 3 - 6 second bursts) if engine won’t start within 6 seconds let

the Compact Elite’s internal battery cool 3 minutes before another attempt.

8. After vehicle starts, turn portable power safety switch to OFF position.

9. Leave engine running.

10. Remove clamps. First, disconnect the clamp connected to the engine or chassis, followed

by the clamp connected to the battery positive terminal.

11. Carefully press negative (black) jumper cable wire into storage channel starting at end

away from the clamp.

12. Squeeze negative (black) clamp handles and clamp onto holster.

13. Carefully press positive (red) jumper cable wire into storage channel starting at end away

from the clamp.

14. Squeeze positive (red) clamp handles and clamp onto holster.

15. Recharge unit as soon as possible.

3.

USE AS A 12 VOLT DC PORTABLE POWER SUPPLY

This portable power source is also for use with all 12VDC accessories equipped with a male

accessory outlet plug and are rated up to 12 amps.

WARNING!

NEVER INSERT A CIGARETTE LIGHTER INTO ACCESSORY OUTLET.

CAUTION:

Make sure that the unit’s power safety switch is ALWAYS in the off position

when using the unit’s 12 volt DC accessory outlet

1. Lift up the cover of the unit ‘s 12 volt DC outlet.

2 Insert the 12 volt DC plug from the appliance into the 12 volt accessory outlet on the unit.

DO NOT EXCEED A 12 AMP LOAD.

3. Switch on the appliance, as usual.

4. Periodically press the battery charge level pushbutton to check battery status.

CAUTION:

DO NOT OPERATE APPLIANCES THAT DRAW MORE THAN 12 AMPS.

Vec010S manual 03/04  5/22/06  11:19 AM  Page 8

Содержание START-IT Compact Elite VEC010INV

Страница 1: ...Y OPERATION MAINTENANCE AND STORAGE OF THIS PRODUCT BEFORE USING READ AND UNDERSTAND ALL CAUTIONS WARNINGS INSTRUCTIONS AND PRODUCT LABELS PLUS YOUR VEHICLE S BATTERY MANUFACTURER GUIDELINES FAILURE T...

Страница 2: ...utlets to get wet electrical shock could result 7 Jump start procedures should only be performed in a safe dry well ventilated area 8 Always store battery clamps in built in holsters when not in use N...

Страница 3: ...F position before connection to a power source or load 3 Never insert anything other than the supplied power recharging cords or recommended appliance power recharging cords into the 12 volt DC chargi...

Страница 4: ...RTWARNINGS 7 2 2 FIRST AID 7 2 3 JUMP START PROCEDURE 8 3 USE AS A 12 VOLT DC PORTABLE POWER SUPPLY 8 4 CHARGING RECHARGING 9 4 1 AC RECHARGE 9 4 2 DC RECHARGE 9 10 5 MAINTENANCE REPLACEMENT PARTS 10...

Страница 5: ...t the beach or wherever your travels take you It can also be used with other Vector 12 volt DC cordless portable rechargeable appliances rated at 12 amps maximum For information about Vector appliance...

Страница 6: ...Most batteries of engines with a standard 12 volt DC battery system boat small truck car airplane RV personal watercraft snowmobile tractor etc O O O Op p p pe e e er r r ra a a at t t te e e e using...

Страница 7: ...e jump starting this type of vehicle read the vehicle s owner s manual to confirm that external starting assistance is advised 12 Power safety switch should be off prior to jump starting 13 Excessive...

Страница 8: ...mp connected to the engine or chassis followed by the clamp connected to the battery positive terminal 11 Carefully press negative black jumper cable wire into storage channel starting at end away fro...

Страница 9: ...ne by one Charge the unit until the battery charge level display lights or flashes the green FULL LED Continue to recharge for one to two hours and then disconnect the recharge adapter AC recharge sys...

Страница 10: ...free sealed non spillable lead acid battery which must be disposed of properly Recycling is required contact your local authority for information Failure to comply with local state and federal regulat...

Страница 11: ...IONS This warranty does not cover accessories bulbs fuses and batteries defects resulting from normal wear and tear including chips scratches abrasions discoloration or fading due to usage or exposure...

Страница 12: ...red or replaced unit will then be warranted under the terms of the remainder of the warranty period The customer is responsible for the shipping charges on all returned items after 30 days During the...

Страница 13: ...s cellular phones camcorders power tool battery packs that have an appropriate recharging adapter with a three prong 110 120 volt AC North American standard type plug OPERATING AND VISIBLE FEATURES 70...

Страница 14: ...stoves and heaters that require more wattage than the inverter can deliver Inductive loads such as TVs and stereos require more current to operate than do resistive loads of the same wattage rating F...

Страница 15: ...n Interference The Pocket Power is shielded to minimize interference with TV signals However in some instances some interference may still be visible especially when the TV signal is weak Try the foll...

Отзывы: