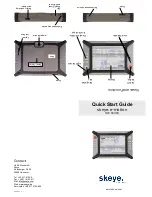
4
WHERE YOU DECIDE TO INSTALL THE TUNER BOX WILL DEPEND
ON A NUMBER OF FACTORS
Your choice of antenna, i.e whether or not you use an existing antenna or a dedicated antenna.
Where your antenna is placed. Taking into account the length of cabling required.
The availability of space in your car.
RECOMMENDED SITES FOR THE MOUNTING OF THE TUNER BOX
Under the driver’s or front passenger’s seat.
Under the dashboard.
In the luggage boot of your car.
Please ensure that wherever the Tuner Box is mounted it does not hinder or obstruct your
movement or driving ability.
Also please ensure that all components are mounted in positions where there is no risk of
impact with head or knees in the event of an accident.
Before installation please ensure that all parts needed for use are present, and that you have
the correct tools needed to complete the task.
Pay particular attention to the placement of components, when drilling holes pay attention
to the location of cable harnesses, the fuel tank and fuel pipes.
Never drill into car parts that are load bearing or are important for reasons of safety.
POWER SUPPLY CONNECTIONS
Before commencing with the installation procedure it is advisable to read carefully all of the
installation instructions and make sure that they are relevant to the navigation computer
being used.
The power data cable provides the interface between the navigation unit and the Tuner Box.
It provides the power to the unit as well as transferring broadcast information from the Tuner
Box to the navigation unit.
Before commencing with installation, please disconnect your car battery terminals. (Fig. 1)
Brown
wire. Connect to an earthing point on the car body. (Fig. 2)
Yellow/red
wire. Connect to a permanent 12 V supply. This is the main power supply. (Fig. 2)
Red
wire. Connect to the switched 12 volt supply of the car ignition. (Fig. 2)
NOTE:
The main battery wire of the power data cable contains an in-line fuse.
Should this fuse need replacing, please use a 3 amp bayonet style fuse.
CONNECTING THE POWER DATA CABLE TO NAVIGATION UNITS PC 5000/PC4000
AND ALL C-IQ SIEMENS VDO COMPUTERS.
Insert the green connector block C2 into the rear of the navigation unit at point C2. (Fig. 3)
Connect the white connector block to the POWER/DATA socket of the Tuner Box. (Fig. 3)
Reconnect your car battery terminals. (Fig. 7)
3
2
1
4
3
2
1
3
2
1
3
2
1
INSTALLATION
2
3
1
MT5011-Eng-1.QXD 9/5/03 10:27 AM Page 4