-
40 -
2.
In the 'Audio Track' column, select the type of audio stream you wish to receive with the
broadcast. (Remember that DVB-T/T2/C/ISDBT/ATSC transponders can stream broadcasts
from both TV and radio stations; make sure you are streaming from the desired type of
station).
3.
The 'IP' column shows the destination IP address where the stream is to be sent inside
your network. Input the correct address of the receiving station
4.
The 'Port' column shows the conduit through which the stream is transmitted into the
network. Usually, all streams are set to go through the same port. However, you can
configure a different port for each station broadcasted to the same IP address, so as to
transmit different stations to that same address.
Note:
To allow viewing different brodcasted stations simultaneously, ensure that unique pairs
of IP addresses and port numbers are input. You may pair one single IP address with
different port numbers, or different IP adresses with one single port number. If you set
the system to stream broadcasts only when at least one listener is present (that is, if
the IGMP function is enabled), different multicast IP addresses must be set in the
configuration
5.
In the 'Action' column' press the S
TART
button corresponding to the desired station. The
Update
window refreshes, the selected station's name turns blue, the 'Audio Track', 'IP'
and 'Port' fields become dimmed, and the 'Action' button becomes blue and reads S
TOP
.
6.
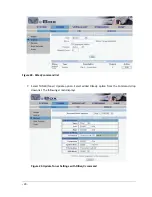
Select the
Status
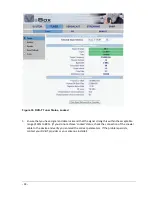
option to review the streaming status. A screen displaying the selected
parameters and the current streaming status displays. (When IGMP is enabled, the
‘Status’ column shows ‘
Waiting
’ for streams that have been started at the
STREAMING/CANNELS/
Update
window but are not being listened to).
Figure 42. Streaming Status
7.
To stop streaming, go to the STREAMING/CHANNELS/
Update
window and press the
relevant S
TOP
button. The information for the corresponding station reverts to its original
color and status.

