7.RAID Mode Guide:
Quad 3.5” SATA to USB 3.0 & eSATA External RAID Hard Drive Enclosure w/ Fan
RAID Mode Configuration
10
RAID Modes:
Individual
JBOD
RAID 0
RAID 10 (1)
RAID 3
RAID 5
Shows all hard drives as separate individual Hard Drives
Just a bunch of drives, Read/Write to each HDD independently
Sum of 4 hard drive capacity
RAID: Read/Write on each HDD simultaneously
Capacity: Multiply the smallest capacity by 4
RAID: Mirroring on each hard drive simultaneously
Capacity equals to the smallest HDD multiply by 2
Note:
1. HDD1/HDD2 create a set of RAID 1: HDD1/2
HDD3/HDD4 create a set of RAID 1: HDD3/4
Two sets (HDD1/2, HDD3/4) create a set of RAID 0
2. When two hard drives are installed, the device will perform
RAID 1 configuration. Total capacity equals capacity of smaller
drive
RAID: Byte-level striping with dedicated parity
Capacity: Multiply the smallest capacity by (4-1)
RAID: Block-level striping with distributed parity
Capacity: Multiply the smallest capacity by (4-1)
Pg. 11
Pg. 12
Pg. 13
Pg. 14
Pg. 15
Pg. 16
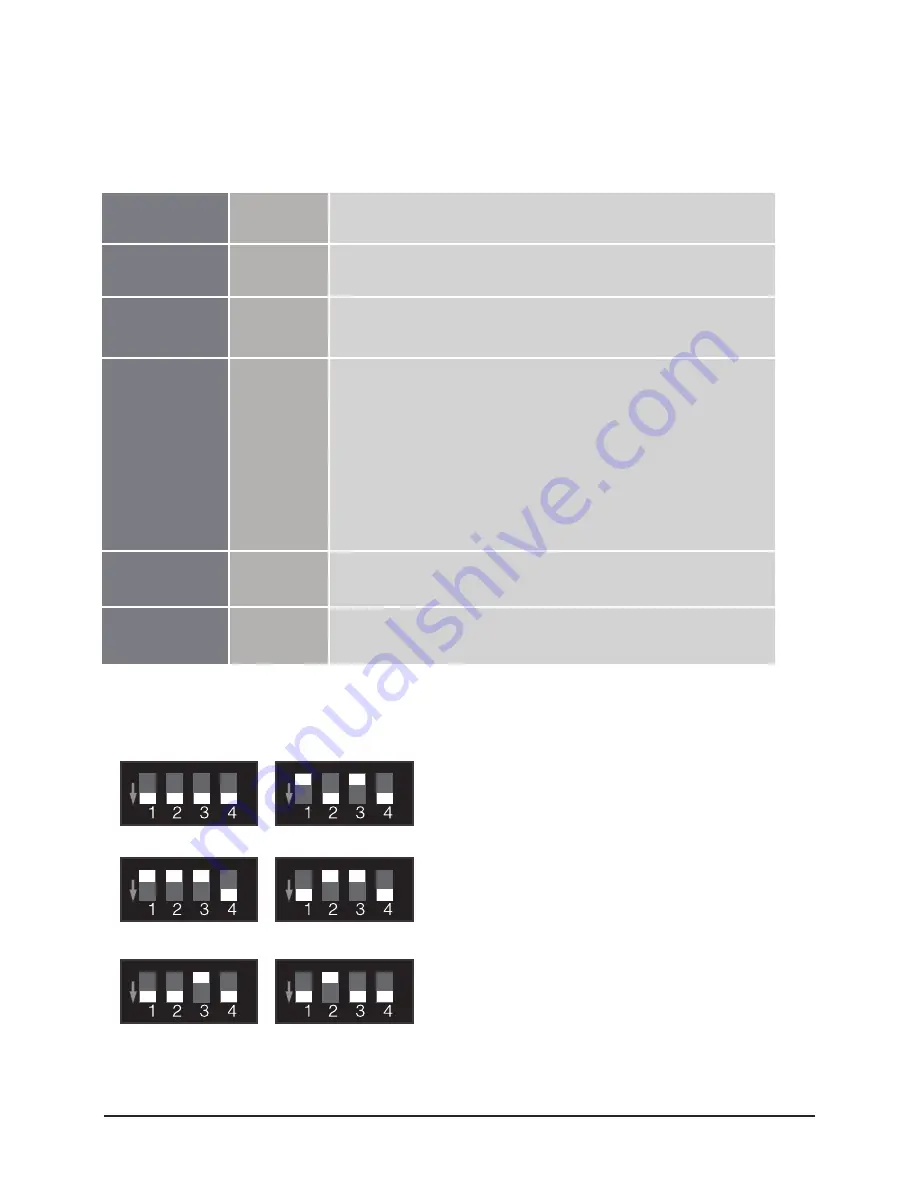
RAID Switch Settings:
ON
ON
ON
ON
ON
ON
Normal
RAID 3
RAID 0
JBOD
RAID 5
RAID 10 (1)
Power on the NexStar HX4R.
Check and make sure all HDDs are installed and all
LEDs light up.
Connect the NexStar HX4R to the computer via
USB 3.0 or eSATA cable.
Locate the RAID switch and select the designated
HDD mode to configure the NexStar HX4R.
Push and hold the “Reset” button for 3-5 seconds.
The Hard Drive Mode will change according to the
selection.
After setting up RAID, please initialize the HDD
again to have the HDD workable.
(1)
(2)
(3)
(4)
(5)
(6)


