background image

19

105274

OWNER’S MANUAL

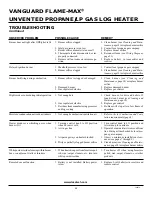
TROUBLESHOOTING

  WARNING: Turn off heater

and let cool before servicing.
Only a qualified service person
should service and repair
heater.

 CAUTION: Never use a wire,

needle, or similar object to clean
ODS/pilot. This can damage ODS/
pilot unit.

POSSIBLE CAUSE

1. Ignitor electrode not connected to igni-

tor cable

2. Ignitor cable pinched or wet

3. Piezo ignitor nut is loose

4. Broken ignitor cable
5. Bad piezo ignitor
6. Ignitor electrode broken
7. Ignitor electrode positioned wrong

1. Gas supply turned off or manual shutoff

valve closed

2. Control knob not in PILOT position
3. Control knob not pressed in while in

PILOT position

4. Air in gas lines when installed

5.  Depleted gas supply
6. ODS/pilot is clogged

7. Gas regulator setting is not correct

1. Control knob not fully pressed in
2. Control knob not pressed in long enough

3. Manual shutoff valve not fully open
4. Pilot flame not touching thermocouple,

which allows thermocouple to cool,
causing pilot flame to go out. This prob-
lem could be caused by one or both of
the following:
A) Low gas pressure
B) Dirty or partially clogged ODS/pilot

5. Thermocouple connection loose at con-

trol valve

6. Thermocouple damaged
7. Control valve damaged

REMEDY

1. Reconnect ignitor cable

2. Free ignitor cable if pinched by any

metal or tubing. Keep ignitor cable dry

3. Tighten nut holding piezo ignitor to base

panel of log set. Nut is located behind
base panel.

4. Replace ignitor cable
5. Replace piezo ignitor
6. Replace piezo ignitor
7. Replace piezo ignitor

1. Turn on gas supply or open manual

shutoff valve

2. Turn control knob to PILOT position
3. Press in control knob while in PILOT

position

4. Continue holding down control knob.

Repeat igniting operation until air is re-
moved

5.  Contact local propane gas company
6. Clean ODS/pilot (see Cleaning and

Maintenance, page 18) or replace ODS/
pilot assembly

7. Replace gas control

1. Press in control knob fully
2. After ODS/pilot lights, keep control

knob pressed in 30 seconds

3. Fully open manual shut-off valve
4. A) Contact local propane gas company

B) Clean ODS/pilot (see Cleaning and

Maintenance, page 18) or replace
ODS/pilot assembly

5. Hand tighten until snug, then tighten

1/4 turn more

6. Replace thermocouple
7. Replace control valve

OBSERVED PROBLEM

When ignitor button is pressed, there is no
spark at ODS/pilot

When ignitor button is pressed, there is
spark at ODS/pilot but no ignition

ODS/pilot lights but flame goes out when
control knob is released

Note:

 For additional help, visit DESA

International’s technical service web site
at 

www.desatech.com

.

Note:

 All troubleshooting items are listed in

order of operation.

www.desatech.com

Continued

Содержание UNVENTED (VENT-FREE) PROPANE/LP GAS LOG...

Страница 1: ...amage Refer to this manual for correct installa tion and operational procedures For as sistance or additional information con sult a qualified installer service agency or the gas supplier WARNING This appliance is for installa tion only in a solid fuel burning masonry or UL127 factory built fireplace or in an approved ventless firebox It is design certified for these installations in accor dance w...

Страница 2: ...closed heat buildup inside fireplace will cause glass to burst Also if fireplace opening has vents at the bottom you must open the vents before operating heater 9 You must operate this heater with a fire placescreeninplace Makesurefireplace screen is closed while running heater 10 This log heater is designed to be smoke less If logs ever appear to smoke turn off heater and call a qualified service...

Страница 3: ...g Set Base Assembly Optional Remote Control Flame Adjustment Knob Optional Selector Switch PRODUCT FEATURES OPERATION This heater is clean burning It requires no outside venting There is no heat loss out a vent or up a chimney Heat is generated by realistic dancingyellowflames Thisheater is designed for vent free operation with flue damper closed It has been tested and ap proved to ANS Z21 11 2 st...

Страница 4: ...pace as a space whose volume is less than 50 cubic feet per 1 000 Btu per hour 4 8 m3 per kw of the aggregate input rating of all appliances installed in that space and an unconfined space as a space whose volume is not less than 50 cubic feet per 1 000 Btu per hour 4 8 m3 per kw of the aggregate inputratingofallappliancesinstalledinthat space Rooms communicating directly with the space in which t...

Страница 5: ...tion air from the outdoors and vents to the outdoors 4 Compare the maximum Btu Hr the space can support with the actual amount of Btu Hr used ____________Btu Hr maximum the space can support ____________Btu Hr actual amount of Btu Hr used Example 51 200 Btu Hr maximum the space can support 79 000 Btu Hr actual amount of Btu Hr used The space in the above example is a confined space because the act...

Страница 6: ...utdoors Provide extra fresh air by using ventilation grills or ducts You must provide two per manent openings one within 12 of the ceiling and one within 12 of the floor Connect these items directly to the outdoors orspacesopentotheoutdoors Thesespaces include attics and crawl spaces IMPORTANT Do not provide openings for inlet or outlet air into attic if attic has a thermostat controlledpowervent ...

Страница 7: ...traffic areas in windy or drafty areas CAUTION This heater cre ates warm air currents These currents move heat to wall sur faces next to heater Installing heater next to vinyl or cloth wall coverings or operating heater where impurities such as to bacco smoke aromatic candles cleaning fluids oil or kerosene lamps etc in the air exist may discolor walls IMPORTANT Vent freeheatersaddmois ture to the...

Страница 8: ...lace hood ac cessory GA6050 GA6052 or GA6053 see Acces sories page 25 18 Model Noncombustible material OK Less than 8 Noncombustible material must be extended to at least 8 See Between 8 and 12 above If you cannot extend material you must operate heater with flue damper open NOTICE Manual control heaters maybeusedasaventedproduct If so you must always run heater with chimney flue damper open If ru...

Страница 9: ...ntel Shelf 12 8 A 18 8 20 14 22 163 4 24 20 All minimum distances are in inches Log Set 24 30 36 Models 18 Model 2 1 2 6 8 10 Minimum Non Combustible Material 8 Min 12 15 18 All minimum distances are in inches Log Sets All Models 20 2 1 2 6 8 10 12 Distances to Underside of Mantel Hood GA6050 GA6052 Top of Fireplace Opening Underside of Mantel Shelf Mantel Shelf Figure 8 Minimum Fireplace Clearanc...

Страница 10: ...g fireplace with a working flue and constructed of non combustible material Ifyourheaterisamanuallycontrolledmodel you may use this heater as a vented product There are three reasons for operating your heater in the vented mode 1 The fireplace does not meet the clear ance to combustibles requirements for vent free operation 2 State or local codes do not permit vent free operation 3 You prefer vent...

Страница 11: ...er base 5 Center heater base and logs front to back and side to side in fireplace 6 Carefully remove logs without moving heater base 7 Mark screw locations through one hole on each side of the mounting bracket see Figure 12 If installing in a brick bottom fireplace mark screw locations in mortar joint of bricks 8 Remove heater base from fireplace If installing optional control accessories do so at...

Страница 12: ... freezing rain or sleet INSTALLATION Continued WARNING Never connect heater to private non utility gas wells This gas is commonly known as wellhead gas Installation must include a manual shutoff valve union and plugged 1 8 NPT tap Locate NPT tap within reach for test gauge hook up NPT tap must be upstream from heater see Figure 14 Apply pipe joint sealant lightly to male threads This will prevent ...

Страница 13: ...or rect all leaks at once CAUTION Make sure exter nal regulator has been installed between propane supply and heater SeeguidelinesunderCon necting to Gas Supply page 12 CHECKING GAS CONNECTIONS TestPressuresEqualToorLessThan 1 2 PSIG 1 Close manual shutoff valve see Fig ure 15 2 Pressurize supply piping system by ei ther using compressed air or opening propane supply tank valve 3 Check all joints ...

Страница 14: ...of chassis see Figure 17 Note 36 model has more features but fits on the chassis the same Log will fit securely on chassis IMPORTANT Make sure log does not cover any burner ports 2 Place lava rock around base of heater Figure 17 Installing Golden Oak One Piece Log Set Figure 18 Installing Golden Oak One Piece Log set Top View CAUTION After installation andperiodicallythereafter check to ensure tha...

Страница 15: ... withafireplacescreeninplace Make sure fireplace screen is closed before running heater NOTICE During initial operation of new heater burning logs will give off a paper burning smell Open damper or window to vent smell This will only last a few hours Note Home owners generally prefer to operate their heater with the chimney damper closed This will put all the heat into the room However there may b...

Страница 16: ...n Adjust flame adjust ment knob anywhere between HI and LO Slide the selector switch to the REMOTE position Note The burner may light if hand held remote ON button was on when selector switch was last turned off You can now turn the burner on and off with the hand held remote control unit IMPORTANT Do not leave the se lector switch in the REMOTE posi tion when the pilot is not lit This will drain ...

Страница 17: ...ance These holes may become blocked with dust or lint Periodically inspect these holes for any blockage and clean if needed Blocked air holes will create soot MAIN BURNER Periodically inspect all burner flame holes with the heater running All slotted burner flame holes should be open with yellow flame present All round burner flame holes should be open with a small blue flame present Some burner f...

Страница 18: ...r holder for dust and dirt see Figure 25 3 Blow air through the ports slots and holes in the burner Figure 25 Injector Holder On Outlet Burner Tube Burner Tube Injector Holder May Be Brass or Aluminum Depending on Model Primary Air Inlet Holes Shape of Holes May Vary by Model Burner Tube Pilot Assembly Pilot Air Inlet Hole Ports Slots Figure 26 Pilot Inlet Air Hole 4 Check the injector holder loca...

Страница 19: ...onnect ignitor cable 2 Free ignitor cable if pinched by any metal or tubing Keep ignitor cable dry 3 Tighten nut holding piezo ignitor to base panel of log set Nut is located behind base panel 4 Replace ignitor cable 5 Replace piezo ignitor 6 Replace piezo ignitor 7 Replace piezo ignitor 1 Turn on gas supply or open manual shutoff valve 2 Turn control knob to PILOT position 3 Press in control knob...

Страница 20: ... requirements page 4 1 Turn control knob to LO position and let warm up for a minute 2 Operate burner until air is removed from line Have gas line checked by local pro pane gas company 3 Observe minimum installation clear ances see pages 7 through 9 4 Clean burner see Cleaning and Mainte nance page 18 or replace burner orifice 1 Turn heater off when using furniture polish wax carpet cleaners or si...

Страница 21: ...th most heaters If noise is excessive contact qualified ser vice person 1 Open window and ventilate room Stop using odor causing products while heater is running 2 Locate and correct all leaks see Check ing Gas Connections page 13 1 Open window and or door for ventilation 2 Contact local natural gas company 3 Clean ODS pilot see Cleaning and Maintenance page 18 1 Locate and correct all leaks see C...

Страница 22: ...FLAME MAX GOLDEN OAK LOG MODELS VYD18PRA VYD24PRA VYD30PRA AND VYD36PR 4 13 13 14 22 13 8 18 7 6 9 1 12 5 23 16 15 17 3 11 2 10 10 19 24 19 20 21 O F F P I L O T O N H I L O O F F P I L O T O N H I L O Note The Golden Oak Log 104254 01 for the VYD36PR model differs slightly from the log shown ...

Страница 23: ...3345 01 Lower Bracket 1 13 M11084 38 M11084 38 M11084 38 M11084 38 Screw 8 x 38 7 14 104384 01 102775 06CK 102775 08CK 102775 08CK Painted Base Assy 1 15 098271 07 098271 07 098271 07 098271 07 Ignitor Cable 1 16 102445 01 102445 01 102445 01 102445 01 Piezo Ignitor 1 17 103587 02 103587 02 103587 02 103587 02 Plate Switch 1 18 104099 01 104099 01 104099 01 104099 01 Heat Shield 1 19 098304 01 098...

Страница 24: ...olden Oak Golden Oak 18 Remote 24 30 and 36 Ready Remote Ready Btu Variable 16 000 30 000 20 000 39 000 Type Gas Propane Only Propane Only Ignition Piezo Piezo Pressure Manifold 8 0 W C 8 0 W C Inlet Gas Pressure in of water Maximum 14 14 Minimum 11 11 Shipping Weight 28 lbs 30 lbs 24 32 lbs 30 34 lbs 36 For input adjustment SERVICE HINTS When Gas Pressure Is Too Low pilot will not stay lit burner...

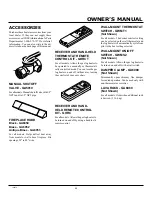
Страница 25: ...g heater to be operated in a manually or thermostati cally controlled mode You can turn the gas log heater on and off without ever leaving the comfort of your easy chair RECEIVER AND HAND HELD REMOTE CONTROL KIT GHRC Forallmodels Allowsthegaslogheaterto be turned on and off by using a hand held remote control WALL MOUNT THERMOSTAT SWITCH GWMT1 Not Shown For all models The desired comfort setting c...

Страница 26: ... warranty does not apply to parts that are not in original condition because of normal wear and tear or parts that fail or become damaged as a result of misuse accidents lack of proper maintenance or defects caused by improper installation Travel diagnostic cost labor transportation and any and all such other costs related to repairing a defective heater will be the responsibility of the owner TO ...

Отзывы: