background image

2

106516

DIRECT-VENT FIREPLACE (NATURAL/PROPANE/LP)

®

BHDV34NB AND BHDV34PB

SAFETY
 INFORMATION

1.

This appliance is only for use with the
type of gas indicated on the rating plate.
This appliance is not convertible for use
with other gases unless a certified kit
is used.

2.

For propane/LP fireplace, do not place
propane/LP supply tank(s) inside any
structure. Locate propane/LP supply
tank(s) outdoors. To prevent perfor-
mance problems, do not use propane/LP
fuel tank of less than 100 lbs. capacity.

3.

If you smell gas
• shut off gas supply
• do not try to light any appliance
• do not touch any electrical switch; do

not use any phone in your building

• immediately call your gas supplier

from a neighbor’s phone. Follow the
gas supplier’s instructions

• if you cannot reach you gas supplier,

call the fire department.

4.

Never install the fireplace
• in a recreational vehicle
• where curtains, furniture, clothing, or

other flammable objects are less than
42" from the front, top, or sides of
the fireplace

• in high traffic areas
• in windy or drafty areas

5.

This fireplace reaches high tempera-
tures. Keep children and adults away
from hot surfaces to avoid burns or cloth-
ing ignition. Fireplace will remain hot
for a time after shutdown. Allow surfaces
to cool before touching.

6.

Carefully supervise young children
when they are in the room with fireplace.

7.

Do not modify this fireplace under any
circumstances. Any parts removed for
servicing must be replaced prior to op-
erating fireplace.

8.

Turn fireplace off and let cool before
servicing, installing, or repairing. Only
a qualified service person should in-
stall, service, or repair this fireplace.
Have fireplace inspected annually by a
qualified service person.

9.

You must keep control compartments,
burners, and circulating air passages
clean. More frequent cleaning may be
needed due to excessive lint and dust
from carpeting, bedding material, pet
hair, etc. Turn off the gas valve and pi-
lot light before cleaning fireplace.

IMPORTANT: Read this owner’s
manual carefully and completely
before trying to assemble, oper-
ate, or service this fireplace. Im-
proper use of this fireplace can
cause serious injury or death from
burns, fire, explosions, electrical
shock, and carbon monoxide
poisoning.

 WARNING: Any change to

this fireplace or its controls can
be dangerous.

 WARNINGS

 DANGER: Carbon monoxide

poisoning may lead to death!

This fireplace is a vented product. This
fireplace will not produce any gas leakage
into your home if properly installed. This
fireplace must be properly installed by a
qualified service person. The glass door
must be properly seated and sealed. If this
unit is not properly installed by a qualified
service person with glass door properly
seated and sealed, gas leakage can occur.

Carbon Monoxide Poisoning:

 Early signs

of carbon monoxide poisoning resemble the
flu, with headaches, dizziness, or nausea. If
you have these signs, the fireplace may not
have been installed properly. Get fresh air
at once!
 Have fireplace inspected and ser-
viced by a qualified service person. Some
people are more affected by carbon monox-
ide than others. These include pregnant
women, people with heart or lung disease or
anemia, those under the influence of alcohol,
and those at high altitudes.

Propane/LP gas and natural gas are both
odorless. An odor-making agent is added to
each of these gases. The odor helps you
detect a gas leak. However, the odor added
to these gases can fade. Gas may be present
even though no odor exists.

Make certain you read and understand all
warnings. Keep this manual for reference. It
is your guide to safe and proper operation of
this fireplace.

10. Have venting system inspected annu-

ally by a qualified service person. If
needed, have venting system cleaned
or repaired. See Cleaning and Mainte-
nance
, page 28.

11. Keep the area around your fireplace

clear of combustible materials, gaso-
line, and other flammable vapor and
liquids. Do not run fireplace where
these are used or stored. Do not place
items such as clothing or decorations
on or around fireplace.

12. Do not use this fireplace to cook food

or burn paper or other objects.

13. Do not use any solid fuels (wood, coal,

paper, cardboard, etc.) in this fireplace.
Use only the gas type indicated on fire-
place nameplate.

14. This appliance, when installed, must be

electrically grounded in accordance
with local codes or, in the absence of
local codes, with the National Electri-
cal Code, ANS/NFPA 70
, or the Cana-
dian Electrical Code, CSA C22.1
.

15. Do not obstruct the flow of combus-

tion and ventilation air in any way. Pro-
vide adequate clearances around air
openings into the combustion chamber
along with adequate accessibility clear-
ance for servicing and proper operation.

16. Do not install fireplace directly on car-

peting, vinyl tile, or any combustible
material other than wood. The fireplace
must set on a metal or wood panel ex-
tending the full width and depth of the
fireplace.

17. Do not use fireplace if any part has been

exposed to or under water. Immediately
call a qualified service person to ar-
range for replacement of the unit.

18. Do not operate fireplace if any log is

broken.

19. Do not use a blower insert, heat ex-

changer insert, or other accessory not
approved for use with this fireplace.

20. Do not operate fireplace with glass door

removed, cracked, or broken.

Содержание BHDV34PB

Страница 1: ...is tance or additional information consult a qualified installer ser vice agency or the gas supplier WARNING If the information in this manual is not followed exactly a fire or explosion may result ca...

Страница 2: ...he glass door must be properly seated and sealed If this unit is not properly installed by a qualified service person with glass door properly seated and sealed gas leakage can occur Carbon Monoxide P...

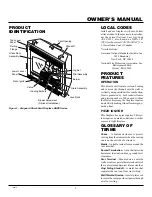
Страница 3: ...t PIEZO IGNITOR This fireplace has a piezo ignitor This sys tem requires no matches batteries or other sources to light fireplace Figure 1 Vanguard Direct Vent Fireplace BHDV Series Glass Door Assembl...

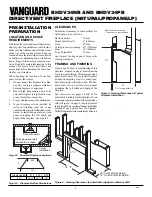
Страница 4: ...3 34 3 4 34 1 4 20 Vertical Termination 19 Horizontal Termination CLEARANCES Minimum clearances to combustibles for the fireplace are as follows Back and sides 0 mm Perpendicular walls 6 152mm Floor...

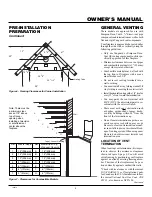
Страница 5: ...ept where stated otherwise Combustible material may be flush with the top front of fireplace with a maxi mum thickness of 3 4 Do not recess venting terminals into a wall or siding You must install a v...

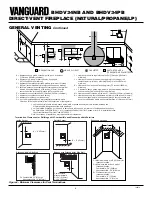
Страница 6: ...bove paved side walk or a paved driveway located on public property 84 inches 2133mm minimum M clearance under veranda porch deck 12 inches 305mm minimum N clearance above a roof shall extend a minimu...

Страница 7: ...ination It is important to select the proper length of vent pipe for the type of termination you choose It is also important to note the wall thickness For Horizontal Termination Select the amount of...

Страница 8: ...bows to the appliance adaptor with pipe seams oriented towards the wall or floor Twist lock Procedure The female ends of the pipes and fittings have four locking lugs indentations These lugs will slid...

Страница 9: ...f the vent cap Position the vent cap in the center of the 7 1 2 or 10 hole on the exterior wall with the arrow on the vent cap pointing up Insure proper clearance of 1 to combustibles is maintained At...

Страница 10: ...use with corner installation UP Horizontal Venting See information in Figure 17 for Vertical V and Horizontal H maxi mums and minimums The same amounts apply for flexible venting Note Figure 16 applie...

Страница 11: ...max 8 min 8 min 20 max 20 max 8 max 20 max Venting with Two 90 Elbows Vertical V Horizontal H1 Horizontal H2 5 min 6 max 6 min 12 max 7 min 18 max 8 min 20 max 20 max 20 max Figure 19 Horizontal Termi...

Страница 12: ...uired clearances air space to combus tibles when passing through ceilings walls roofs enclosures attic rafters etc Do not pack air spaces with insulation Also note maximum vertical rise of the venting...

Страница 13: ...y using a level Temporarily tack the support box in place through the inside walls and into the roof sheathing 4 Using tin snips cut the supportbox from the top corners down to the roofline and fold t...

Страница 14: ...VENTING INSTALLATION Continued Venting with Two 90 Elbows Vertical V1 Horizontal H 5 min 6 max 6 min 12 max 7 min 18 max 8 min 20 max Note Vertical V1 Vertical V2 20 max Figure 27 Vertical Rigid Venti...

Страница 15: ...alvanized Coaxial Pipe 6 pcs D1020 7 x 48 Galvanized Coaxial Pipe 6 pcs D1030 7 Adjustable 7 12 Galvanized Coaxial Pipe 6 pcs D1050 7 x 6 Galvanized Coaxial Pipe 6 pcs D2000 7 x 90 Elbow 6 pcs D2010 7...

Страница 16: ...nstall this fireplace as your primary heat source If you have acentralheatingsystem youmay run system s circulating blower while using fireplace This will help circulate the heat through out the house...

Страница 17: ...see Figure 33 Route power cord through both plastic bushing s and plug the power cord into a properly grounded 3 prong wall receptacle near the firebox b If your fireplace system installation is rece...

Страница 18: ...pt able alternative to test gauge connection Purchase the CSA AGA design certified equipment shutoff valve from your dealer WARNING A qualified ser vice person must connect fire place to gas supply Fo...

Страница 19: ...ble gas line provided by installer from equipment shutoff valve to fireplace Route flexible gas supply line through one of the access holes on side of fireplace 3 Attach flexible gas line from gas sup...

Страница 20: ...off valve see Fig ure 37 2 Open propane LPsupply tank valve for propane LPfireplace or main gas valve located on or near gas meter for natu ral gas fireplace 3 Make sure control knob of fireplace is i...

Страница 21: ...place or heat and air conditioning ducts 5 Gently remove the cover of the ther mostat from the base Grasp the sides of the cover firmly and pull to separate from the base 6 Feed the electrical wires t...

Страница 22: ...h terminal wires to a 9 volt alka line battery not included Place bat tery into the battery housing 3 Replace battery cover onto remote con trol unit Figure 45 Installing Alkaline Battery in Hand Held...

Страница 23: ...48 4 Slide the left retainer bracket against the left side brick panel Loosely se cure the bracket screw This secures the left side brick panel 5 Install the right brick panel using the same method d...

Страница 24: ...4 Place log 4 small round log on the pin on the right side of front log as shown in Figure 53 5 Place log 5 small log onto the front left part of the grate making sure the notches fit over the prongs...

Страница 25: ...LO The burners will turn on and off automatically to maintain the comfort level you select The ideal comfort setting will vary by household depending upon the amount of space to be heated the output...

Страница 26: ...ntrolled blower have an ON setting and an OFF setting The blower will only run when the switch is in the ON position In the OFF position the blower will not operate Note for DA3610TA Only If you are u...

Страница 27: ...e To Turn Off Gas to Appliance page 25 see Troubleshooting pages 29 through 31 Figure 59 Pilot Assembly Figure 60 Typical Flame Pattern for models BHDV34NB and BHDV34PB Thermocouple Thermopile 3 8 to...

Страница 28: ...gidity WARNING Turn off fireplace and let cool before cleaning CAUTION Youmustkeepcon trol areas burners and circulat ing air passageways of fireplace clean Inspect these areas of fire place before ea...

Страница 29: ...oose at con trol valve 6 Thermocouple damaged 7 Control valve damaged REMEDY 1 Reconnect ignitor cable 2 Free ignitor cable if pinched by any metal or tubing Keep ignitor cable dry 3 Tighten nut holdi...

Страница 30: ...e burner until air is removed from line Have gas line checked by local pro pane LP or natural gas company 3 Clean burner see Cleaning and Maintenance page 28 or replace burner orifice 1 Adjust the log...

Страница 31: ...t blocked 3 Burner flame holes blocked OBSERVED PROBLEM Fireplace produces unwanted odors Fireplace shuts off in use Gas odor even when control knob is in OFF position Gas odor during combustion Dark...

Страница 32: ...o disconnection when servicing controls Wiringerrorscancause improper and dangerous opera tion Verify proper operation af ter servicing Note Use only original replacement parts Thiswillprotectyourwarr...

Страница 33: ...ure 4 5 w c 11 0 w c Thermal Efficiency 70 70 Dimension Inches mm HxWxD Fireplace Actual size of firebox Measurements do not 32 3 16 x 34 3 8 x 18 1 2 32 3 16 x 34 3 8 x 18 1 2 include nailing flanges...

Страница 34: ...Oak G3004W Series Off White Paint Thehearthbasecreatesahandsomeriserfor the fireplace cannot be used with corner mantel Dimensions WxHxD 58 x61 2 x289 16 CORNER MANTEL GM200F Series Walnut Stained Har...

Страница 35: ...es installation and removal quick and easy They are designed to go at the top and bottom of the glass door on BHDV units Note Remove the plastic film covering on strips before installing on fireplace...

Страница 36: ...ND BHDV34PB ILLUSTRATED PARTS BREAKDOWN BHDV34NB BHDV34PB 48 31 3 1 2 3 4 6 6 36 5 5 6 5 11 Included in Hardware Pack 7 7 8 10 9 12 13 14 15 16 17 18 19 20 32 21 22 23 24 25 26 27 28 28 29 30 33 32 32...

Страница 37: ...P 1 19 104498 01 Thermocouple 1 20 104499 01 Thermopile 1 21 104500 01 Ignitor 1 22 104501 01 Ignitor Bracket 1 23 104502 01 Ignitor Screw 1 24 104503 01 Ignitor Wire 1 25 104504 01 Burner Natural 1 1...

Страница 38: ...airing a defective heater will be the responsibility of the owner TOTHEFULLEXTENTALLOWEDBYTHELAWOFTHEJURISDICTIONTHATGOVERNSTHESALEOFTHEPRODUCT THIS EXPRESS WARRANTY EXCLUDES ANY AND ALL OTHER EXPRESS...

Отзывы: