Instructions for Use, Installation and Servicing ecoMAX pro
21
Commissioning 12
12.4 Initial Lighting
The lighting procedure of the boiler is fully automated.
To prepare the boiler for initial lighting first ensure that all
external controls are not calling for heat.
With the front casing panel and inner casing panel
removed turn on the mains electrical supply. Slide the On
/ Off control down to the I position to turn on the boiler.
The operating indicator will illuminate (green) to show
that the boiler is on.
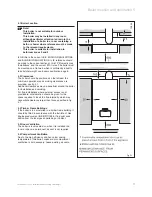
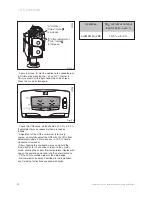
Now adjust the boiler thermostat to its lowest setting by
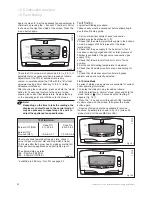
pushing the mode button (
) (see fig 3.1.) until the
radiator symbol is displayed. Push the - button until the
lowest temperature possible is selected. Now return
to the normal mode by pushing the mode button, the
display will now show the current temperature of water in
the boiler.
Now turn on external heat demand to boiler.
The fan should start and after a few seconds the ignition
will commence.
Note!
Allow the boiler to run on minimum until
commissioning is complete.
If the burner fails to light the fan will stop. Initially this
may be due to air in the gas supply line.
The boiler will have three attempts at ignition.
To reset the boiler slide the On / Off control to the Off (O)
position and after 5 seconds back to the On (I) position.
The boiler should now restart.
Once the boiler has lit, allow the system to warm at the
minimum temperature setting to purge any air from the
system.
Once the system has been purged of air, the temperature
of the central heating water can be adjusted to the
desired setting by pushing the mode button (
) (see
fig 3.1.) until the radiator symbol is displayed. Pushing
the + or - buttons will then set the water temperature
as desired. (Typical setting temperatures for a normal
radiator heating system will be in the range of 60°C to
80°C. Note that set temperatures below 60°C will not
sufficiently heat any hot water cylinder). To return to
the normal mode push the mode button (
) until the
display shows the current temperature of water in the
boiler.
The boiler will then continue to fire until the user controls
are satisfied.
Note!
After the first power up the firing sequence
changes. After one minute stabilisation time the
boiler will ramp slowly to full rate rather than
going immediately to full rate, this feature is
designed to cope with small system
requirements.
12.5 Testing - Gas
The boiler is supplied ready adjusted and no further gas
adjustments are necessary, however both the gas inlet
working pressure and the maximum gas rate should be
checked at least 10 minutes after the burner has lit.
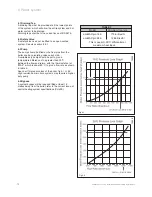
The gas inlet working pressure can be checked at the
pressure test point on the gas valve (fig 12.2.). The gas
inlet working pressure should be 20 mbar when the
boiler is firing at full rate. After testing the inlet pressure
remove the U gauge, tighten the sealing screw and test
for tightness.
The approximate gas rates are:
18 E : 2.00 m
3
/h
28 E : 3.02 m
3
/h
NOTE: The burner pressure cannot be measured at the
gas valve due to the fan/burner design. Replace the
inner and front casing panels. Record appliance working
gas inlet pressure (mbar) in Benchmark service record.
Functional checks
Procedure:
After installing and checking the gas supply pressure,
perform a function check before commissioning the
appliance and handing over to the user.
• Commission the appliance according to the relevant
operating manual.
• Check the gas supply pipe, exhaust system, heating
system and the hot water lines for leaks.
• Check that the flue system has been installed properly
according to the flue system assembly manual.
• Check for ignition and an even flame on the burner.
• Perform a function check on the heating system (see
Section 12.6).
• Hand over the appliance to the user (see Section
12.10).
12.6 Testing - Heating System
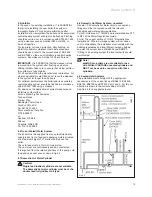
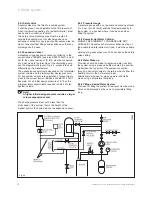
Check that all remote controls are calling for heat. The
boiler will fire automatically. Fully open all radiator
valves, flow control valve ‘A’ and bypass valve ‘B’, see fig
6.4.
Balance the radiators as required and if fitted adjust
valve ‘A’ to give the required system differential. Turn off
all radiators that can be shut off by the user and check to
see if less than the maximum differential allowed of
20°C can be achieved across flow and return. Allow the
system to reach maximum temperature then switch off
the boiler by isolating from the electrical supply.
Drain the entire system rapidly whilst hot, using the drain
tap at the lowest part of the system. Fill and vent the
system as described previously.
Lock or remove the handles from controls valve ‘A’ to
prevent unauthorised adjustment.
Содержание ecoMAX pro 18E
Страница 37: ...Instructions for Use Installation and Servicing ecoMAX pro 37 Declaration of Conformity 17...
Страница 38: ...Instructions for Use Installation and Servicing ecoMAX pro 38...
Страница 39: ...Instructions for Use Installation and Servicing ecoMAX pro 39...
Страница 40: ...0020005557_04 GB 08 2006 Subject to alteration...

