


WallVIEW Universal PRO EagleEye Installation and User Guide 341-660 Rev. B Page 4 of 12
MOUNTING AND INSTALLATION INSTRUCTIONS
Step 1:
After determining the optimum location of the camera system, mark locations for the four screw holes and
the vertical oval cable pass-thru (see Figure 4). Install the drywall mounts and cut the hole for the cable
pass-thru. Next, pull the Cat. 5 cables through the hole then install the Wall Mount. Confirm that the mount
is level and tighten the wall mount screws.
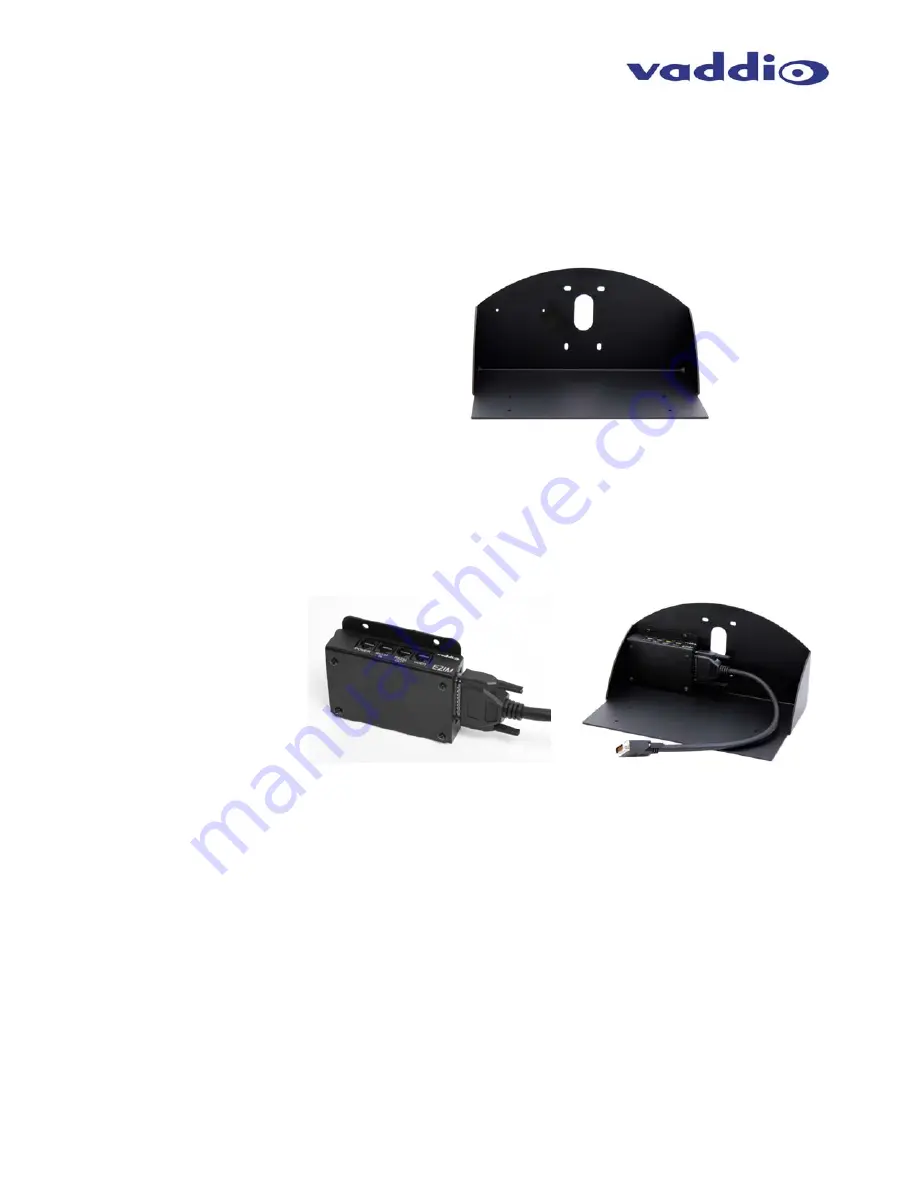
Step 2:
Connect the 25-pin cable to the EZIM then, mount the EZIM and break out cable on the back of the mount,
using the two tapped screw holes (see Figure 5). Connect the HDCI connector to the EagleEye camera that
was supplied with the HDX codec.
Step 3:
Align the tapped screw holes on the bottom of the EagleEye camera to the four holes of the mount. Using
the supplied hex head screws, feed the screws through the four holes to attach the camera to the mount.
Step 4:
Prior to connecting the Cat. 5 cables, check cables for proper continuity with a Cat. 5 cable tester. Attach the
Cat. 5 cables for Power, Video and Control to the EZIM and feed the excess cabling into the wall opening or
wall box.
Step 5:
Connecting the Quick-Connect PRO
The Quick-Connect PRO is a 1-RU rack mount interface that breaks out the signals from the Cat. 5 cables
back to the standard connectors. The basic system connectivity is illustrated in Figures 2 and 3.
Figure 5:
25-pin to HDCI adapter
cable connected to EZIM
(left); EZIM and adapter
cable installed on the Wall
Mount (right)
Figure 4:
Thin Profile Wall Mount with oval cable
feed-through hole. The wall mount may be
attached directly to a 2-gang wall box or to
drywall with the supplied wall anchors.


