


ProductionVIEW HD-SDI MV
ProductionVIEW HD-SDI MV Manual - Document Number 342-0318 Rev. B
Page 16 of 36
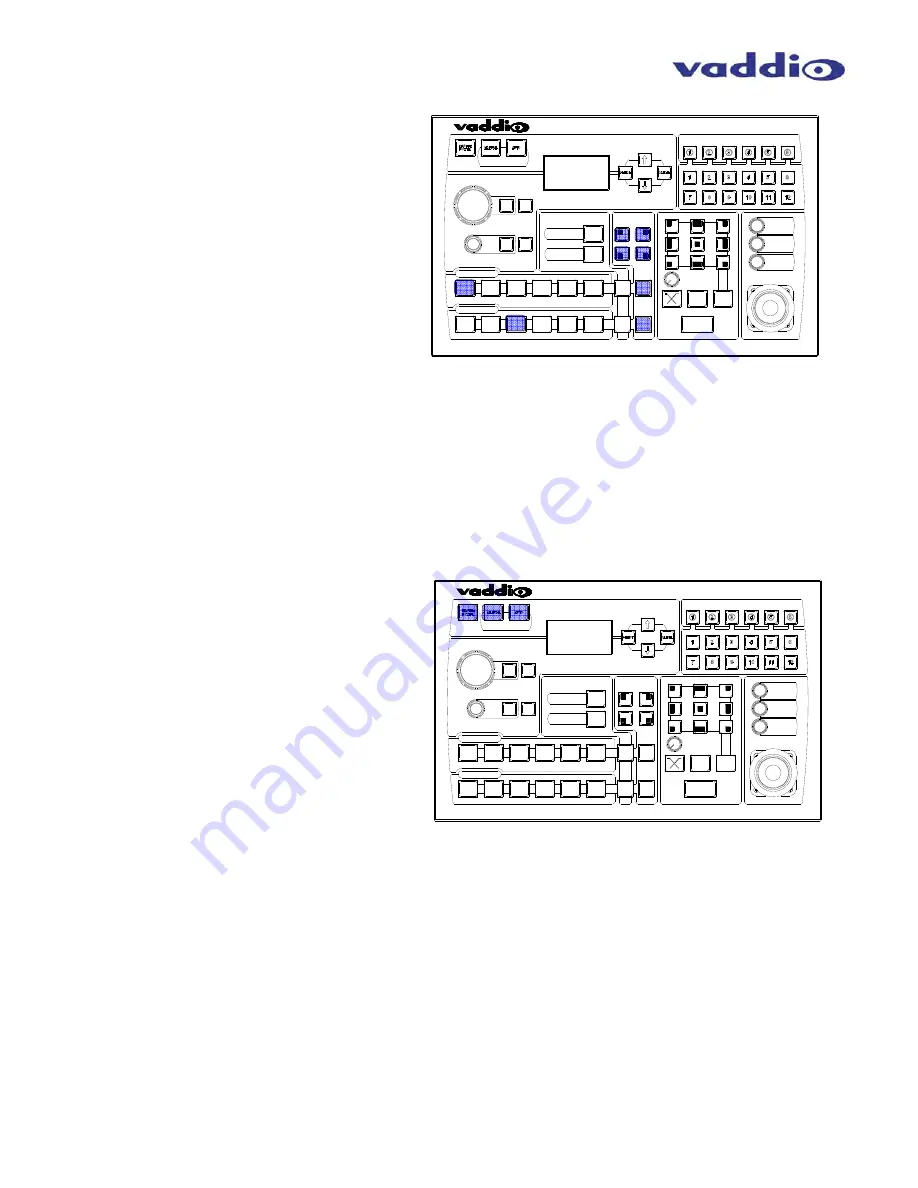
PIP Display:
To set up and display a Picture-In-Picture on the
Program output, select the input that will be the
“background” on the Program bus. Select the
video input that will be the picture-in-picture, or in
the “window” on the screen. In the example to
the right, the background is Input 1 on the
Program bus and Input 3 is the window on the
Preview bus.
Next, select the corner that the PIP window will
show up in, using the P.I.P. Positioning buttons
(upper left, upper right, lower left and lower right).
In the illustration to the right, the lower left is
selected.
To display the PIP, press either of the PIP buttons, and the PIP will appear on the screen. Input 3 will now be
displayed in a window in the lower left corner of the screen.
Changing PIP Size:
To change the size of the PIP (small, medium or large), press and hold the PIP Positioning
button and ProductionVIEW HD-SDI MV will toggle through the sizes.
PIP In Dual Mode:
If ProductionVIEW HD-SDI MV is set up for Dual Mode (independently switched live feeds on
Preview and Program buses) select the background source. Next, select the PIP source, which will flash. Press
the PIP button for that specific bus, and the window will be displayed. Press the PIP button to remove the window
from the screen. PIP is discrete for the Program and Preview buses when the system is in Dual Mode.
Master Power, Manual and Auto Modes:
If ProductionVIEW HD-SDI MV is to be used with
an operator at the console, the Manual mode
button will need to be illuminated.
Pressing the Auto button will activate the Auto
mode, which is a configuration when
ProductionVIEW HD-SDI MV is used in
conjunction with Vaddio’s StepVIEW mats,
MicVIEW system and AutoVIEW IR sensors or
other trigger devices. These triggers allow
ProductionVIEW HD-SDI MV to automatically
switch between camera inputs and preset camera
positions. In this mode, no operator is required.
The mats and sensors can be placed in locations, such as podiums, white boards, etc. to allow the system to be
run in “Presenter” or Auto mode. No operator needs to be present when the system is set up in Auto mode.
ProductionVIEW HD-SDI MV handles camera switching and PTZ movements automatically.
Master Power Switch
When the Master Power Switch is powered down, all of the attached cameras will be placed in standby.
Press and hold the power switch for 3 seconds to initiate power down sequence. This is a safeguard to
prevent accidental shutdown.
When the Master Power Switch is powered up, all attached cameras will activate and select default camera
and preset information as defined in the menu. The ProductionVIEW HD-SDI MV will scan the inputs for
camera type and video signal type and auto-configure accordingly. This can take up to one minute and is
normal operation.
Note: When the camera control ports are changed or reconfigured, the “Rescan Cameras” option in the menu
must be selected and started to rescan the cameras and reload the proper control codes.
If only the video
inputs are changed, then activate the Rescan Video function in the Main Menu to reset the video input
priorities.
1
2
3
4
5
6
PROGRAM
PREVIEW
1
2
3
4
5
6
ProductionVIEW HD-SDI MV
PAN
SPEED
CAMERA PRESETS
CAMERA SELECT
WIPE PATTERNS
P. I. P.
POSITIONING
LOWER SCREEN GRAPHIC
MIX / FTB
TAKE
TRANSITION
SPEED
CUT
WIPE
.01
4 SEC
+
-
PIP
PIP
LSG
LOWER SCREEN
SIZE
TRANSPARENCY
LEVEL
AUTO
FOCUS
IRIS
BLC
AWB
FOCUS
AUTO
IRIS
CONTROL MODE
TILT
SPEED
+
-
ZOOM
SPEED
+
-
LSG
CONTROL MENUS
MENU
STATUS LINE
1
2
3
4
5
6
PROGRAM
PREVIEW
1
2
3
4
5
6
ProductionVIEW HD-SDI MV
PAN
SPEED
CAMERA PRESETS
CAMERA SELECT
WIPE PATTERNS
P. I. P.
POSITIONING
LOWER SCREEN GRAPHIC
MIX / FTB
TAKE
TRANSITION
SPEED
CUT
WIPE
.01
4 SEC
+
-
PIP
PIP
LSG
LOWER SCREEN
SIZE
TRANSPARENCY
LEVEL
AUTO
FOCUS
IRIS
BLC
AWB
FOCUS
AUTO
IRIS
CONTROL MODE
TILT
SPEED
+
-
ZOOM
SPEED
+
-
LSG
CONTROL MENUS
MENU
STATUS LINE


