EasyTalk Wireless Mic
EasyTalk Wireless USB Mic System - Document Number 342-0442 Rev A
Page 10 of 16
SW3
SW4
SW5
Step by Step Instructions
For setting up the EasyTalk Wireless Mic System:
Step 1:
Review the manual to eliminate any and all surprises.
Step 2:
Connect the 3.5” right-angle RP-SMA antenna to the front of the receiver and connect the power supply.
Step 3:
Connect the audio outputs (Balanced, Unbalanced or
USB) to the audio system (not included). Set all audio levels on
the audio system low to avoid any rude awakenings.
Step 4:
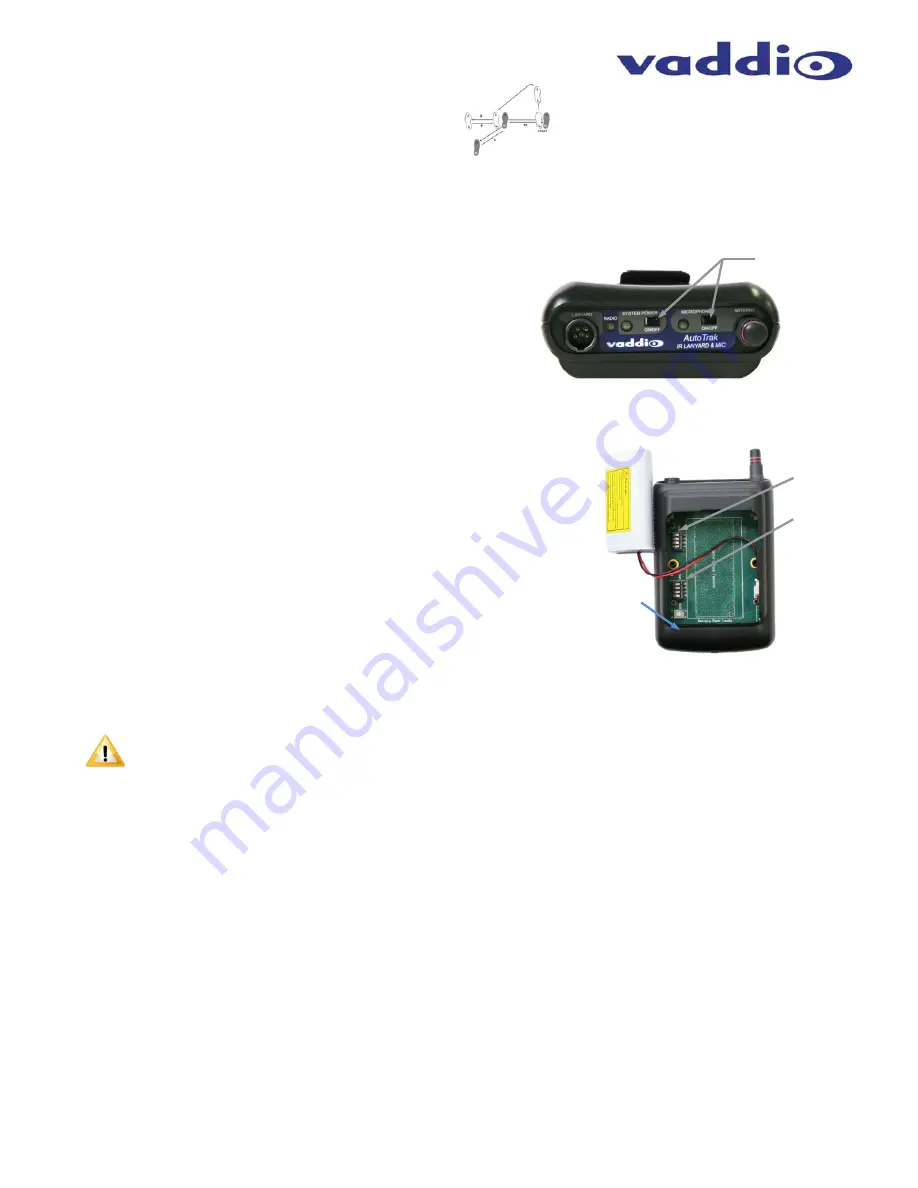
On the Belt Pack, plug in the lavalier mic using the 5-
pin XLR connector and turn the System Power and the
Microphone switches to the ON position.
Step 5:
Touch the Power button on the EasyTalk Wireless
Receiver Audio and the back-lit blue LED power switch will
illuminate.
Step 6:
To “Pair” the Belt Pack with the Receiver, carefully press
down at the top of the removable battery cover near the center of
the small opening and slide the cover downward. Switch #3,
marked SW3 on the circuit board next to the battery is the pairing
button (see figure on the right).
Place the Belt Pack in close proximity to the EasyTalk Wireless
Receiver.
Press the SW3 button and release. The Radio LED on the Belt
Pack front panel will begin blinking at a slow rate.
Press the Pair Button on the front panel of the EasyTalk
Wireless Receiver.
The Belt Pack and the EasyTalk Wireless Receiver will
automatically sync with each other.
The blue Radio LED’s on
the Belt Pack and the EasyTalk Wireless Receiver front panels
will illuminate solid blue indicating they are paired and ready for
operation
Important Note:
The Pairing button on the EasyTalk Wireless Receiver must be pushed within ten (10)
seconds of pressing the pairing button SW3 on the Belt Pack or pairing will not occur.
Step 7:
To replace the removable battery cover, start sliding the cover on at the bottom of the battery pack compartment
and slide cover upward to the top of the small opening until the cover latches back into place.
Step 10:
Adjust the volume by using the + (plus) and – (minus) buttons on the front panel of the Wireless
Receiver and set the audio levels on the audio system to taste. The LED ladder will act as an LED meter and as
a way to set the levels when the volume buttons are touched and held. Test the mic ON/OFF switch on the Belt
Pack and also the Mic Mute switch on the Audio Interface for proper operation.
Step 11:
Set the Dip Switches on the Back Panel of the Audio Receiver and on the inside of the Belt Pack for the
requirements of the application.
Other Notes:
If the System Power LED on the Belt Pack flashes, then the battery is low and a battery charge is required.
Power and Mic
Switches


