When assembling, ensure
vacuum-tightness
. After as-
sembly, check the whole system for leaks.
Use a suitable valve to isolate the pump from the vacuum
application. This is to allow the pump to warm up before
pumping condensable vapors and to clean the pump after
use before it is switched off.
NOTICE
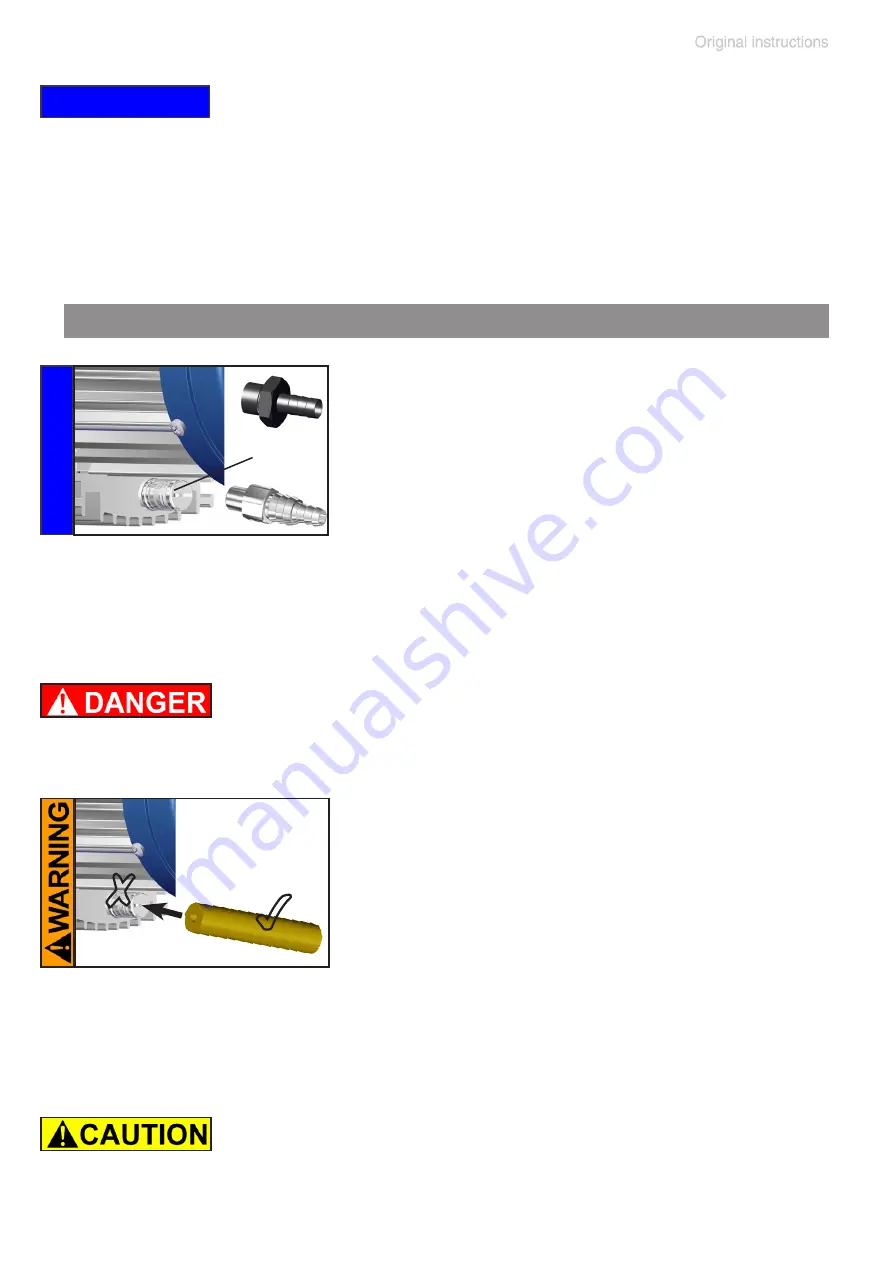
Connecting the outlet
Outlet via silencer.
Attention
: Use the silencer only in case of low
gas throughput. Check the silencer regularly
for permeability! In case, install a hose nozzle
instead (see „Accessories“, pg. 46).
Connecting an exhaust line at the pump outlet:
Unscrew the silencer and install a hose noz-
zle DN 6 mm or a hose nozzle DN 10/6 mm
(thread G1/8”).
➨
If dangerous or polluting fluids could be released at
the outlet, install an appropriate system to catch and
dispose of those fluids.
NOTICE
outlet
+
Connect a gas-tight exhaust line at the pump
outlet (see above) if necessary. Always vent
exhaust gases appropriately (e.g., into a
fume hood).
+
Never block the gas outlet. The exhaust
line must always be free of obstructions (no
back pressure) to ensure an unimpeded
discharge of gas. The cross-section of the
outlet tubing must be at least the size of the
pump’s exhaust connection.
✔
✘
• Reduce the transmission of vibration. Prevent mechan-
ical load due to rigid pipelines. Insert elastic hoses or
flexible elements as couplings between the pump and
rigid pipes.
Содержание MD 1
Страница 1: ...page 1 of 72 Diaphragm pumps Instructions for use Technology for Vacuum Systems MD 1 VARIO SP MD 1 ...
Страница 27: ...page 27 of 72 MD 1 MD 1 C US pump with dual voltage motor 4 9 8 7 5 6 3 2 1 2 1 2 1 ...
Страница 28: ...page 28 of 72 MD 1 VARIO SP Ensure sufficient venting of the pump 9 5 6 7 10 ...
Страница 53: ...page 53 of 72 1 2 1 2 3 15 mm 4 6x size 2 2x 1 ...
Страница 54: ...page 54 of 72 4 5 6 20696264 Clean ...
Страница 55: ...page 55 of 72 Replacing the diaphragm 7 8 9 1 2 ...
Страница 56: ...page 56 of 72 3 10 11 12 Pay attention to number of washers ...
Страница 57: ...page 57 of 72 13 14 15 1 2 Pay attention to number of washers ...
Страница 58: ...page 58 of 72 Replacing the valves and assembling the pump heads 16 17 18 4x ...
Страница 59: ...page 59 of 72 19 21 20 4 6x 4 4 ft lbf 6 Nm Screw in diagonally at first slightly then tighten ...
Страница 60: ...page 60 of 72 22 23 16 15 24 1 2 Maintain all pump heads in the same way 15 16 mm size 2 2x ...


