


ENGLISH
- 39 -
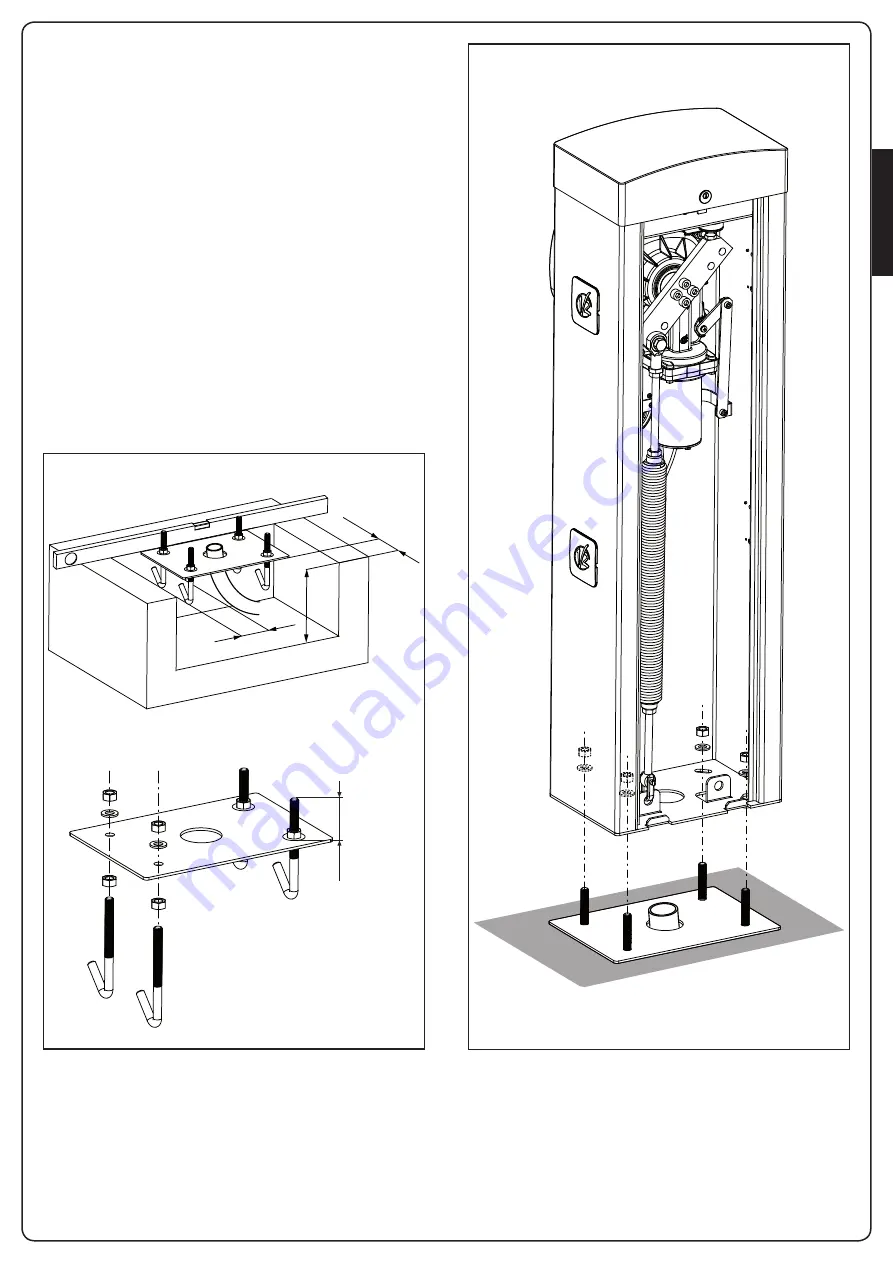
4 - PREPARATION OF THE BASE FOR
AUTOMATION
1.
Provide a foundation pit and arrange one or more conduits for
the passage of the electrical cabling (FIG. 1).
2.
Assemble the 4 anchoring brackets on the mounting plate and
fasten with the 8 bolts provided (FIG. 2).
3.
Pour the concrete into the inside of the pit and position the
base plate
m
NOTE: verify that the plate is perfectly leveled and
parallel to the opening barrier
4.
Wait for the complete setting of the concrete
5.
Unscrew the 4 nuts that hold the base joined to the anchoring
brackets and position the rack on the plate (FIG. 3).
NOTE: it is advisable to install the rack cabinet with the
inspection access flap turned towards the more accessible
side
60mm
10 cm
10 cm
30 cm
FIG. 1
FIG. 2
FIG. 3
Содержание NIUBA-24V
Страница 2: ...1153 mm 320 mm 287 mm 218 mm 897 mm 1168 mm 374 mm 239 mm 319 mm 897 mm ...
Страница 7: ...ITALIANO 5 NIUBA4 NIUBA6 ...
Страница 11: ...ITALIANO 9 FIG 3 FIG 4 ...
Страница 13: ...ITALIANO 11 A D E C F F G E A B D C O N M ...
Страница 31: ...ITALIANO 29 ...
Страница 34: ...ITALIANO 32 ...
Страница 39: ...ENGLISH 37 NIUBA4 NIUBA6 ...
Страница 43: ...ENGLISH 41 FIG 3 FIG 4 ...
Страница 45: ...ENGLISH 43 A D E C F F G E A B D C O N M ...
Страница 63: ...ENGLISH 61 ...
Страница 66: ...ENGLISH 64 ...
Страница 71: ...FRANÇAIS 69 NIUBA4 NIUBA6 ...
Страница 75: ...FRANÇAIS 73 FIG 3 FIG 4 ...
Страница 77: ...FRANÇAIS 75 A D E C F F G E A B D C O N M ...
Страница 95: ...FRANÇAIS 93 ...
Страница 98: ...FRANÇAIS 96 ...
Страница 103: ...ESPAÑOL 101 NIUBA4 NIUBA6 ...
Страница 107: ...ESPAÑOL 105 FIG 3 FIG 4 ...
Страница 109: ...ESPAÑOL 107 A D E C F F G E A B D C O N M ...
Страница 127: ...ESPAÑOL 125 ...
Страница 130: ...ESPAÑOL 128 ...
Страница 131: ......