ColonyDoc-It Imaging Station
19
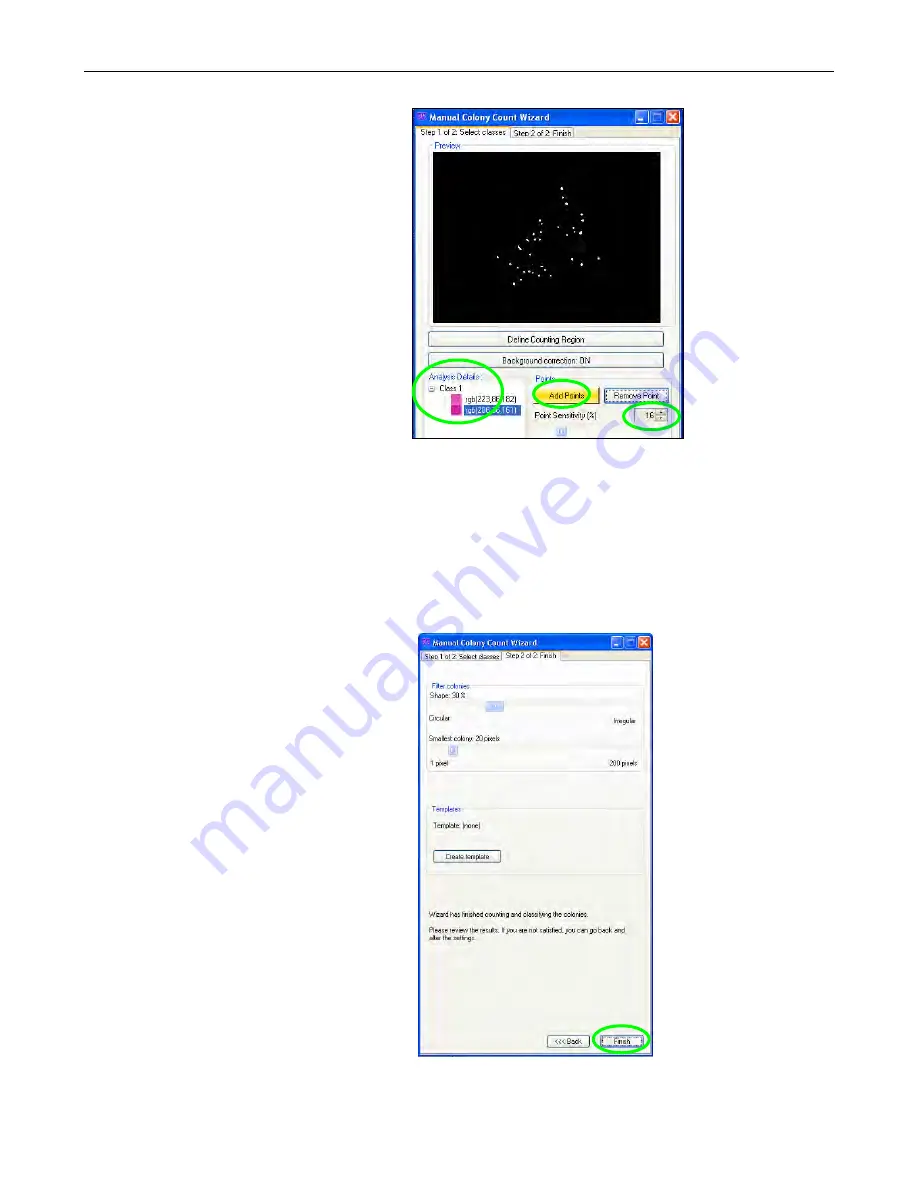
Once the first colony is selected, the new
image in the
Step 1 of 2: Select classes
window will show a black background
along with all of the colonies that contain
the same color as the point identified in
the
Analysis Details
window.
Adjust the
Point Sensitivity
slider to
increase or decrease sensitivity.
Increasing and decreasing sensitivity
almost always improves the final count.
Continue clicking on colonies in the
captured image to add points and adjust
the
Point Sensitivity
as necessary until
the black and white image shows all the
colonies of interest identified in white.
To remove points or classes from the
Analysis Details
window, highlight the
point and select
Remove Point
or
highlight the class and select
Remove
.
Click the
Count
button to proceed to the
next tab.
NOTE:
The
Step 1 of 2: Select classes
tab allows the settings created in this window to be saved in a user defined
template. If there are no templates created, the drop down menu will list Default as the only template option. Go to the
Templates
section of this manual for instructions on creating templates.
Step 2: Finish
The software will automatically move to the
second tab
Step 2 of 2: Finish
after
Count
is selected in
Step 1 of 2: Select classes
.
To filter the colonies, adjust the shape or
colony size in the
Filter colonies
section.
Change slider buttons for
shape
(from
circular to irregular) and
size
(1 pixel to 200
pixels) to capture additional colonies or
eliminate colonies.
This window is a second means to save
settings into templates. Go to the
Templates
section of this manual for
instructions on creating templates.
Click
Finish
to exit the manual count mode
and to get the final count.


