5
INSTALLATION INSTRUCTIONS
OPERATING INSTRUCTIONS
CONNECTING THE POWER (continued):
• Pull enough properly sized wire through
cable connector and connect the wire to
the power block located in the base of the
heater
(see Figure 6)
.
• Turn on the power at the main service.
TIMER FUNCTION:
•
The Timer function allows you to set the length of operation from 1 to 12 hours. Each time the timer button is
pressed the length of operation will increase 1 hour. The duration the timer is set for will be displayed on the
LED screen in hour increments.
•
TO TURN THE TIMER FUNCTION OFF: Press the timer Button continuously until the LED screen displays "0".
• NOTE: The timer function is not an excuse to leave the heater unattended.
TEMPERATURE SETTING:
•
This heater is designed to maintain a comfortable room temperature.
•
When the heater is turned on by pressing the power button, it will operate on HIGH setting (6000 W)
continuously. Press the MODE button on either the unit or remote to change the heat setting to LOW (3000 W)
then press the MODE button again to MEDIUM (4500W), the sequence is HIGH-LOW-MEDIUM. The fan will
start running about 10 seconds after initial start to push the heat out.
•
The temperature setting can be adjusted between 45°F (7°C) to 95°F (35°C). To change the temperature, press
the TEMP+ or TEMP– buttons on either the unit or the remote.
•
The temperature display will blink while it is being adjusted. When the desired temperature is reached, it will take
about 5 seconds to accept the setting. Once the display stops flashing, the room temperature will reappears on
the LED screen to indicate the desired temperature is set.
• While the temperature setting is in either LOW or MEDIUM or HIGH mode, the unit will stay in this mode, cycling
on and off to maintain the set temperature. The heater will reach the set temperature faster in HIGH setting in
comparison to LOW/MEDIUM setting.
• NOTE:
The first time you operate the unit, it may smoke slightly. This is due to residual cleaning agents used to
clean the element when the heater is manufactured. This is normal and does not indicate a problem with the unit.
This condition will stop after the heater has been in operation for a few minutes.
FAHRENHEIT OR CELSIUS DISPLAY:
To switch the display between Fahrenheit and Celsius, press the °F/°C on either the unit or the remote.
THERMAL CUTOUT:
The heater is equipped with a thermal cutout which will automatically shut off the heater. The heater will turn on
when the abnormal temperature returns to normal. Should the unit overheat and cause the thermal cutout to cycle,
the cause of the overheating should be determined and corrective action taken before further operation.
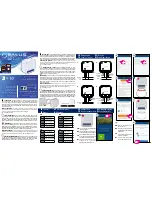
Figure 6
HOT
HOT
L2
L1
GROUND
(or bare copper)
HEATER RATING
& VOLTAGE
HEATER
AMPS
MAX.
FUSE SIZE
MIN. WIRE SIZE
75ºC COPPER
6000W @240V
24
45
#8


