background image

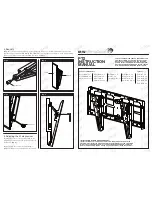
1-2  Assembly Extenders and TV plate

6

Please pay attention to the front and back of the extenders          while installing.

Front

Back

Содержание XMS004-M-1

Страница 1: ...XMS004 M 1 INSTRUCTION MANUAL For 13 32 TV If you have any questions along the way just give us a call 1 800 460 0956 or mail to customerservice x mount com We re ready to help R ...

Страница 2: ...ts indicated may result in collapse of the mount and its accessories causing possible injury Solid concrete 1 2 in 13 mm Socket Wrench Stud Finder 1 8 in 3 2 mm Wood Drill Bit This product is designed for use in wood stud solid concrete walls DO NOT install into drywall alone The wall must be capable of supporting five times the weight of the TV and mount itself Do not use this product for any pur...

Страница 3: ...TED TOP VIEW EXTENDED SIDE VIEW RETRACTED 3 5 15 TOP VIEW EXTENDED 90 90 MAX 200mm 7 87in MIN 75mm 2 95in MAX 200mm 2 95in MIN 75mm 2 95in 233mm 9 19in 233mm 9 19in 236mm 9 28in 166mm 6 52in 120mm 4 72in 51mm 2 01in 100mm 3 94in Ø8mm Ø0 31in 60mm 2 36in 280mm 11 02in ...

Страница 4: ... are missing or damaged do not return the damaged item to your dealer contact Customer Service Never use damaged parts NOTE Not all hardware included will be used Parts and Hardware for STEP 1 4 Extenders x4 Spacers TV Screws M4x12mm M6x12mm M8x25mm M4x30mm M6x35mm M6x17mm M4 M6 10mm 2 5mm Washers x4 x4 x4 x4 x4 x4 x4 x4 x8 x4 M5x12mm x4 M5x30mm x4 Wall Plate Unit x1 ...

Страница 5: ...le Wall Plate Unit into Two Pieces Lag Bolt x2 Contact us at telephone 1 800 460 0956 USA or mail to customerservice x mount com to have these additional pieces shipped directly to you Concrete Wall Anchor 2pcs M6x8mm Bolt x4 Wall plate TV plate Velcro x3 5 ...

Страница 6: ...1 2 Assembly Extenders and TV plate 6 Please pay attention to the front and back of the extenders while installing Front Back ...

Страница 7: ... If your TV VESA size is above 100 100mm you need to assemble extended arms onto TV plate using bolts and alley key per below option 2 option 4 shown 75X75 100X100 100X200 200X100 150X150 Option 1 Option 2 Option 3 Option 4 7 ...

Страница 8: ...M8 M6 M4 1 4 Select TV Screws M5 8 ...

Страница 9: ...rews with 2 5mm spacers i you have to remove the inner circle Yes choose suitable screws washers and spacers 1 6 Attach the TV Plate No No choose suitable screws and washers 1 5 Need Spacer VESA 100mm x 100mm 100mm x 100mm VESA 200mm x 200mm 9 ...

Страница 10: ...ominal 1 x 3 in 38 x 89 mm Stud center must be verified 1 Locate your studs Verify and mark the center of the stud by finding the stud edges using a thin nail or an edge to edge stud finder 2 Position the wall plate at your desired height and line up the holes with your stud center line Level the wall plate and mark the hole locations Centre line Wall plate level 10 ...

Страница 11: ...e sure to drill into the center of the studs 4 Install wall plate using lag bolts Tighten the lag bolts only until they are pulled firmly against the wall plate CAUTION Improper use could reduce the holding power of the lag bolt DO NOT over tighten the lag bolts Go to STEP 3 on PAGE 14 2 16 55mm 1 8 3 2mm Wall plate No level 11 ...

Страница 12: ...solid concrete thickness 8 in 203 mm 1 Position the wall plate on the wall at your desired height Level the wall plate and mark the hole locations 2 Drill two pilot holes using a 3 8 in 10 mm diameter masonry drill bit IMPORTANT Pilot holes must be drilled to a depth of 2 16 in 55 mm 2 16 55mm 3 8 10mm Wall plate level Wall Wall 12 ...

Страница 13: ...O NOT over tighten the lag bolts No 4 Insert wall plate using lag bolts Tighten the lag bolts only until they are pulled firmly against the wall plate Please contact us at telephone 1 800 460 0956 USA or mail to customerservice x mount com to have these additional pieces shipped directly to you Concrete Wall Anchor Not included Wall plate level Wall Wall 13 ...

Страница 14: ...Before hanging TV please try to pull the mount to make sure that it has been assembled on the wall tightly 14 ...

Страница 15: ...TV 1 2 Hang pre assembled TV unit on the wall plate and fix them using screws fully Wall plate 15 ...

Страница 16: ... 15 5 15 5 5 1 Loosen 2 bolts at the same time to tilt TV 5 15 to desired angle Fasten fully 2 bolts when finished 16 ...

Страница 17: ...5 2 Cables manage Manage TV cables orderly and guide them through the velcros Velcro 17 ...

Отзывы: