www.uscutter.com
425.481.3555
25
Contour Cutting
3
This section applies when ARMS contour
cutting:
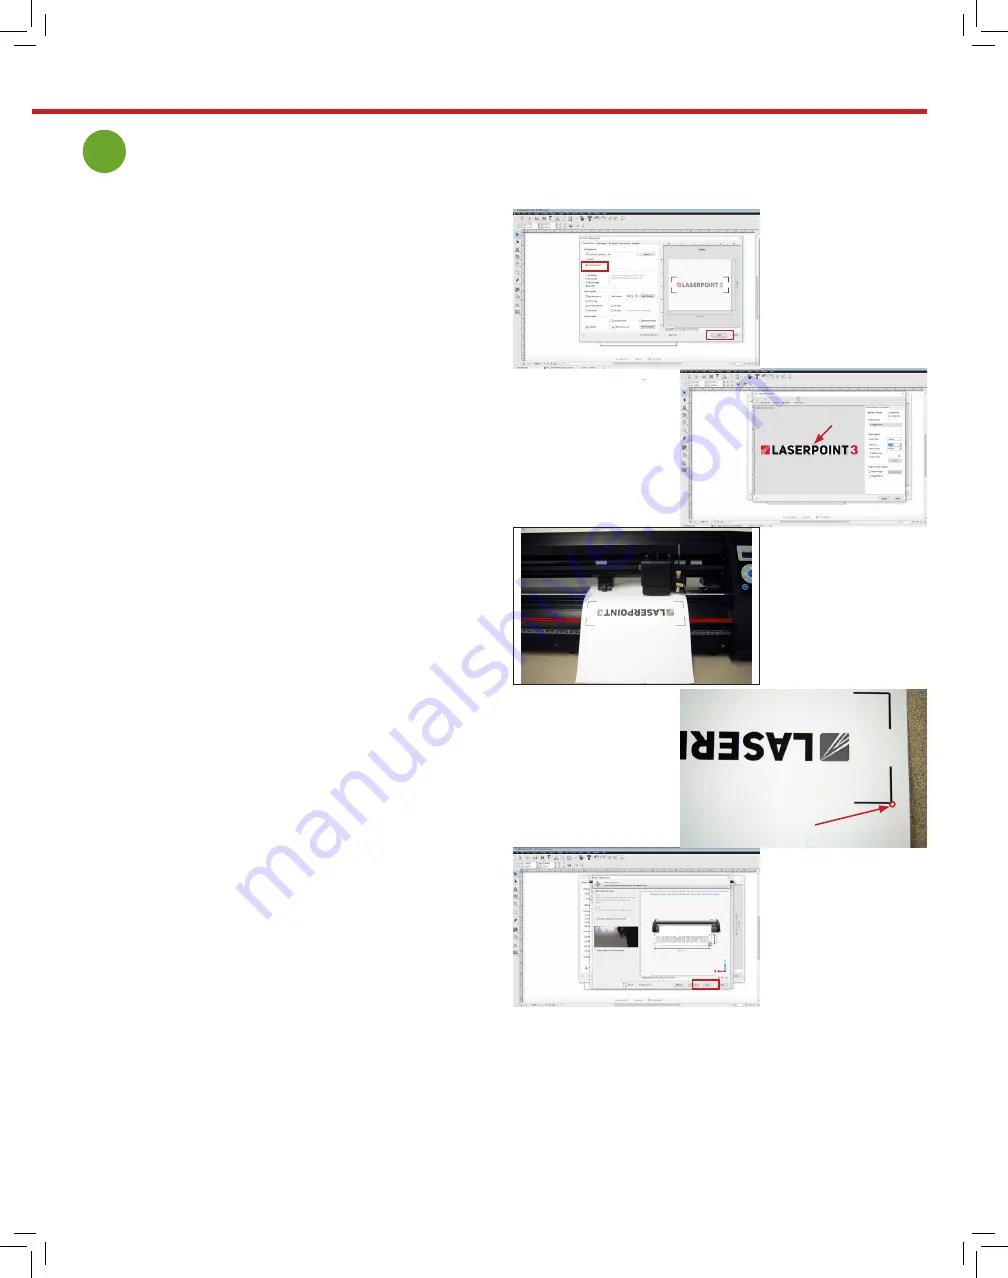
Within the Contour Cutting Wizard of VinylMaster,
make sure that Cutting Device is set to ARMS (fig 1.)
You should have already previously used Build to
create a contour around you image (fig 2). Take the
printed image and place the printed artwork with
alignment marks in the cutter.
Note the correct orientation of the artwork for ARMS
contour cutting (fig 3). The top of the image comes
out of the cutter first and shows up side down when
viewed from the front of the cutter. In this image the
paper has been moved forward - normally the blade tip
will be directly beside the alignment mark as seen in
figure 4
Using the navigation keys on the cutter, position the
blade tip so that it appears just outside the corner
shaped alignment mark (fig 4). Press the Origin key on
the cutter to set this as your origin point.
Press the Next key on your computer (fig 5). If you
have correctly positioned the blade, the cutter will turn
on the laser, automatically read all 4 alignment marks
and start ARMS contour cutting.
Precision laser alignment matters a great deal when
contour cutting. Take the time to get the printed
artwork loaded into the cutter perfectly straight.
Laser aligning registration marks
figure 1
figure 2
figure 3
figure 4
figure 5
Position blade/pen just
outside the alignment mark
Contour around text
Watch this video for step by step instrucitons of how to calibrate the cutter and perform a contour cut:
https://support.uscutter.com/support/solutions/articles/14000086258-laserpoint3-contour-cutting-video
Содержание LaserPoint3
Страница 1: ...User Manual Assembly Instructions...
Страница 31: ...www uscutter com 425 481 3555 31...


