TEC00-014
Pico2000 User Manual (Rev. 3.0)
Page 13 of 51
Multi-Screen mode
A group of four multi-screen buttons is implemented for multi-screen display
control.
The multi-screen buttons are enabled only under the 4-screen mode.
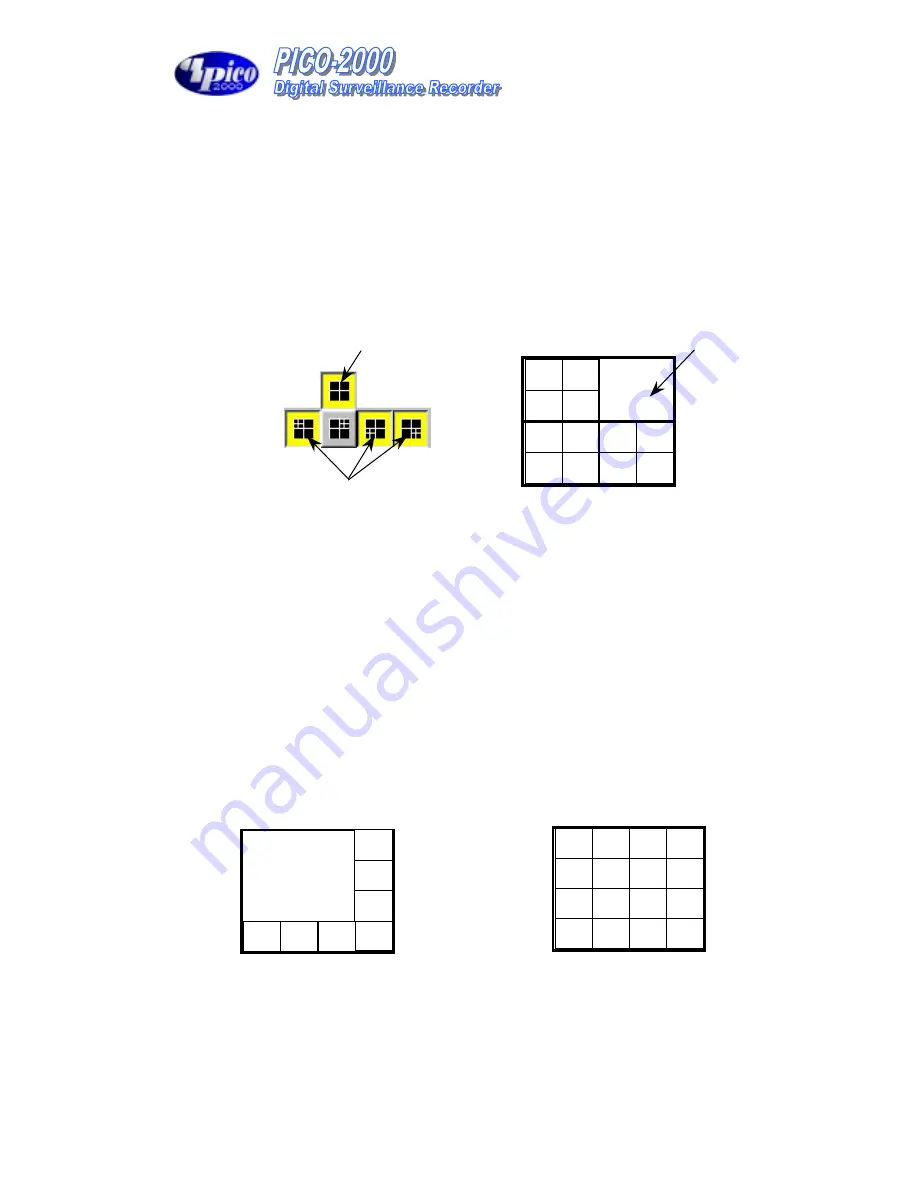
You can click on any of these mode buttons to further split any quadrant of
the original 4-Screen display into a smaller quad display (quad within a quad).
All multiscreen mode buttons can be selected simultaneously.
Example:
Using the following multi-screen buttons configuration (as that shown
in Figure 5-1) as an example, the camera display will be assigned as
Figure 5-2.
Figure 5-1
Figure 5-2
8-Screen mode
Click on the 8-Screen mode button to select this mode.
All cameras will be displayed simultaneously at first time entry to this mode.
Click the camera buttons to select or de-select camera(s) to display in this mode .
The down buttons will light up in yellow to indicate the display status
Click on the surrounding (small) screen will cause the camera on display to be
swapped with the one at the center(Large) screen. Keep doing the swapping until
the designed cameras is assigned to the respective screen. The assignment will be
maintained even if there is a momentary change to other multi-screen modes, but
it will return to its default by logging out and on again.
The camera display in 8-Screen mode is assigned as in Figure 6-1 by default.
Figure 6-1
Figure 6-2
(For Model 205A & 208 only)
Select 4-screen mode to
enable multi-screen selection
The multi-screen buttons can be pressed
simultaneously to superimpose the
quad-quad selections.
Cameras 5,6,7,8
1
2
3
4
9
10
13
14
11
12
15
16
1
2
3
4
5
6
7
8
9
10
11
12
13
14
15
16
1
5
4
3
2
6
8
7


