background image

MRF-260i B

ASE

S

TATION

Page 10

Programming For Multiple Equipment Locations

You can operate up to 15 different equipment locations, each with
an MRF-260i assigned a unique Receiver ID#.  You program each of
your remotes to talk to the equipment locations you want by assign-
ing each of your devices to a receiver. First, you must add and
name your receivers for the locations they are placed in:

Step 1 - Open the RF Setup Window

The RF Setup window opens after selecting RF Control from the
Program Menu or RF Settings from the Main Menu of ProWizard.

Step 2 - Reveal the Receiver settings

Extend the RF Setup window by clicking on the Receivers button of
the RF setup window.

Step 3 - Add, Name and Assign Receiver ID#

Using the controls at the bottom extended portion of the RF Control
window, add new receivers and rename them for the equipment
location. 

Step 4 - Save and Download to your
remote.

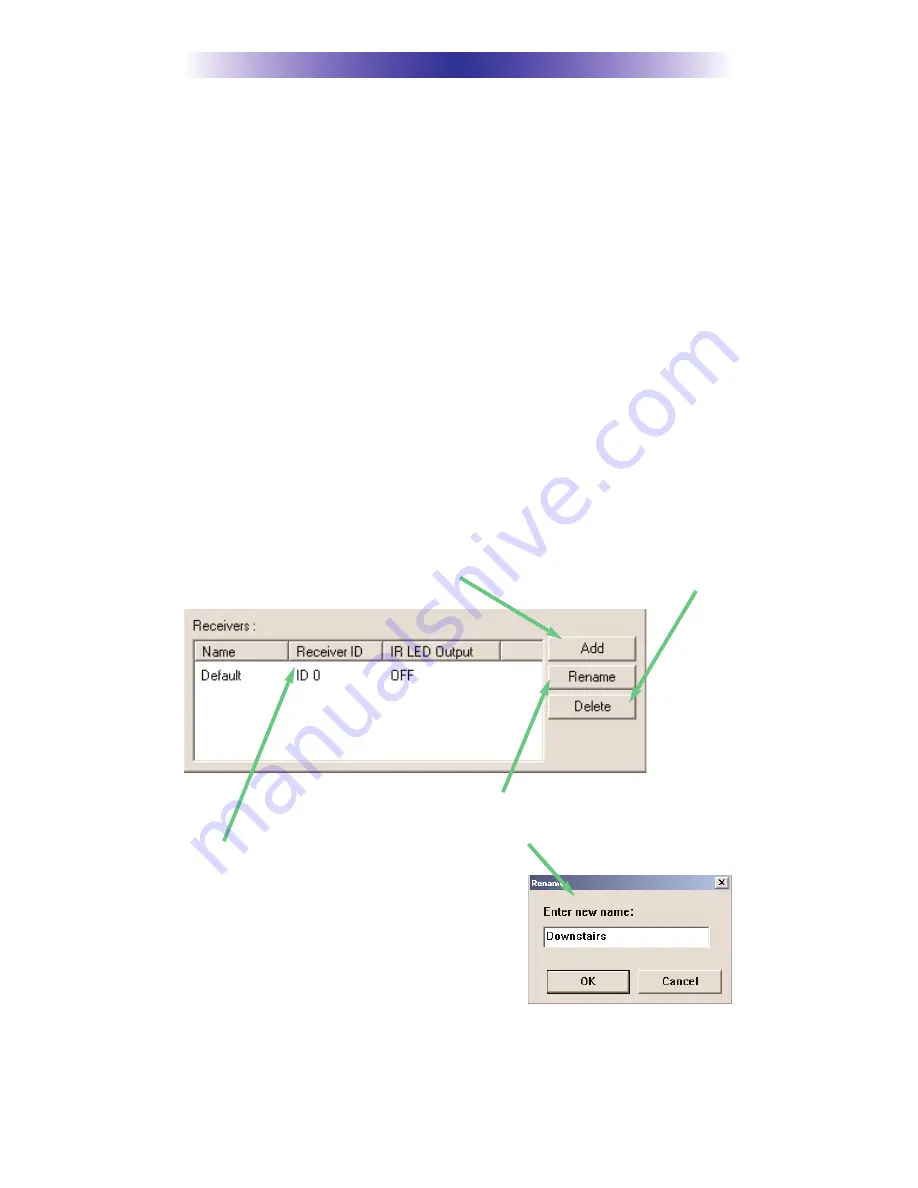
You may rename the Default
receiver to something more
descriptive by clicking on
the Rename button.

Add new receivers by click-
ing on the Add button.

Delete receivers by selecting them
first by clicking on their Name,
then clicking the Delete button.

Assign the correct Receiver ID# for
each LOCATION by clicking on the
desired CELL and selecting the ID#
you want from the pull down list.
Each LOCATION should have a
unique ID#.  It is ok to install multi-
ple MRF-260i’s in one location.

Содержание MRF-260i

Страница 1: ...MRF 260i Installation Manual Optimizing Narrow Band Reception with Complete Control Remotes...

Страница 2: ...L OR EDITORIAL ERRORS OMISSIONS MADE IN THIS MANUAL The Home Theater installation on the cover was designed and installed by Stone Glidden of King of Prussia and Doylestown PA The information in this...

Страница 3: ...er Overload 6 Disabling the Front Blaster Step by Step via PC 6 Controlling Four Identical Components Zones 7 Identical Components Zones Step by Step via PC 7 Programming For Multiple Equipment Locati...

Страница 4: ...3000is You can identify the build date of a remote control by looking at the serial number The first 6 digits indicate the build date If the serial number appears as 122905 014054 the first 6 digits...

Страница 5: ...be programmed to specifically control components in a particular room by installing an MRF 260i base station at each location In operation it s simple when you select a device located in the Den the M...

Страница 6: ...cable boxes HDTV tuners DVRs PCs or any other device with a high speed micro processor these generate broad band Radio Frequency Interference RFI Of course you should keep in mind that the emitter cab...

Страница 7: ...a valid RF ID Watch the Status LED on MRF 260i it should light every time you press a button on the remote This confirms that the signal was received and understood perfectly If you repeat any button...

Страница 8: ...emote control is set to a particular LINE OUT rather than ALL When IR commands are sent to all the flashers in a cabinet you can have difficulty adjusting the IR Output Reprogram the remote control to...

Страница 9: ...ade to an MRF 350i Disabling the Front Blaster Step by Step via PC Note If you are programming a URC MX addressable remote control that sets up without a PC refer to the owners manual to dis able the...

Страница 10: ...be set to RF ONLY for each identical component IR can still be utilized for other devices in your system 3 You must note the NUMBER of the Flasher Output you have uti lized for EACH of the identical c...

Страница 11: ...umn and then selecting RF from the three options shown in the pull down list box Select RF from the three options shown for EACH of the identical TVs You may leave the other components of the system s...

Страница 12: ...5 Make sure that the ID is set on both the remote and on the wheel of the MRF 260i Click on the Receivers button and set the RF address to one of the first 15 addresses 1 9 or A B C D or E The second...

Страница 13: ...Extend the RF Setup window by clicking on the Receivers button of the RF setup window Step 3 Add Name and Assign Receiver ID Using the controls at the bottom extended portion of the RF Control window...

Страница 14: ...AND OR OMISSIONS MADE IN THE URC DOCUMENTATION URC DOES NOT WARRANT THAT THE URC SOFTWARE IS BUG FREE OR ERROR FREE OR THAT THERE ARE NO ERRORS BUGS IN THE URC SOFTWARE URC warrants that at the time...

Страница 15: ...ng 914 835 4484 or contacting URC at returnrequest universalremote com To obtain warranty service end user must deliver the URC equipment freight prepaid in its original packaging or packaging affordi...

Страница 16: ...LIMITED TO ACTUAL DAMAGES NOT IN EXCESS OF AMOUNTS PAID BY END USER FOR THE URC EQUIPMENT IN NO EVENT SHALL URC BE LIABLE FOR ANY EVENTS BEYOND ITS CONTROL INCLUDING ANY INSTANCE OF FORCE MAJEURE IN N...

Страница 17: ...anel blaster by setting the device to a specific IR Line Output instead of ALL then adjust the Line Output I have a row of identical TVs I ve correctly set the flasher outputs using the Editor softwar...

Страница 18: ...f and on the user is encouraged to try to correct the interference by one more of the following measures Reorient or relocate the receiving antenna Increase the separation between the equipment and re...

Отзывы: