Vision™ OPLC™
Unitronics
9
Pinouts
The pinouts below show the PLC port signals.
To connect a PC to a port that is set to RS485, remove the RS485 connector, and connect the PC to
the PLC via the programming cable. Note that this is possible only if flow control signals are not used
(which is the standard case).
RS232
RS485**
Controller Port
Pin #
Description
Pin #
Description
Pin #1
1*
DTR signal
1
A signal (+)
2
0V reference
2
(RS232 signal)
3
TXD signal
3
(RS232 signal)
4
RXD signal
4
(RS232 signal)
5
0V reference
5
(RS232 signal)
6*
DSR signal
6
B signal (-)
*Standard programming cables do not provide connection points for pins 1 and 6.
**When a port is adapted to RS485, Pin 1 (DTR) is used for signal A,
and Pin 6 (DSR) signal is used for signal B.
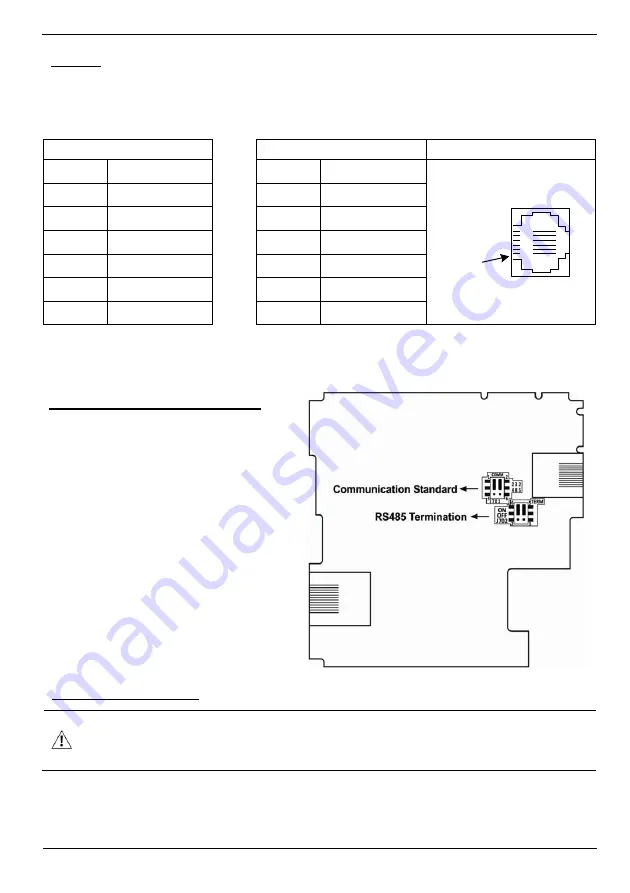
RS232 to RS485 Jumper Settings
The figure to the right shows the jumper
factory default settings, RS232, RS485
termination ON.
Note that in order:
To change the communication
setting to RS485, both
communication standard jumpers
must be moved.
To change the RS485 termination,
both termination jumpers must be
moved.
To access the jumpers, you must open the
controller according to the instructions below.
Opening the Controller
Before performing these actions, touch a grounded object to discharge any electrostatic
charge.
Avoid touching the PCB board directly. Hold the PCB board by its connectors.
1. Turn off the power supply, disconnect, and dismount the controller.
2. The back cover of the controller comprises 4 screws, located in the corners. Remove the screws,
and pull off the back cover.


