


Selecting a Communications Port
The EV2903 program displays the port selection dialog
box (as shown in Appendix A) the first time that the pro-
gram is run. You must specify to which communications
port (1-4) the EV2903 is connected. Specify the correct
port by clicking first on the appropriate selection and
then on the “OK” button. After several seconds, the pro-
gram will display an information box confirming that
communications have been established. Please note that
the program then saves this information to the hard
drive, so the port selection box will not appear again
during subsequent use of the program.
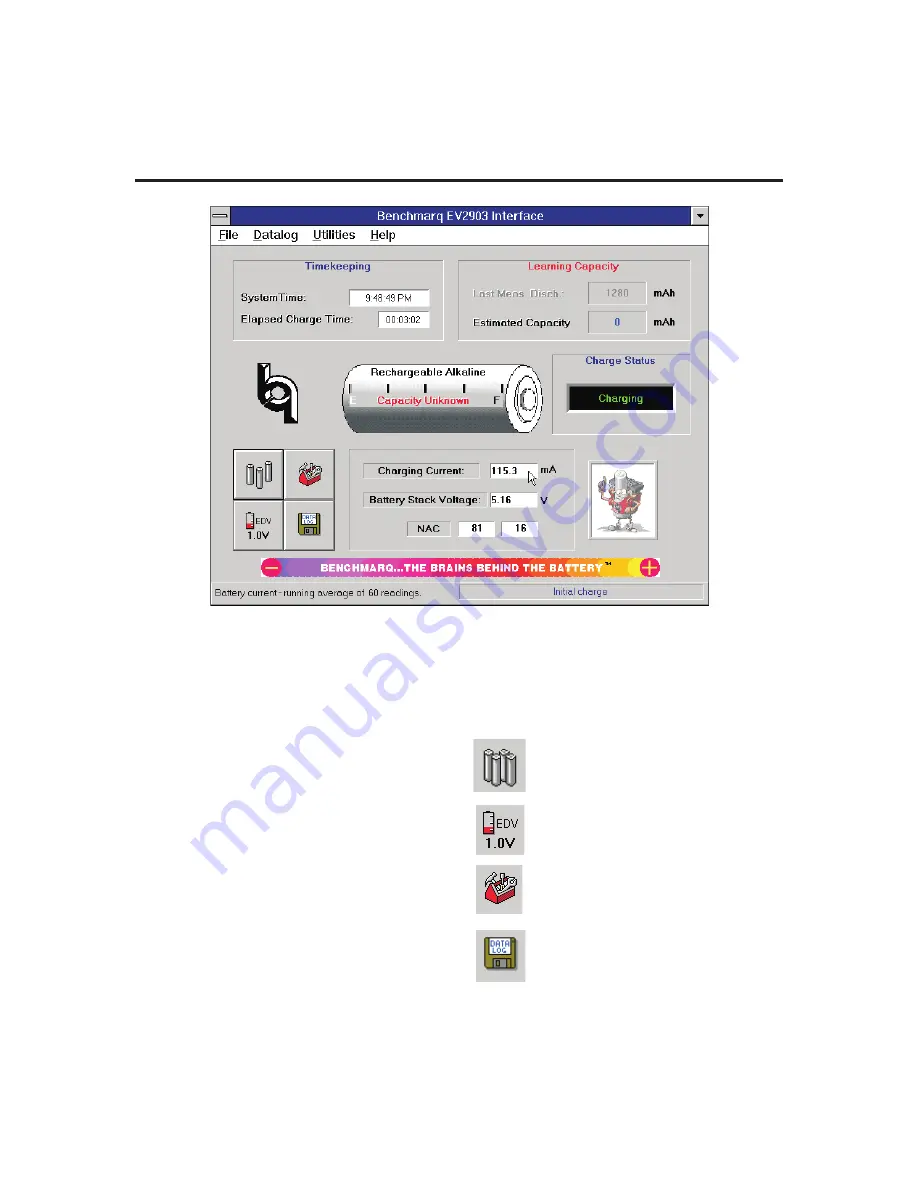
Interface Screen
The Interface screen appears after the program has
started and communication has been established with
the EV2903 board. If this screen does not appear, please
refer to Appendix A (Troubleshooting) for possible solu-
tions.
Display and Functional Buttons
The Interface screen shows four buttons for display and
functional purposes:
Select this button to show either three or
four cells in use. This button is for dis-
play only to remind the user of configura-
tion.
Select this button to show EDV. This but-
ton is for display only to remind user of
configuration.
Use this button to calibrate in the battery
stack voltage.
Select it and then enter
the measured stack voltage to calibrate
the Battery Stack Voltage display.
Click on this button to start a datalog.
Enter the filename where the datalog will
be saved and an optional line of text
which will be placed on the first line of
the datalog.
3
EV2903
Figure 1. EV2903 Interface Screen


