background image

© 2021 U

nited S

tat

es Sto

ve C

ompany

7

INSTALL

ATION

DÉGA

GEMENTS A

UX C

OMBU

STIBLE

S

• A

près a

voir c

onsult

é les instr

uctions d'ins

talla

tion pour 

les déga

gemen

ts minimum a

ux matéria

ux combus

tibles, 

localis

ez v

otr

e prot

ecteur de plancher en c

onséquenc

e et 

placer 

soigneus

ement 

le poêle 

dans vo

tre 

emplacemen

sélec

tionné. Ins

taller t

uyau de 

poêle, les 

coudes 

et dé 

à 

coudr

e si néces

sair

e, en utilis

ant s

oit une cheminée en 

maçonnerie r

écemmen

t nett

oyé e

t inspecté (

corr

ectemen

doublée) ou une cheminée UL

, ULC. A

ssur

er que le déflec

teur 

de combus

tion fixe qui es

t prévu es

t installé dans le c

ol de 

combus

tion.

• E

ncor

e une fois, 

vérifie

z les illus

trations s

uivan

tes e

ass

urez

-vous d’

avoir les dé

gag

ements mon

trés du cha

uffag

et du t

uyau de r

accor

dement par r

apport a

ux sur

fac

es 

combus

tibles. Si v

ous ave

z de la brique ou de la pierre derrièr

votr

e chauff

age

, veuille

z cons

ulter le c

ode de cons

truc

tion 

local 

quant a

ux rè

gles spécifiques 

pouvan

t s’appliquer 

à vo

tre 

région. P

ar con

tre, si le mur n

’es

t que rev

êtu a

vec de la brique 

ou de la pierre, c

onsidérez

-le par un mur combus

tible. A

fin 

de réduir

e les déga

gemen

ts de la cheminée par r

apport a

ux 

matéria

ux combus

tibles, con

tac

tez v

otr

e ser

vice de s

écurit

é 

local.

• S

i votr

e cheminée a un tirag

e exc

essif

, proc

urez

-vous un 

rég

ulateur 

baromé

trique de 

tirag

e (DR6 

disponible aupr

ès du 

fabric

ant).

• L

e rac

cor

d de cheminée devr

ait êtr

e aus

si cour

t que possible

et le cha

uffag

e doit poss

éder son pr

opre c

onduit de cheminée. 

NE BR

ANCHEZ PA

S CET

TE UNITÉ À 

UN COND

UIT DE 

FUMÉE UTILISÉ PAR UN A

UTRE APPAREIL

.

• U

tilisez 

trois 

vis aut

o tar

audeus

es dans 

chaque tuy

au 

de 

poêle ou joint c

oudé pour maintenir s

olidement le t

uyau. 

Scelle

z le pourtour des vis

• N’

installe

z pas c

e chauff

age dans une mais

on mobile.

• V

érifiez 

vos 

codes 

de cons

truc

tion et 

d’as

sur

ance. 

L’ins

talla

tion doit respec

ter c

es règ

les.

CAUTION!

• 

GARDER LES MEUBLE

S ET AUTRE

S MATÉRIA

UX 

COMB

USTIBLE

S À L'ÉCAR

T DU CHA

UFFAGE.

• 

GARDER LA Z

ONE ADJA

CENTE AU CHA

UFFAGE LIBRE 

DE TO

UTES MA

TIÈRES C

OMBU

STIBLE

S, ESSENCE 

ET AUTRE

S VAPEUR

S INFLAMMABLE

S.

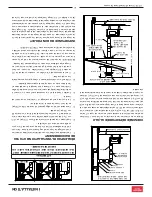
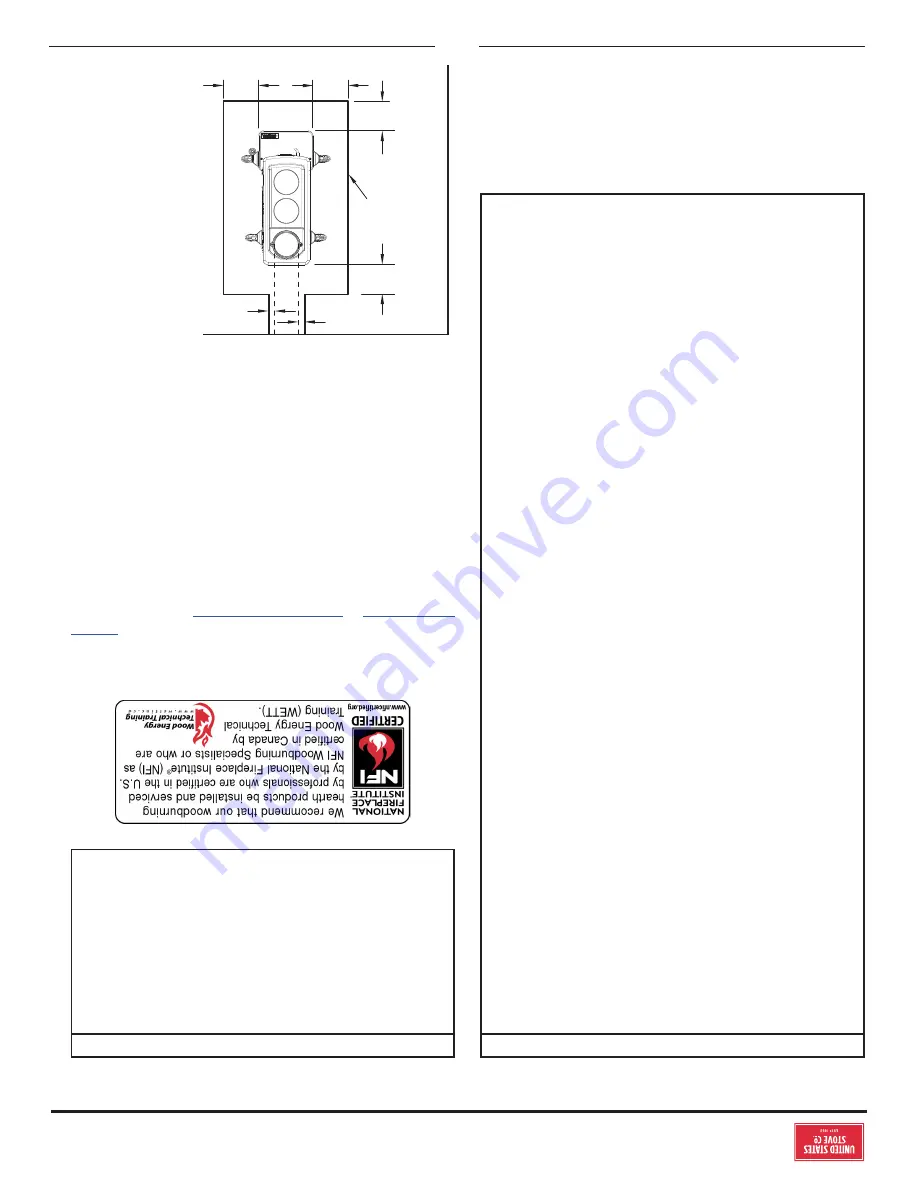
SOL

PROTECTEUR

16”

407 mm

16”

407 mm

23”

585 mm

25-1/2”

648 mm

14”

(356 mm)

18”

(458 mm)

18” (458 mm)

84” min.

(2134 mm)

SOL PROTECTEUR

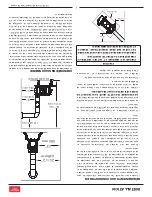
CHEMINÉE EN MAÇONNERIE

La cheminée de maç

onnerie doit êtr

e approuv

ée par le code e

avoir un c

onduit de cheminée. L

a cheminée de maçonnerie doit 

respec

ter les c

odes UL, UL

C. A

van

t d’utilis

er une cheminée en 

maçonnerie e

xistan

te, ne

tto

yez la cheminée e

t inspecte

z-en le 

doublage pour s’

ass

urer que le f

onctionnemen

t ser

a séc

uritair

e. 

Appor

tez les r

éparations néc

essair

es avan

t de rac

cor

der le 

chauff

age

. Voir la pa

ge 3

, élément 5

. Reg

arde

z à la Fig

. 5. L

e tuy

au 

de rac

cor

dement e

t le matériel néc

essair

e au br

anchement 

direc

t à une cheminée 

en maçonnerie y 

son

t montr

és. Si le 

tuy

au 

de rac

cor

dement doit 

pass

er à tr

aver

s un 

mur combus

tible av

ant 

d’en

trer dans la cheminée en maç

onnerie, c

onsult

ez un maç

on 

compé

ten

t ou un repr

ésen

tan

t en cheminées. L’ins

talla

tion doit 

êtr

e con

forme a

ux codes loc

aux d’

incendie

, et a

u NFPA 211(É.-

U.) ou C

AN/CS

A-B3

65-M91 (

CANAD

A). Ne pa

s brancher c

chauff

age dans le même c

onduit de fumée que le f

oyer d’

un 

autr

e chauff

age

. La cheminée utilis

ée pour un chauff

age ne 

doit pas ê

tre utilis

ée pour ven

tiler le cellier ou le s

ous-s

ol. S’il 

y a une porte de ne

tto

yag

e à la base de la cheminée

, ferme

z-la 

hermétiquemen

t.

6

© 2021 U

nited S

tat

es Sto

ve C

ompany

INSTALL

ATION

AVIS DE SÉ

CURITÉ

:

• 

L’INS

TALL

ATION INC

ORRECTE DE CE P

OÊLE 

PO

URRAIT ENTR

AÎNER L’INCENDIE D

U DOMICILE. 

AFIN DE RÉDUIRE LE RIS

QUE D

’INCENDIE, 

RESPE

CTEZ LE

S INSTR

UCTIONS D

’INSTALL

ATION. 

NE PAS RE

SPECTER LE

S INSTR

UCTIONS PEUT 

ENTRAÎNER 

DES DOMMA

GES MA

TÉRIELS, DE

BLESS

URES PER

SONNELLE

S VOIRE L

A MORT !

• 

CONS

ULTEZ LE

S FONC

TIONNAIRES MUNICIP

AUX 

DE CONS

TRU

CTION 

OU DE 

LUT

TE CONTRE 

LES 

INCENDIES AFIN DE C

ONNAÎTRE LES LIMIT

ATIONS 

ET LES EXIGENCE

S D’INS

TALL

ATION DE V

OTRE 

RÉGION.

• 

UTILISEZ DES DÉTE

CTEUR

S DE FUMÉE DANS L

PIÈCE D

ANS LA

QUELLE LE P

OÊLE EST INS

TALLÉ.

• 

MAINTENEZ LE MOBILIER ET LES RIDEA

UX 

ÉLOIGNÉ

S DU P

OÊLE.

• 

N’UTILISEZ PAS D

’ESSENCE, DE C

OMBU

STIBLE 

PO

UR LANTERNE À E

SSENCE, DE KÉR

OSÈNE, DE 

LIQUIDE D

’ALL

UMAGE DE CHARB

ON OU DE LIQ

UIDES 

SIMILAIRE

S PO

UR DÉMARRER OU « R

AVIVER » 

UN FEU DANS CE P

OÊLE. MAINTENEZ TO

US CE

LIQUIDE

S ÉLOIGNÉ

S DU P

OÊLE.

• 

NE PAS BR

ANCHER OU UTILISER EN C

ONJONC

TION 

AVE

C TO

UT COND

UIT DE DISTRIB

UTION

• 

FO

URNIR DE L'AIR PO

UR LA C

OMBU

STION DE 

L'EXTÉRIEUR DE L

A MAISON À L

A PIÈCE O LE 

CHAUFF

AGE E

ST SITUÉ. SI L'ENTRÉE N'E

ST P

AS 

DANS L

A MÊME PIÈCE, L'AIR DOIT A

VOIR UN A

CCÈ

LIBRE DANS L

A CHAMBRE.

• 

BRANCHEZ T

OU

JO

URS CET APP

AREIL À UNE 

CHEMINÉE ET ÉVENT À L'EXTÉRIEUR

. NE JAMAIS 

VENTILER DANS UNE A

UTRE PIÈCE O

U À L'INTÉRIEUR 

D'UN BÂTIMENT

. NE PAS R

ACC

ORDER CET APPAREIL 

À UN FUMÉ DE CHEMINÉE SERVANT UN A

UTRE 

APPAREIL

.

• 

TO

UTES LE

S PERSONNE

S, EN PAR

TICULIER 

LES ENF

ANTS, DOIVENT ÊTRE ALER

TES DE

DANGER

S PR

OVENANT DE TEMPÉR

ATURE

S DE 

SURF

ACE 

ÉLEVÉES ET 

TENIR À L'É

CAR

T PENDANT 

L'UTILISATION. 

LES 

PETITS 

ENFANT

S NE 

DEVRAIENT 

PAS ÊTRE L

AISSÉ

S SANS S

UPERVISION Q

UAND 

DANS L

A CHAMBRE AVE

C LE CHAUFF

AGE.

• 

CET APPAREIL NE DOIT P

AS ÊTRE UTILISÉ C

OMME 

SO

URCE PRIMAIRE DE CHALEUR

.

AVIS DE SÉ

CURITÉ

:

NE PAS R

ACC

ORDER UN CHA

UFFAGE A

U BOIS À 

UN ÉVENT À GAZ DE TYPE B

. CECI N'E

ST P

AS S

ÛR 

ET EST INTERDIT P

AR LE CODE DE L'A

SSOCIA

TION 

NATIONALE 

DE PR

OTE

CTION 

INCENDIE. CET 

APPAREIL 

DE CHAUFF

AGE NÉ

CESSITE UNE MA

ÇONNERIE 

APPRO

UVÉE O

U UL, UN TYPE RÉ

SIDENTIEL 

HOMOLOG

UÉ UL

C ET UNE 

CHEMINÉE D'APP

AREIL DE 

CHAUFF

AGE DE B

ÂTIMENT

. UTILISEZ UNE CHEMINÉE 

DE 6 "DE 

DIAMÈTRE O

U PL

US 

GRANDE, 

ASSEZ ÉLEVÉE 

PO

UR DONNER UN BON TIR

AGE.

US S

tov

e rec

ommande for

temen

t que votr

e poêle soit ins

tallé 

par un technicien qualifié NFI (

US) ou WET

T (Canada

). Pour 

trouv

er l’ins

talla

teur qualifié le plus pr

oche, ac

céde

z à: 

http

s://

nfic

ertified.

org

; or 

http

s://w

ww

.w

ettinc.

ca/

PRO

TECTEUR DE PL

ANCHER

Placez le cha

uffag

e sur une s

olide maçonnerie ou du bé

ton. 

Lor

sque le cha

uffag

e est utilis

é sur un plancher c

ombustible

utilisez 

un pr

otec

teur 

de plancher 

réper

torié 

par U

nderwrit

ers. 

Le pr

otec

teur de plancher doit r

especter les normes UL (É.-

U.) 

et C

AN/ULC (

Canada

) et a une v

aleur R de 2,06

. Le pr

otec

teur 

de plancher doit dépass

er d'au moins 16 po a

u-delà du c

ôté 

de la porte de l'appar

eil de chauff

age e

t 8 po de chaque côt

é. 

Il de

vrait 

égalemen

t ét

endre 8 

po au-

delà de 

l'arrière pour 

le 

Canada

. Le pr

otec

teur de plancher doit é

tendr

e 2 po au-

delà de 

chaque côt

é du conduit de f

umée si elle est c

oudée ver

s un mur, 

ainsi que 2 po de chaque côt

é de la cheminée pour les cour

ses 

horizon

tales.

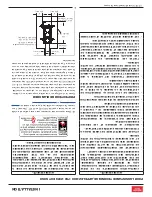
8”

8”

(204 mm)

8”

(204 mm)

US 16” (407 mm)

CAN 18” (458 mm)

(204 mm)

SOL

PROTECTEUR

Construction incombustible 

conforme à NFPA 211 

(USA) ou CAN / CSA 

B365-M91 (CANADA)

2”

(51 mm)

2”

(51 mm)

PO

UR L’A

SSIS

TANCE TE

CHNIQUE, APPELEZ: 8

00-7

50

-27

23 EX

T 505

0

Содержание US1269E

Страница 1: ...tallation of this heater Contact local building or fire officials about permits restrictions and installation requirements in your area NEVER OPERATE THIS PRODUCT WHILE UNATTENDED CAUTION Please read...

Страница 2: ...EPA test conditions burning Douglas Fir dimensional lumber this heater has been shown to deliver heat at a rate of 29 234 to 26 300 Btu hr This heater achieved a particulate emissions rate of 1 8 g h...

Страница 3: ..._________________________________________ If no Date of inspection of the existing chimney system ___________________________________________________________ COMMISSIONING Confirm Hearth Pad Installat...

Страница 4: ...ney Furnace Cement Flooring protector as specified NOTICE UNITED STATES STOVE COMPANY GRANTS NO WARRANTY STATED OR IMPLIED FOR THE INSTALLATIONORMAINTENANCEOFYOURWOOD STOVE AND ASSUMES NO RESPONSIBILI...

Страница 5: ...h a handle bracket This bracketed leg is designed to be installed at the front right side of the unit X 2 X 2 7 Attach the rear legs to the base of the stove with two 2 M8 X 45 screws and two 2 M8 X 4...

Страница 6: ...R TO A TYPE B GAS VENT THIS IS NOT SAFE AND IS PROHIBITED BY THE NATIONAL FIRE PROTECTION ASSOCIATION CODE THIS HEATER REQUIRES APPROVED MASONRY OR UL ULC LISTED RESIDENTIAL TYPE AND BUILDING HEATING...

Страница 7: ...pe and or elbow joint to firmly hold the pipe together Seal around the screws Do not install this heater in a mobile home or trailer Check with local codes The installation must comply with their ruli...

Страница 8: ...orizontal pipe upward toward the chimney at least 1 4 for each foot of horizontal run The horizontal section must be a minimum of 24 from the stove 3 You must have at least 18 inches clearance between...

Страница 9: ...from any material that could catch fire The inside diameter of the fireclay liner shall be sized for the proper snug fit of a 6 diameter chimney connector pipe The fireclay liner shall run from the o...

Страница 10: ...s shown for 3 and 4 above Parts C and D respectively of Figure 8 shall be for types 3 and 4 connections to facilitate removal of the chimney connector for cleaning The chimney thimble shall be of ASTM...

Страница 11: ...Smoke spillage into the house or excessive buildup of water or creosote in the chimney are warnings that the chimney is not functioning properly Correct problem before using heater Possible causes ar...

Страница 12: ...n burning air dried seasoned hardwoods as compared to softwoods or too green or freshly cut hardwoods The following resources can assist in learning the burn characteristics of various species of wood...

Страница 13: ...the ends of the piece your wood is soaked or freshly cut green Do not use this wood in your stove Large amounts of creosote could be deposited in your chimney creating potential conditions for a chim...

Страница 14: ...the air inlet 5 Reloading of fuel should only occur once the prior fuel load has burned down to embers Abiding by this routine your stove will achieve the cleanest emissions burn plus will prevent ove...

Страница 15: ...ays check for creosote deposit once every two months and have your chimney cleaned at least once a year If a chimney or creosote fire occurs DO NOT open the door keep the door closed Wait for the fire...

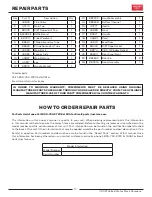
Страница 16: ...16 2021 United States Stove Company REPAIR PARTS 1 2 3 4 5 6 7 9 11 10 8 16 15 14 13 12 18 19 20 21 22 23 17 24...

Страница 17: ...1 22 892511 Door Panel Front 1 23 892843 Door Pin 2 24 893216 Door Assembly 1 To order parts Call 1 800 750 2723 Ext 5051 or Email to parts usstove com For Parts Assistance Call 800 750 2723 Ext 5051...

Страница 18: ..._____ Engineer Name _____________________________________ License No _________________________________________ Company ___________________________________________ Telephone No ________________________...

Страница 19: ...ce de 07 Date ______________________ Nom de l ing nieur _________________________________ N de licence ______________________________________ Compagnie ________________________________________ N de t...

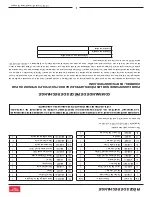
Страница 20: ...de corde 3 8 1 21 88174 Joint de fen tre 1 8x1 1 22 892511 Panneau de porte 1 23 892843 Goupille de porte 2 24 893216 Assemblage de porte 1 COMMANDE DE PI CES DE RECHANGE Les informations contenues da...

Страница 21: ...16 2021 United States Stove Company PI CES DE RECHANGE 1 2 3 4 5 6 7 9 11 10 8 16 15 14 13 12 18 19 20 21 22 23 17 24...

Страница 22: ...r osote V rifiez toujours le d p t de cr osote une fois tous les deux mois et faites nettoyer votre chemin e au moins une fois par an Si un feu de chemin e ou de cr osote se produit N OUVREZ PAS la po...

Страница 23: ...l es plus emp chera le surfiage de votre po le FUM E VISIBLE La quantit de fum e visible produite peut tre une m thode efficace pour d terminer l efficacit du processus de combustion aux param tres d...

Страница 24: ...dans votre chemin e cr ant des conditions potentielles pour un feu de chemin e ALT RER AVERTISSEMENT Ce chauffage au bois a un taux de combustion minimum r gl la fabrication et qui ne peut tre modifi...

Страница 25: ...ents nerg tiques que d autres Des rendements plus lev s et des missions plus faibles r sultent g n ralement de la combustion de bois durs s ch s l air par rapport aux r sineux ou aux feuillus trop ver...

Страница 26: ...Le dispersement de fum e dans la maison ou une accumulation excessive d eau ou de cr osote dans la chemin e est un avertissement que la chemin e ne fonctionne pas correctement Corrigez le probl me av...

Страница 27: ...es directives qui l accompagnent offrant une m thode s curitaire pour faire traverser le conduit de raccordement travers un mur combustible en vue d un branchement une chemin e en ma onnerie EXIGENCES...

Страница 28: ...s d tre ciment en place Le d gagement minimum de la chemin e la brique et les mat riaux combu ibles e de 5 cm 2 po 50 8 mm 30 cm 304 8 mm 12 po minimum aux mat riaux combu ibles Chemin e en ma onnerie...

Страница 29: ...e au moyen de 3 vis puis scell avec du ciment calorif re 2 Appliquez une pente minimale de 6 mm 1 4 po par 30 cm 1 pi de conduit horizontal de tuyau en direction de la chemin e La section horizontale...

Страница 30: ...lisez trois vis auto taraudeuses dans chaque tuyau de po le ou joint coud pour maintenir solidement le tuyau Scellez le pourtour des vis N installez pas ce chauffage dans une maison mobile V rifiez vo...

Страница 31: ...ITS ENFANTS NE DEVRAIENT PAS TRE LAISS S SANS SUPERVISION QUAND DANS LA CHAMBRE AVEC LE CHAUFFAGE CET APPAREIL NE DOIT PAS TRE UTILIS COMME SOURCE PRIMAIRE DE CHALEUR AVIS DE S CURIT NE PAS RACCORDER...

Страница 32: ...oign e Ce pied support est con u pour tre install sur le c t avant droit de l unit X 2 X 2 7 Fixez les pieds arri re la base du po le avec deux 2 vis M8 X 45 et deux 2 crous M8 X 45 X 2 X 2 8 Soulevez...

Страница 33: ...de sol tel que sp cifi ATTENTION LE PO LE EST LOURD ASSUREZ VOUS D AVOIR SUFFISAMMENT D AIDE ET D UTILISER LES TECHNIQUES APPROPRI ES DE LEVAGE LORSQUE VOUS D PLACEZ LE PO LE AVIS UNITED STATES STOVE...

Страница 34: ...ion du syst me de chemin e existant ____________________________________________________________________ MISE EN SERVICE Confirmer l installation du tapis de foyer conform ment aux instructions d inst...

Страница 35: ...ectrique Aucun Dimensions G n ral profondeur x largeur x hauteur 838 x 470 x 584 mm 33 x 18 5 x 23 po Chambre de combustion Largeur x profondeur 229 mm x 482 9 x 19 po Volume M tres cubes pieds cubes...

Страница 36: ...sables locaux du b timent ou des pompiers pour conna tre les permis les restrictions et les exigences d installation dans votre r gion NE JAMAIS UTILISER CE PRODUIT SANS SURVEILLANCE MISE EN GARDE Veu...

Отзывы: