


SETUP INSTRUCTIONS
13
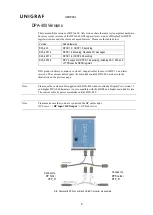
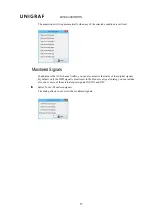
DPA-400 Firmware Upgrade
When launching the GUI, it will verify that the firmware programmed in the DPA-400 unit is
matching the GUI version. If upgrade is needed the GUI will prompt the user to update the
firmware.
Please follow these steps in order to upgrade your DPA-400 internal firmware:
Unplug the DPA-400 USB cable.
With a length of wire, short-circuit pins 1 and 6 of the digital I/O connector. Try to make a
good contact by inserting at least ½” of bare conductor in each of the connector pin holes.
Plug the DPA-400 USB cable to your PC.
Locate the COM port used by your DPA-400 (for instance, COM3).
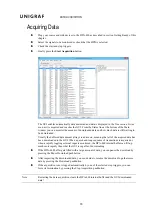
Open Windows command prompt dialog and go to the directory where the installer copied the
firmware files. (by default c:\Program Files (x86)\Unigraf\DPA-400\ Firmware). In this
directory you should find the updater,
UUFUpd.exe
, and the FW file, e.g.
dpa-400.uuf
.
In Windows command prompt run:
uufupd -c 3 -f dpa-400.uuf
(In the entry, please substitute
“3” with the number of your COM
port and “
dpa-400.uuf
” with the
firmware file included in your
package)
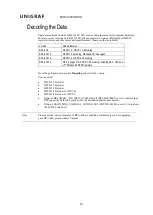
The UUFUpd utility will upgrade the DPA-400 firmware while printing a series of dots. Please
wait for its completion without removing the USB cable.
When the message “DONE” is printed, please remove the short-circuit from the I/O connector
and unplug the USB cable. Your DPA-400 is now upgraded with its latest firmware.
In case you receive an error message from the UUFUpd utility, please restart the above
procedure from its very beginning (USB cable unplugged) and verify that the short-circuit you
use makes a good contact and to the right pins.
Note
After a firmware upgrade, the DPA-400 USB cable must be unplugged and plugged once for
the device to be again functional.