background image

English

84

INITIALIZING THE CARD MEMORY 
AND INTERNAL MEMORY

A card must be formatted with this camera:

i

After purchasing, when used for the first time, or

i

If it was formatted using a personal computer or another digital camera.

The card cannot be reformatted if the lock switch is set to the “LOCK” 
position. Proceed with the reformat procedure after setting the lock switch to 
the unlocked position.

To reformat a card, install it in the camera. To reformat the camera’s 
internal memory, remove the card from the camera.

Display the Option Menu (page 72).

Select “FORMAT” and press the ok 
button.

h

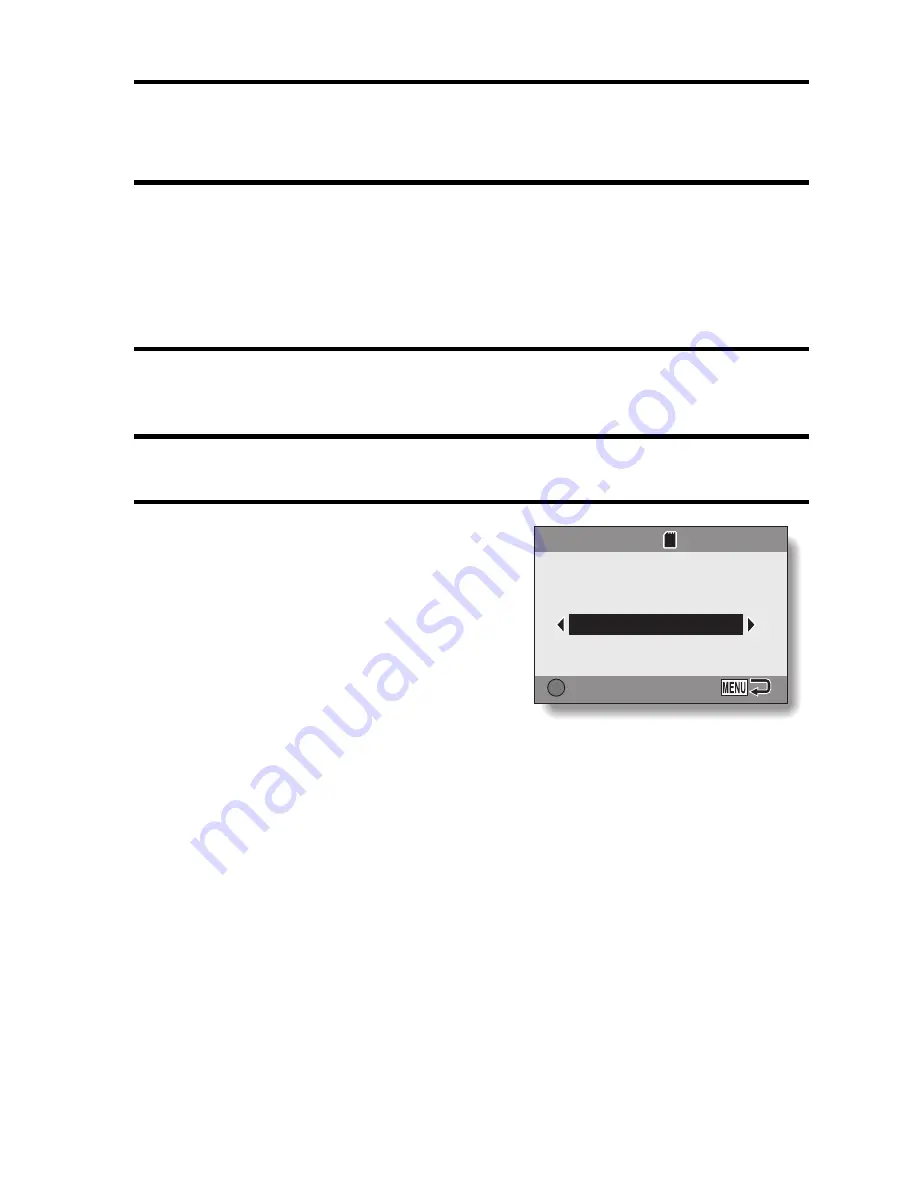
The screen to begin formatting 
appears.

OK

FORMAT

FORMAT

FORMAT

CARD

CARD

CARD

((

)))

FORMAT

OK

OK

OK

<Example: With card 

installed>

Содержание UDC-5M

Страница 1: ...ations on your purchase of the Uniden UDC 5M Digital Camera Please be sure to read this Instruction Manual before you begin using your camera Save this manual for future reference Review the separate...

Страница 2: ...lar installation If this equipment does cause harmful interference to radio or television reception which can be determined by turning the equipment off and on the user is encouraged to try to correct...

Страница 3: ...English ii kFOR CANADIAN USERS i This Class B digital apparatus complies with Canadian ICES 003...

Страница 4: ...ttery 1 Open the battery card cover and insert the batteries h The battery card cover is located on the bottom of the camera 2 Press the on off button to turn the camera on h The Shooting Screen appea...

Страница 5: ...y an icon in the upper left area of the monitor 4 Press the shutter button Still image shooting mode A still image is captured Video clip recording mode Recording begins To stop recording press the sh...

Страница 6: ...to the Playback Screen h Press the l or m button to display the video clip you wish to play back h Video clips are indicated by a video clip pattern along the top and bottom of the screen 2 Press the...

Страница 7: ...g recording Getting started shooting Shooting still images on page 29 Recording a video clip on page 36 Log the date and time of your photos DATE AND TIME SETTINGS on page 19 DATE IMPRINTING ON STILL...

Страница 8: ...ight view portrait mode on page 40 FLASH SETTING red eye reduction on page 43 Photographing landscapes USING THE SCENE FUNCTION landscape mode on page 40 Take a self photo SELF TIMER on page 45 Make i...

Страница 9: ...or brightness ADJUST THE MONITOR BRIGHTNESS on page 76 Data managing processing Search for image data 9 image display playback on page 32 Delete files Erasing files on page 34 Protect images from acci...

Страница 10: ...17 DATE AND TIME SETTINGS 19 BASIC OPERATION BEFORE TAKING PICTURES 22 CAPTURING AND PLAYING BACK STILL IMAGES 29 VIDEO CLIP RECORDING AND PLAYBACK 36 USING THE SCENE FUNCTION 40 USING THE ZOOM 42 FL...

Страница 11: ...IES 71 OPTIONS DISPLAYING THE OPTION MENU 72 POST VIEW SETTING 75 ADJUST THE MONITOR BRIGHTNESS 76 SCREEN LANGUAGE 77 TV SYSTEM SETTING 78 AUTO POWER OFF FUNCTION 79 FILE No RESET FUNCTION 81 INITIALI...

Страница 12: ...OTHER DEVICES AND CONNECTIONS CONNECTING TO A TV 90 CONNECTING TO A COMPUTER 91 DIRECT PRINTING 98 APPENDICES COMMONLY ASKED QUESTIONS 105 TROUBLESHOOTING 111 SPECIFICATIONS 117 HINTS FOR TAKING PICT...

Страница 13: ...CKING THE INCLUDED ACCESSORIES i AA Alkaline Batteries 2 i Video Cable 1 i USB Cable 1 i SAFETY MANUAL safety precautions booklet Please read this booklet carefully before using the digital camera i W...

Страница 14: ...English 8 Attaching the Wrist Strap...

Страница 15: ...Multi Media Card What card means in this manual i In this manual SD Memory Cards and Multi Media Cards that can be used in this digital camera are referred to as card i The cards in the illustrations...

Страница 16: ...xtensive scene functions and more k Abundant scene functions You can select from a variety of preset modes aperture shutter speed etc for specific shooting conditions k Speedy mode switching Switch fr...

Страница 17: ...can for exam ple copy your photos to the computer s hard disk You can connect it to a printer for direct printing of your photos Or take the card to a photo shop to have your photos printed there USB...

Страница 18: ...English 12 SETUP PARTS NAMES Front Lens Flash USB VIDEO terminal cover on off button Shutter button Self timer indicator...

Страница 19: ...W T Monitor ok button Tripod stand hole Playback button Battery card cover n button o button l button m button Strap holder Illumination sensor Detects the ambient brightness and automatically adjust...

Страница 20: ...d By using a card however you will be able to take many more photos The card can be used after it has been formatted with the camera page 84 1 Open the battery card cover h While gently pressing the b...

Страница 21: ...oving the card h To remove the card press it down and then release The card will protrude slightly and you can then pull it out Keep your finger on the card until it is completely inserted or released...

Страница 22: ...ng without a card installed i When a card is installed images are recorded to and played back from the card When no card is installed images are recorded to and played back from the camera s internal...

Страница 23: ...was last turned off In the playback mode 1 Press the playback button for at least one second h The Playback Screen appears on the monitor pages 31 and 37 Turning off the camera 1 Press the on off but...

Страница 24: ...ess the on off button to turn it back on i You can change the setting for the time elapsed before the camera automatically turns off page 79 i When the camera is connected to a computer or printer usi...

Страница 25: ...Option Menu appears 3 Press the m button to select CLOCK SET and press the ok button or the m button h The Clock Set Screen appears h The current date and time settings are shown h Follow the procedur...

Страница 26: ...o button to change the time setting 4 Press the m button to select the M D Y indication 5 Press the n or o button to change the displayed date order h Press the n button to change the displayed date o...

Страница 27: ...internal battery will maintain the date and time settings However there is a small chance the settings may be lost The backup will last for about 7 days It is recommended to check that the date and t...

Страница 28: ...sure that the lens and flash are not blocked by your fingers or the Wrist Strap HINT i Images captured in the still image shooting mode can be rotated when they are played back page 61 i When the opti...

Страница 29: ...of the situations where the autofocus function may not work i Subjects with low contrast very bright subjects at the center of the image or dark subjects or locations Use the focus lock function page...

Страница 30: ...ects are present Use the focus lock function to lock the focus on an object at the same distance as the desired subject then reposition the camera to compose the picture i Fast moving subjects Use the...

Страница 31: ...the playback button h Each time the playback button is pressed the camera switches between the shooting mode and the playback mode HINT To turn the camera on in the playback mode i Press the playback...

Страница 32: ...ton h The screen to set the shooting mode and the self timer appears 3 Press the m button to select the shooting mode 4 Press the ok button h The selected shooting mode is set h An icon in the upper l...

Страница 33: ...nitor while you shoot or the normal display mode in which the setting indications are turned off providing a full view of the subject 1 Press the on off button to turn the camera on 2 Press the ok but...

Страница 34: ...recorded on the card If no card is installed the data is recorded in the camera s internal memory Taking pictures in backlight conditions i When taking pictures with the light coming from behind the s...

Страница 35: ...s by pressing the shutter button halfway focus lock 3 Continue to gently press the shutter button all the way h Press the shutter button gently taking care not to move the camera h The image that was...

Страница 36: ...The large target mark appears when the camera focuses on a wide area in the center of the screen About the focus indicator i A green focus indicator appears when the subject is successfully focused o...

Страница 37: ...h Press the l or m button to display the previous or next image To display the previous image Press l To display the next image Press m h To return to Shooting Screen press the playback button If the...

Страница 38: ...e frame to the desired image and press the ok button Instead of pressing the ok button you can press T on the zoom switch to show the image full screen 0001 0001 0001 100 100 100 0002 0002 0002 0003 0...

Страница 39: ...and the central portion of image is displayed h Press the arrow buttons to view different parts of the magnified image To magnify Magnification increases with each press of T on the zoom switch To ret...

Страница 40: ...delete button h The Delete Screen appears DELETE ALL Erases all the data DELETE SINGLE Erases one file at a time EXIT Returns to the Playback Screen 3 Delete the files To delete all the files 1 Use t...

Страница 41: ...et the protect setting for the file to off page 60 and then follow the file delete procedure HINT To quickly delete a still image immediately after capturing it direct delete i If you press the delete...

Страница 42: ...ing time available are shown on the monitor h It is not necessary to continue pressing the shutter button while shooting 3 End the recording h Press the shutter button again to stop recording and save...

Страница 43: ...playback button for at least 1 second h The video clip just recorded appears on the monitor h Video clips are indicated by a video clip pattern along the top and bottom of the screen 5 Press the ok b...

Страница 44: ...ayback While playback is paused press the l button Slow playback During forward playback While playback is paused press and hold the m button During reverse playback While playback is paused press and...

Страница 45: ...layed back the computer may not be able to play back the video fast enough making it appear jerky The video will always be displayed properly on the camera monitor If video clip recording stops even w...

Страница 46: ...Features of each setting continued on next page Scene setting Features X Auto The camera uses the optimum settings Y Sports Capture a split second image of a fast moving subject Z Portrait Enhance the...

Страница 47: ...k conditions i Camera shake reduction Increases shutter speed and ISO sensitivity to reduce blurred image due to camera shake still image shooting mode only 7 Cosmetic Skin tones are enhanced in close...

Страница 48: ...pressed the zoom bar appears on the monitor h When the optical zoom factor is at maximum zooming stops temporarily When T on the zoom switch is pressed again the mode changes to the digital zoom mode...

Страница 49: ...se the flash only when required In a backlight situation if only the center of the image is very dark the flash will operate to compensate auto flash m The flash will operate with every image captured...

Страница 50: ...h The picture is snapped and the flash operates according to the selected mode HINT In the automatic flash mode i The k icon indicating the flash setting is not shown on the Shooting Screen i In the a...

Страница 51: ...ge 25 and press the n button 2 Use the n and o buttons to select the self timer setting 3 Press the ok button h This completes the self timer setting y The image is captured about 2 seconds after the...

Страница 52: ...tart the self timer i To cancel self timer photography set the self timer setting to off c i After the self timer picture is snapped the self timer is automatically reset to off When x is selected i W...

Страница 53: ...he specified focus range is set and the camera returns to the Shooting Screen HINT i When the focus range is set to macro the zoom is set to the wide end 7 The camera automatically focuses on the subj...

Страница 54: ...1 Set the camera to a shooting mode page 26 2 Press the menu button h The Recording Menu corresponding to the shooting mode set in step 1 appears h The Recording Menu can be canceled by pressing the m...

Страница 55: ...49 English ACCESSING THE RECORDING MENU Overview of the Recording Menu 1 2 3 4 5 6 RECORDING MENU RESOLUTION FOCUS METHOD ISO WHITE BALANCE EXPOSURE INSERT DATE ON IMAGE OFF...

Страница 56: ...change automatically Still image shooting mode u Shoot at 2 592 1 944 pixels Q Shoot at 2 048 1 536 pixels h Shoot at 1 024 768 pixels Shoot at 640 480 pixels Video clip recording mode 5 Shoot at 320...

Страница 57: ...mode select VIDEO CLIP QTM and press the ok button h The resolution menu or video clip mode menu appears Still image shooting mode Video clip recording mode 3 Select the desired icon and press the ok...

Страница 58: ...he camera focuses on the subject in the center of the monitor 1 Display the Recording Menu page 48 2 Select FOCUS METHOD and press the ok button h The focus mode menu appears B 9 point range finder fo...

Страница 59: ...age appear to flicker when recording a video clip i If recording a video clip under fluorescent lights with the ISO sensitivity set to 6 a noticeable flicker may appear in the image t Sets the ISO sen...

Страница 60: ...white balance menu appears The camera will make the white balance adjustment automatically based on the natural and artificial light conditions This is the setting used in the auto mode r For shooting...

Страница 61: ...and press the ok button h If the icon was selected fill the entire screen with white paper and press the ok button h This completes the white balance setting HINT To cancel the white balance setting i...

Страница 62: ...ect EXPOSURE and press the ok button h The screen to adjust the exposure appears 3 Press the n or o button to select the exposure numerical value and press the ok button h The specified exposure is se...

Страница 63: ...capture is not imprinted on the image ON The date of the capture is imprinted on the image 3 Press the n or o to select the desired setting and press the ok button h The date imprint mode is set and...

Страница 64: ...ur camera s playback settings 1 Press the playback button h The display changes to the Playback Screen 2 Press the menu button h The Playback Menu appears h The Playback Menu is canceled when the menu...

Страница 65: ...data from accidental erasure write protect 2 Rotate image page 61 h Rotate still images 3 Copy file page 62 4 Print setting page 64 h Specify the print settings 5 Slideshow page 70 h Play back the ima...

Страница 66: ...r the data h The protect mark B indicates that the data is locked CAUTION i Even if the protect mode is set for certain data files they will be erased if the card is reformatted page 84 HINT To select...

Страница 67: ...s the ok button h The screen to rotate the image appears 3 Select YES and press the ok button h Each time the ok button is pressed the image is rotated another 90 degrees HINT i On the 9 image display...

Страница 68: ...play the Playback Menu page 58 3 Select FILE COPY and press the ok button h The screen to copy files appears 4 Select the copy direction INT MEM CARD Copy image data from the internal memory to the ca...

Страница 69: ...ata from the copy source to the copy destination 6 Select the desired type of copy When selecting COPY SINGLE 1 Press the l or m button to display the image you wish to copy 2 Press the n or o button...

Страница 70: ...nt and also to specify an index print Display the screen to set the print settings 1 Display the Playback Menu page 58 2 Select PRINT SETTING and press the ok button h The screen to set the print sett...

Страница 71: ...print settings page 102 for the desired images and then have the reserved images printed automatically About the finished prints i Images that have been rotated will be printed in their original orie...

Страница 72: ...lied to all the still images on the card 3 Press the ok button h The Date Copies Print Screen appears h If EACH IMAGE was selected press the l or m button to display the desired image to print h The p...

Страница 73: ...o specify the number of prints h Press the n or o button until the desired number of prints is displayed 4 Press the ok button h You are returned to the Date Copies Print Screen Specifying dated print...

Страница 74: ...int function page 57 set to ON do not set the DATE print setting to YES Images that were captured with the date imprint function set to ON will be always be printed with the date displayed If the DATE...

Страница 75: ...reen appears YES Clear the print settings for all images EXIT Cancel the clear procedure and return to the screen to set the print settings 4 Select YES and press the ok button h All the print setting...

Страница 76: ...setting 3 Press the ok button 3 Select START and press the ok button h Slideshow playback starts h To stop slideshow playback press the ok button or menu button TIME Adjust the transition speed the pe...

Страница 77: ...k button h The Information Screen appears h If the ok button is pressed again the Information Screen is canceled 1 Resolution setting 2 Resolution 3 Scene function setting 4 Image number 5 Protect set...

Страница 78: ...page 58 2 Press the n or o button to select the option tab 3 h The Option Menu appears To exit the Option Menu To return to the Shooting Screen or Playback Screen Press the menu button To return to th...

Страница 79: ...ish DISPLAYING THE OPTION MENU Overview of the Option Menu 8 7 9 NTSC 1 2 3 4 5 6 OPTION MENU 1 2 CLOCK SET POST VIEW 3SEC LCD BRIGHTNESS LANGUAGE TV SYSTEM AUTO POWER OFF RESET SETTINGS FORMAT FILE N...

Страница 80: ...setting page 78 h Select the type of TV signal that is output from the camera s USB VIDEO terminal 6 Auto power off page 79 h Specify the time elapsed before the auto power off function operates to tu...

Страница 81: ...tton is pressed 1 Display the Option Menu page 72 2 Select POST VIEW and press the ok button h The Post View Menu appears 3 Select the desired setting and press the ok button h This completes the post...

Страница 82: ...ge 72 2 Select LCD BRIGHTNESS and press the ok button h The Monitor Brightness Menu appears h When set to AUTO the illumination sensor page 13 detects the ambient brightness and automatically adjusts...

Страница 83: ...n any one of several languages 1 Display the Option Menu page 72 2 Select LANGUAGE and press the ok button h The screen to select the display language appears 3 Select the desired language and press t...

Страница 84: ...V System Menu appears NTSC Outputs NTSC video signals PAL Outputs PAL video signals 3 Select the desired setting and press the ok button h The selected TV system is set HINT If no image appears on the...

Страница 85: ...rom dying if the camera has accidentally been left on You can specify the elapsed time standby time before the auto power off function operates to turn the camera off 1 Display the Option Menu page 72...

Страница 86: ...Press the n or o button to select the standby time 5 Press the ok button h The auto power off function is set h To return to the Option Menu press the l button OK AUTO POWER OFF AUTO POWER OFF AUTO P...

Страница 87: ...nsequently it results in more than one card containing images with the same numbers By setting the file number reset function to OFF even if the card is reformatted or the card is replaced with anothe...

Страница 88: ...n the highest image number on Card B before replacing is higher than the highest image number on Card A the file name of the next recorded image continues from last file name recorded on Card B HINT W...

Страница 89: ...OFF The file number reset function is OFF 3 Select OFF and press the ok button h The file number reset function was set to OFF HINT i Until the file number reset function is turned ON consecutive fil...

Страница 90: ...d if the lock switch is set to the LOCK position Proceed with the reformat procedure after setting the lock switch to the unlocked position 1 To reformat a card install it in the camera To reformat th...

Страница 91: ...is also erased so before reformatting a card any data you want to keep should be copied to your personal computer s hard disk or other storage medium Caution regarding disposing transferring the card...

Страница 92: ...Reset to the factory preset settings NO Do not change the settings and return to the Option Menu 3 Select YES and press the ok button h The camera settings are reset to the factory preset settings HIN...

Страница 93: ...maining number of images and video recording time will differ depending on the resolution setting HINT i When the remaining number of images or the remaining video recording time is 0 you cannot captu...

Страница 94: ...y appear early for an incorrect indication of the remaining charge Also depending on the conditions of use of the camera or the ambient conditions temperature etc the indicated remaining charge may ch...

Страница 95: ...etc or the ambient temperature temperatures below 10 C 50 F the number of images that can be saved on fully charged batteries will vary greatly i It is recommended that you prepare extra batteries wh...

Страница 96: ...n viewing images on the camera s monitor CAUTION Insert and pull out the cable carefully i When connecting the cables make sure that the cable plugs are correctly oriented and that they match the shap...

Страница 97: ...er with a standard equipped USB port and preinstalled with Windows ME 2000 XP or later is required Correct operation cannot be guaranteed for models that have been upgraded Macintosh A model with a st...

Страница 98: ...e About file names when the card is replaced i If the file number reset function is set to off even when the card is replaced consecutive numbering of folder numbers and file names continues from the...

Страница 99: ...computer and turn the camera on h Connect the camera s USB VIDEO terminal to the computer s USB connector h The USB Connection Screen appears on the camera s LCD monitor USB CONNECTION USB CONNECTION...

Страница 100: ...pes of the terminal sockets on the devices Push the plugs in straight when connecting them If undue force is used to connect a cable it may permanently damage the connector pins in the terminal socket...

Страница 101: ...nt on your computer 2 Select an action h Select the desired procedure from the UDC 5M E window Dismounting the camera CAUTION i To disconnect your camera be sure to follow the procedure below Failure...

Страница 102: ...or internal memory exactly like you would the data in the other computer drives Dismounting the camera CAUTION i To disconnect your camera be sure to follow the procedure below Failure to follow this...

Страница 103: ...her computer drives Dismounting the camera CAUTION i To disconnect your camera be sure to follow the procedure below Failure to follow this procedure may cause faulty operation of your computer or los...

Страница 104: ...ntaining the images you wish to print in the camera 2 Turn the printer on use the supplied USB Cable to connect the camera to the printer and turn the camera on h Connect the camera s USB VIDEO termin...

Страница 105: ...camera s button operation response is slower i Make sure that the remaining battery charge is sufficient Insert and pull out the cable carefully i When connecting the cables make sure that the cable...

Страница 106: ...or o button to specify the number of prints 3 Press the ok button 4 Select PRINT and press the ok button h Printing begins HINT To cancel printing 1 During printing press the o button h The Confirm Ca...

Страница 107: ...PRINT ALL IMAGES and press the ok button h The Print All Images Screen appears 4 Select PRINT and press the ok button h Printing begins CAUTION Printing is not possible if there are more than 999 stil...

Страница 108: ...s Screen appears 4 Select PRINT and press the ok button h Printing begins h Printing begins about 1 minute after the ok button is pressed HINT i In step 3 if you press the l or m button you can confir...

Страница 109: ...ton h The Printer Settings Menu appears DATE STAMP Print the date the photo was taken MEDIA TYPE Specify the type of paper used for printing PAPER SIZE Specify the size of paper used for printing LAYO...

Страница 110: ...can be made for each parameter will differ depending on the printer When PRINTER VALUE is selected h The images will be printed according to the settings specified on the printer side 4 Select EXIT an...

Страница 111: ...ure is very low Keep the batteries in an environment of 10 to 40 C 50 to 104 F The battery life has expired Replace with new batteries Why does the icon appear The remaining battery power is low Repla...

Страница 112: ...web page or sent as e mail attachments What is the difference between the digital zoom and the optical zoom Because shooting with the optical zoom uses the optics of a physical lens you can shoot with...

Страница 113: ...eave traces as it moves Condition due to the liquid crystals Not a malfunction Spots that appear in the monitor only appear in the monitor and will not be recorded with the images Why does the display...

Страница 114: ...ed in focus gently press the shutter button all the way to capture the image Why is there no image z is shown This may happen when trying to play back images stored on a card from a different digital...

Страница 115: ...the accurate playback of data that has been edited using a computer Printing Why does a message appear during PictBridge printing There is a problem with the printer Please refer to the instruction m...

Страница 116: ...ries and try again Why does the SYSTEM ERROR message appear A problem has occurred within the camera or card Check the following items 1 Remove the card and then install it again 2 Remove the batterie...

Страница 117: ...rt the batteries making sure to orient them correctly The battery card cover is not completely closed Close the battery card cover completely The camera turns off by itself The power save function is...

Страница 118: ...eries are dead Insert new bat teries 14 When zooming in or out the zoom movement stops momentarily The optical zoom has moved to the maximum magnification position Not a malfunction Release the zoom s...

Страница 119: ...ly and make sure the flash is not obstructed 22 The subject was too far away Capture the image in the range of operation of the flash 120 The subject was lit from behind Use the forced flash mode 43 U...

Страница 120: ...t the correct focus setting for your needs 29 47 The focus setting is not correct The camera moved when the shutter button was pressed Hold the camera correctly and press the shutter button correctly...

Страница 121: ...rotect mode is set Cancel the protect mode 60 Misc The PROTECTED message appears and the data cannot be erased You have attempted to erase data that is protected from accidental erasure Set the protec...

Страница 122: ...unction setting will automatically change to full auto X Likewise if you set the scene function to camera shake reduction i or when the ISO sensitivity is set to a setting other than ISO A the ISO sen...

Страница 123: ...s to provide interoperability between digital photography devices for the images stored on removable memory cards However it is not guaranteed that all devices will support the DCF standard Video clip...

Страница 124: ...balance Full auto TTL manual setting possible Lens 3 0 optical zoom lens f 5 8 mm to 17 4 mm 35 mm film camera conversion f 35 mm to 105 mm Autofocus 5 groups 6 elements 2 with aspheric surfaces inte...

Страница 125: ...nds when the scene function is set to fireworks etc During flash 1 30 to 1 1 500 sec Video clip recording mode 1 30 to 1 10 000 sec Sensitivity Still image shooting mode Auto equivalent to ISO64 to 40...

Страница 126: ...4 F operation 20 to 60 C 4 to 140 F storage Humidity 30 to 85 operating no condensation 10 to 90 storage no condensation Power supply Batteries AA size alkaline batteries 2 Longer life AA size nickel...

Страница 127: ...ions of the batteries and the conditions of use Especially when used at temperatures below 10 C 50 F the battery operation time is drastically reduced USB VIDEO communication and image output terminal...

Страница 128: ...ctually be stored may differ depending on the card brand etc i The continuous shooting time will differ depending for example on the card type capacity performance etc Shooting mode setting Resolution...

Страница 129: ...tents of this manual i Uniden Corporation shall not be held responsible for any problems resulting from the use of this camera i Uniden Corporation declines all responsibility for damages due to impro...

Страница 130: ...ed halfway Press the shutter button slightly and the target mark will appear on the monitor to indicate that the autofocus has been activated Next continue to gently press the shutter button all the w...

Страница 131: ...camera correctly and press the shutter button halfway 3 Wait for the target mark to appear in the monitor and holding the camera steady gently continue to press the shutter button all the way down Fol...

Страница 132: ...dark You can get a better picture by using the flash for example or changing the exposure setting Photographing moving subjects sports mode Y Points i Match the camera s movement with that of the sub...

Страница 133: ...es keep the camera and the subjects motionless for about 2 seconds Photographing scenery landscape mode Points i Shoot using a high resolution i For zoom photography use the optical zoom i Pay attenti...

Страница 134: ......

Отзывы: