background image

T E L E P H O N E   F E A T U R E S               [  19 ]

TELEPHONE 

FEATURES

In memory dialing
operation, you must
press a key within
20 seconds or the
phone will return 
to standby. If you
return the handset
to the base, the
phone will also
return to standby.

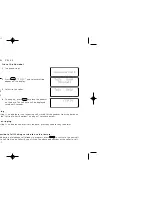
1

Press and hold

until “

Memory

Store

” is displayed.

2

Press

and

or enter a two-digit number

(01 - 20) to select the memory location where

you would like to store the number.

3

Press

.

The following screen appears and a cursor

flashes indicating that the display is ready for

the name to be entered.

If this screen appears, the selected memory

location is already stored. Then, you must

either change the entry in this location, clear

the location, or select “

Go Back

” to

choose another location.

4

Use

,

, or

to enter the name.

The name cannot exceed 13 characters.

• Use

and

to scroll through the

character menu. It contains upper and lower

case letters and various characters.

• Use

and

to move the cursor to

the desired location.

• Use

to delete characters as needed.

S T O R I N G   P H O N E   N U M B E R S   A N D   N A M E S

Memory Dialing allows you to dial a number using just a few key strokes. You can store up to 20

phone numbers in the memory.

TRU246_2.4GHz Owners Manual  7/26/00  9:34  Page 19

Содержание TRU 246

Страница 1: ...O W N E R S M A N U A L T R U 2 4 6 i...

Страница 2: ...ory dialing Storing phone numbers and names 19 Making calls with memory dialing 21 Chain dialing 22 Editing a stored name and or phone number 23 Erasing a stored name and phone number 25 Paging 26 Cal...

Страница 3: ...Display al Locations Life inger Volume Control m Technology utilizes a wider frequency band vs a single narrow band ransmissions The 2 4 GHz frequency range was recently released to commercial ult is...

Страница 4: ...andset earpiece 5 LCD display 6 Memory key 7 Talk key 8 Volume Cursor down key 9 tone key 10 Redial Pause key 11 Options key 12 Handset microphone 13 Volume Cursor up key 14 Flash key 15 Call ID key 1...

Страница 5: ...C O N T R O L S A N D F U N C T I O N S 3 20 Pulse Tone switch 21 DC power input 22 Phone jack 23 Handset retainer clip 24 Base antenna 25 Status LED 26 Page Find key 27 Base charging contacts 3...

Страница 6: ...rized access to your base unit This security code prevents other cordless handsets from making calls through your base unit A random security code will be assigned automatically between your base unit...

Страница 7: ...G E T T I N G S T A R T E D O N T E N T S the package This Owner s Manual Precautions and Important Safety Instructions Quick Reference Guide Registration Card AC adapter AD 311 Rechargeable battery...

Страница 8: ...s you T H E B A S E U N I T d heat sources such as tors air ducts and sunlight d television sets other electronic pment Avoid noise sources such as a window by a street with heavy traffic Avoid microw...

Страница 9: ...e k and a continuous power outlet which is f electrical noise such as motors and e antenna to a vertical position mounted on a standard wall plate e Place the power cord so it does not create a trip h...

Страница 10: ...therwise set to PULSE e supplied AD 311 AC adapter Do not use any other AC adapter e AC adapter to a continuous power supply ase unit close to the AC outlet so that you can unplug the AC adapter easil...

Страница 11: ...W A L L one wall plate n the base and the AC outlet ing channel ch l outlet mounting posts s firmly seated f the slot k into the slot is down The 1 2 7 8 9 If you have wall mounted the base you canno...

Страница 12: ...one within 10 15 feet of a working phone ssive cord lengths l material is capable of supporting the weight of dset minimum length of 1 3 8 inches with anchoring or the wall material where the base uni...

Страница 13: ...G E T T I N G S T A R T E D 11 G E T T I N G S T A R T E D you start he cover down rect polarity ck into the y sliding it up oesn t light nd that the ging contacts P A C K plied with 11...

Страница 14: ...liminate functions in order to save s not in use Low Battery flashes will operate If the phone is in use Low and the handset beeps Complete your kly as possible and return the handset to the g ttery c...

Страница 15: ...E T T I N G S T A R T E D 13 G E T T I N G S T A R T E D e combinations et repeatedly arpiece volume of the handset This setting will ormal mode the error tone sounds D E A R P I E C E V O L U M E 13...

Страница 16: ...lashes on the display Then the volume setting is displayed Example Volume level High 3 The number is dialed After about 5 seconds the call time display appears 4 To hang up press or place the handset...

Страница 17: ...Press The following numbers will be sent as tone dialing Press Press during a call Scanning appears on the display If the operation fails the error tone sounds dial mode g sequence e es on the displa...

Страница 18: ...on and there is an incoming call simply lift the handset from the base unit See Setting Caller ID options on page 27 for more details hen ringing etting is on and the handset is off the base press any...

Страница 19: ...17 B A S I C S If the number exceeds 32 digits only the first 32 digits are retained for redialing s last dialed appears on the display display one of the last three numbers dialed will be dialed y r...

Страница 20: ...aled 3 To hang up press or place the handset on the base The call time will be displayed for about 5 seconds Only the last number dialed can be accessed after has been pressed O U T O F R A N G E begi...

Страница 21: ...urn the handset to the base the phone will also return to standby ntil Memory a two digit number ory location where number rs and a cursor display is ready for selected memory Then you must this locat...

Страница 22: ...enter a pause in the dialing sequence The display eature is useful for long distance calling dialing or sequences that require a pause gits elete digits as needed and displays the confirmation screen...

Страница 23: ...y location programmed a two digit number ory location you the volume setting n the displayed R Y D I A L I N G tandby Number e between the names display and the numbers display ne number has 14 or mor...

Страница 24: ...lected phone number is displayed Then the number is dialed I N G after dialing a number you may be requested to enter an access code such as your can enter this number into a memory location for later...

Страница 25: ...S til Memory a two digit number ory location you rs with the memory ave selected in Edit Memory he following screen ng that the display is dited When a name rsor appears at the ne or to 9 ber skip thi...

Страница 26: ...e phone number cannot exceed 20 digits See page 20 If you don t want to change the phone number skip this step 8 Press The handset beeps and displays the confirmation screen The memory storage is comp...

Страница 27: ...E A T U R E S til Memory a two digit number ory location you rs with the memory ave selected in the or down to the command line following rs or to Yes e and the entry is en appears play returns to th...

Страница 28: ...beeps for 5 seconds The following screen appears 3 Press any key on the handset to end coming call is received during paging paging is canceled ephone is switched to the incoming call s during paging...

Страница 29: ...on for memory dialing ey are AutoTalk CIDCW Caller ID on Call Waiting pressing talk If the phone rings when AutoTalk is he phone automatically answers the call Or if the r the call If the phone rings...

Страница 30: ...oggle between On and Off for For CIDCW choose On Off or ng upon the type of service to which you subscribe enter Area Code press or the number key r to select Area Code Then press nd enter the 3 digit...

Страница 31: ...e Caller ID record e the caller s name appears on the display es to Talk See page 16 G S When a private number is received When an unknown number is received When invalid data is received When the cal...

Страница 32: ...ing calls even unanswered calls 1 Press The summary screen appears The screen shows the number of new messages and total messages 2 Press to display the latest caller ID message 3 Press to see the nex...

Страница 33: ...l or page the deleting operation is cancelled The telephone returns to standby so you can answer the call or page essage deleted from the or Yes or No Yes er ID message is message is then No aller ID...

Страница 34: ...es numbers 1 Press 2 Press 3 Press or to select Yes or No 4 Press or When the pointer is at Yes A tone sounds and all stored Caller ID messages are deleted When the pointer is at No The display return...

Страница 35: ...ller ID list if your TRU 246 is connected to private branch exchange PBX hat you want to dial er will be dialed 246 stores up to 50 messages ing displayed in step 1 will set or cancel a Long ea code s...

Страница 36: ...select the memory location 4 Press A confirmation tone will sound The number is stored in memory and the display returns to the Caller ID list all and Area Code setting ore Long Distance call prefix...

Страница 37: ...gain W A I T I N G S E R V I C E rvices CIDCW Caller ID on Call Waiting all waiting number You must subscribe to the efore you can use the following features The endently Please contact your local tel...

Страница 38: ...ne company for details Selecting an Option 1 When you receive a call waiting call press for a list of options 2 Press and keys or a number key 1 7 to select an option 3 Press A confirmation screen wil...

Страница 39: ...f this happens a new security code is set automatically next time the battery pack is charged et from the base unit Press is emitting the paging replace the handset on the ging tone stops on the base...

Страница 40: ...es on dset Press down To remove the beltclip Pull both sides of the beltclip to release the tabs from the holes S T A L L A T I O N sed with an optional headset the this feature simply plug the headse...

Страница 41: ...ry pack Please take your used nickel cadmium battery packs to a store that recycles nickel cadmium batteries aution ck rom the handset to charge it o a fire disassemble it or heat it he battery casing...

Страница 42: ...osition Move the handset and or base unit to a different location away from metal objects or appliances and try again Make sure that you are not too far from the base Check both ends of the base unit...

Страница 43: ...ring aced through a switch board telephone company to verify your Caller ID ent et away from microwave ovens computers toys wireless microphones alarm systems m monitors fluorescent lights and ances...

Страница 44: ...ing calls with memory dialing 21 Erasing a stored name and phone number 25 Storing phone numbers and names 19 Mounting the base unit on a wall 9 P Q Package contents 5 Paging 26 R Receiving a call 16...

Страница 45: ...M E M O 43 43...

Страница 46: ...44...

Страница 47: ...l our Customer Hotline at 1 800 297 1023 URN THIS PRODUCT TO THE PLACE OF PURCHASE s will be happy to help you with any matters regarding t available accessories or any other related matters you for p...

Страница 48: ...058 4 595 795 4 797 916 5 381 460 5 426 690 5 434 905 5 491 745 5 533 010 5 574 727 5 650 790 5 660 269 5 661 780 5 663 981 5 671 248 5 717 312 5 754 407 5 768 345 5 787 356 5 838 721 5 864 619 5 893...

Отзывы: