background image

[ 34 ]

Tone Dialing Switch-over

Some telephone companies use equipment that requires pulse dialing (sometimes referred
to as rotary dialing). If you need to enter tone dialing digits, you can switch-over to
tone dialing during the call. For example, entering your bank account number after you
have called your bank.

Initially make your call with the pulse dialing mode. Once your call
connects, press 

/tone/

on the handset or base. Enter the

desired number. These digits will be sent as tone dialing. Once the
call ends, the tone mode is canceled and pulse dialing mode resumes.

• The tone feature only

applies when the dial
mode is set to pulse.

• This special number

can be stored in a
memory location.
This is referred to as
Chain Dialing (see
page 44.)

B A S I C S

Mute Microphone

With the handset

You can temporarily turn Off the microphone so that the person you are talking with
cannot hear you. 

During a telephone call, press the 

MUTE

soft key to turn Off the microphone. “

Mute

” and

appear in the display. Press the 

MUTE OFF

soft key to cancel muting.

With the base

While using the base speakerphone, press 

mute

on the base to turn Off the microphone.

Press 

mute

again, or press 

(talk) to cancel muting.

• If you press the 

end

key to cancel muting,
the call is
disconnected and the
phone will return to
the standby mode.

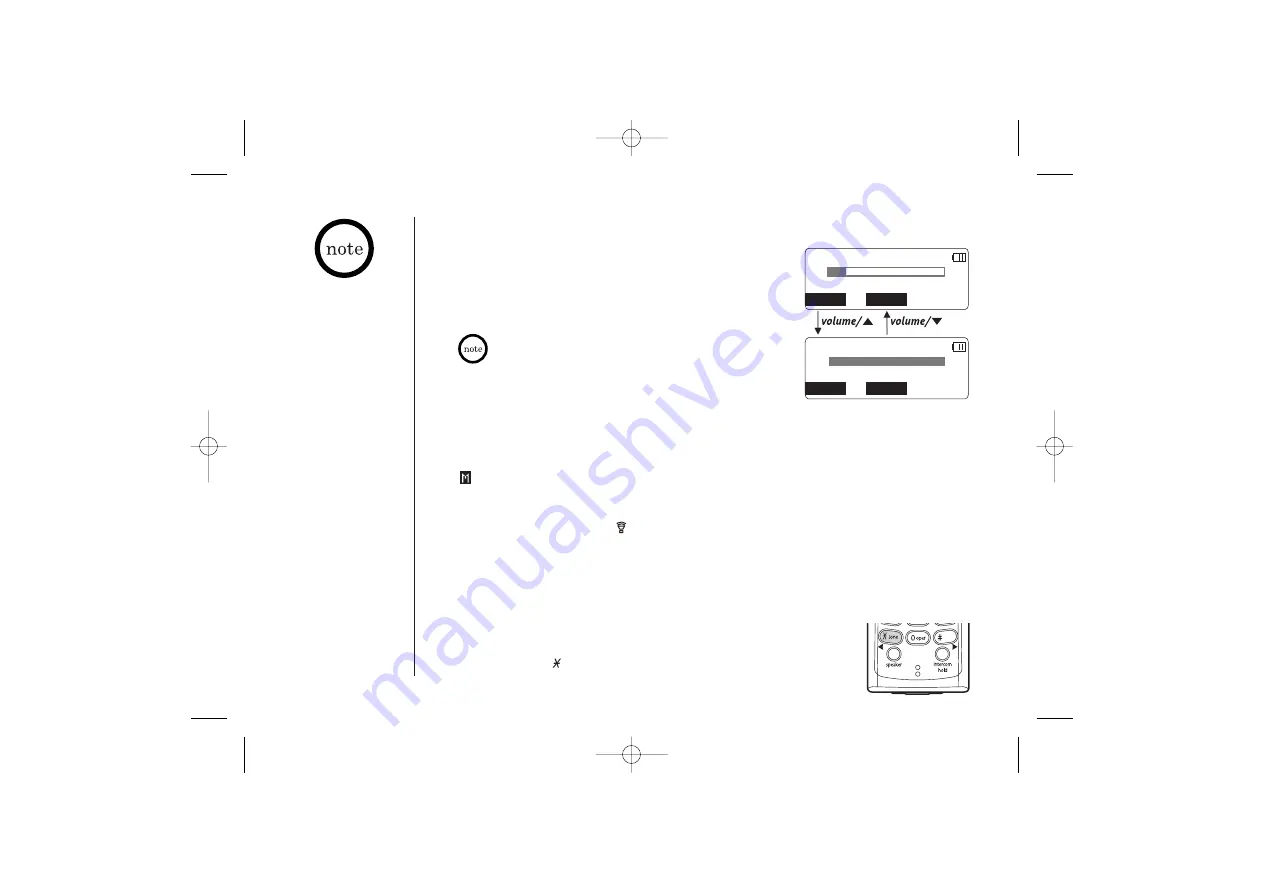
Adjusting the Earpiece and Handset Speaker Volume

You can select different volume levels for the handset
earpiece and the handset speaker (6 levels: Low to Max).
The volume can only be adjusted during a call. Press

volume/

or 

to select the volume settings. When you

hang up, the phone keeps the last volume setting selected.

If you press 

volume/

in the maximum volume level or

volume/

in the lowest volume level, you will hear a beep.

  T a l k         0 : 1 5

    -     V o l u m e     +

MUTE

MENU

  T a l k         0 : 1 5

    -     V o l u m e     +

MUTE

MENU

• To adjust the base

ringer or speaker
volume, see page
52-53.

DCT5285_UP304BH UP01304BA_1  5/23/03  3:08 PM  Page 34

Содержание DCT 5285

Страница 1: ......

Страница 2: ...DCT5285_UP304BH UP01304BA_1 5 23 03 3 06 PM Page ii...

Страница 3: ...www uniden com DCT5285_UP304BH UP01304BA_1 5 23 03 3 06 PM Page iii...

Страница 4: ...onebook 41 Making Calls Using the Phonebook 42 Speed Dialing 42 Editing or Erasing a Stored Name Phone Number Distinctive Ring and Speed Dial 43 Chain Dialing 44 Memory Dialing base only 44 CALLER ID...

Страница 5: ...his manual may differ from the actual unit for explanation purposes As an Energy Star Partner Uniden has determined that this product or product models meets the Energy Star guidelines for energy effi...

Страница 6: ...cts one of over approx 130 000 digital security codes for the handset and base Frequency Hopping Spread Spectrum FHSS technology improves calling range and clarity and eliminates cross talk Because it...

Страница 7: ...with your phone observing the correct polarity Replace the cover PLUG INTO AC POWER Plug the AC adapter cord into the base unit and then to a 120V AC outlet Place the handset in the base Note You mus...

Страница 8: ...Beltclip Hole 4 Hands Free Speaker 5 Handset Battery Compartment 6 New Message LED 7 Handset Earpiece 8 LCD Display 9 Talk flash Key 10 tone t Key 11 Speaker Key 12 Soft keys 13 Volume up Key 14 End K...

Страница 9: ...ry Key 29 Redial pause Key 30 Flash Key 31 tone Key 43 Ringer vol volume up Key 44 Ringer vol volume down Key 45 Microphone 46 Telephone Input 47 DC Power Input 48 Charging Contacts DCT5285 2 only 49...

Страница 10: ...ons indicate the handset battery status This icon cycles Standby Talk depending on the battery status empty low medium and full indicates that the batteries installed are not for use with this phone r...

Страница 11: ...aller ID messages stored Store or edit phone numbers Redial one of the last three numbers dialed from the handset Etc Note The soft keys will not appear while charging the handset SUN 12 00A Handset 1...

Страница 12: ...o change the security code see page 69 Step 1 page 11 Unpack the telephone and accessories Step 2 page 12 Next choose the best location to set up the base unit Step 3 page 13 to 17 Then insert the bat...

Страница 13: ...er 1 Rechargeable batteries DCT5285 2 DCT5285 2 4 Long telephone cord 1 Short telephone cord 1 Beltclip DCT5285 1 DCT5285 2 2 Charger 1 DCT5285 2 only Also included This Owner s Manual Other Printed M...

Страница 14: ...al vibration or shock Avoid heat sources such as radiators air ducts and sunlight Avoid television sets and other electronic equipment Avoid noise sources such as a window by a street with heavy traff...

Страница 15: ...performance and safety use replacement batteries specifically matched for this phone contact www uniden com Using incorrect batteries could damage or limit the performance and could cause bodily injur...

Страница 16: ...ts become very dirty using water only dampen a cloth to clean the charging contacts Then make sure to go back over the charging contacts with a dry cloth before returning the handset to the base to ch...

Страница 17: ...the base charging contacts Place the power cord so that it does not create a trip hazard or where it could become chafed and create a fire or electrical hazard If your telephone outlet isn t modular...

Страница 18: ...lug the AC adapter into a standard 120V AC wall outlet 4 Plug the telephone line cord into the TEL LINE jack Route the cord inside the molded wiring channel as shown 5 Plug the telephone line cord int...

Страница 19: ...jack to avoid excessive cord lengths Make sure the wall material is capable of supporting the weight of the base and handset Use 10 screws minimum length of 1 3 8 inches with anchoring devices suitabl...

Страница 20: ...n d s e t 1 D i r e c t L i n k M o d e CANCEL DirectLink S U N 1 2 0 0 A H a n d s e t 1 D i r e c t L i n k M o d e CANCEL DirectLink D i r e c t L i n k M o d e H a n d s e t S e t u p A n s w S e...

Страница 21: ...r e e n A N S W S E T U P S e c u r i t y C o d e or Setup the menu see pages 27 28 OK soft key S Y S T E M R E S E T D e r e g i s t e r H S R e p l a c i n g B a s e BACK BACK OK or Setup the menu...

Страница 22: ...cription Ringer Volume Adjust the ringer volume see page 24 Ringer Tones Adjusting the ringer tone see page 25 Distinct Ring Set the distinctive ring see page 25 Distinctive Ringer allows you to Disti...

Страница 23: ...Adjust the handset LCD brightness for better viewing 10 levels see page 26 Submenu name Description Security Code Select a two digit Personal Identification Number PIN code A PIN code is required to...

Страница 24: ...e you will see a full 10 digit number see page 29 Note If your calling area requires 10 digit dialing do not program this option Dial Mode Set the dial mode to tone or pulse see page 30 Submenu name D...

Страница 25: ...confirm your setting To return to the previous screen press the BACK soft key For detailed instructions see the following sections for the desired submenu 5 To exit the menu press the end key If any...

Страница 26: ...OK DirectLink Mode Using the DirectLink Mode 1 Enter the DirectLink Mode menu see Entering the Menu on page 23 2 Press the ENTER soft key to enter the DirectLink mode You will hear a confirmation ton...

Страница 27: ...You will hear the ringer or melody as you scroll through the options 3 Press the OK soft key You will hear a confirmation tone Distinctive Ringer Setup 1 Enter the Handset Setup menu then the Distinc...

Страница 28: ...et Setup menu then the Language submenu see Entering the Menu on page 23 2 Press volume or to choose English French Fran ais or Spanish Espa ol 3 Press the OK soft key You will hear a confirmation ton...

Страница 29: ...ge 23 2 Press volume or to select a Ring Time Toll Saver 2 Times 4 Times or 6 Times 3 Press the OK soft key You will hear a confirmation tone Setting the Record Time 1 Enter the Answ Setup menu then t...

Страница 30: ...sh Espa ol 3 Press the OK soft key You will hear a confirmation tone Setting the Call Screen 1 Enter the Answ Setup menu then the Call Screen submenu see Entering the Menu on page 23 2 Press volume or...

Страница 31: ...y You will hear a confirmation tone Setting the Area Code 1 Enter the Global Setup menu then the Area Code submenu see Entering the Menu on page 23 2 Press the number keypad 0 9 to enter a 3 digit are...

Страница 32: ...ear a confirmation tone When de registration is complete Deregistration Complete appears 4 After de registering the handset move to Replacing the Base Setting below Replacing the Base Setting 1 Enter...

Страница 33: ...ress talk 2 Listen for the dial tone 2 Listen for the dial tone 2 Listen for the dial tone 3 Dial the number 3 Dial the number 3 Dial the number OR OR Dial the number then Dial the number then press t...

Страница 34: ...e or to select Redial History then press the OK soft key The phone number that was last dialed appears in the display 3 Press volume or to toggle through the last three phone numbers dialed 4 Press ta...

Страница 35: ...MUTE soft key To mute the base ringer tone press on the base The ringer tone will return to the previous setting starting with the next incoming call Ringer Mute temporarily Redialing from the Base 1...

Страница 36: ...on you are talking with cannot hear you During a telephone call press the MUTE soft key to turn Off the microphone Mute and appear in the display Press the MUTE OFF soft key to cancel muting With the...

Страница 37: ...nly when the phone is in use 1 Press the MENU soft key 2 Select Booster On then press the OK soft key Clarity Booster appears in the display To turn Off the Clarity Booster press the MENU soft key sel...

Страница 38: ...o return to the original caller press talk flash or flash on the base again You must subscribe through your local telephone company to receive Call Waiting Service Intercom Call Transfer Feature Inter...

Страница 39: ...line How to enter the storing operation press the STORE soft key 4th line The BACK and the STORE soft keys Storing Phone Numbers Names Distinctive Rings and Speed Dial Phonebook Phonebook 50 Search A...

Страница 40: ...confirmation tone and Done appears in the display If you choose not to store a Distinctive Ring simply select the No Selectn option If you choose not to store the name number as a Speed Dial simply s...

Страница 41: ...number keys to select the desired characters With each press of a number key 0 9 the displayed character appears in the following order Upper case letters first lower case letters next and finally the...

Страница 42: ...bers Names Distinctive Rings and Speed Dial on page 37 2 Press the STORE soft key Store Edit Name appears 3 Press 6 once then press s to move the cursor to right 4 Press 6 six times 5 Press 8 six time...

Страница 43: ...from first to last when you press volume from last to first when you press volume Or refer to the letters on the number keys to select the first letter of the desired name Press a number key 2 9 and 0...

Страница 44: ...Calls Using the Phonebook From Standby Mode 1 When the phone is in the standby mode view the phonebook location to dial see Viewing the Phonebook on page 41 2 Press talk flash or speaker The displayed...

Страница 45: ...4 to 8 under Storing Phone Numbers Names Distinctive Rings and Speed Dial on page 38 to complete the editing operation 3 Press the OK soft key You will hear a confirmation tone b Deleting the Stored D...

Страница 46: ...nfirmation tone The 10 memory locations in the base are independent from the handset If you have not pressed any key for 30 seconds the phone returns to the standby mode If you make or receive a call...

Страница 47: ...s not offer Caller ID service the caller s phone number and name does not appear This includes some international calls When the call is via a private branch exchange PBX the caller s phone number and...

Страница 48: ...alphabetical search press the number key pad 2 9 and 0 with the letter associated with the first letter of the desired message 4 To finish the viewing operation press the BACK soft key repeatedly or...

Страница 49: ...the phone is in the standby mode press the CID RDL PB soft key 2 Press volume or to move the pointer to Caller ID then press the OK soft key The number of new and total records appear 3 Press the DEL...

Страница 50: ...e Caller ID list can be stored in memory 1 When the phone is in the standby mode view the Caller ID message to be stored Then press the STORE soft key Store Edit Name appears 2 To complete the setting...

Страница 51: ...your local telephone company for details 1 When you receive a Call Waiting call press the CWDX soft key for a list of options 2 Press volume or or the number keypad 1 7 to select an option For example...

Страница 52: ...able Outgoing Messages Voice Prompts for Menu Setup Guidance Time and Day Announcement Remote Message Retrieval Toll Saver Conversation Recording Voice Memo Trilingual Language Option Message Alert Re...

Страница 53: ...8 Setting up your Answering System Setting your outgoing message Greeting When you receive a call the answering system automatically plays either the pre recorded message or your own greeting Pre reco...

Страница 54: ...The other three are volume levels 1 When the phone is in the standby mode press ringer vol or You hear the ringer at the current volume level High Medium Low or Off if you set the base ringer volume...

Страница 55: ...roll through the menu options repeatedly press CLOCK MENU on the base in the standby mode The system returns to standby after the last menu option A confirmation tone sounds to indicate the standby mo...

Страница 56: ...etting A confirmation tone sounds the day and time you set are announced for your review Setting a PIN code To play your messages from a remote location you will need to enter a two digit Personal Ide...

Страница 57: ...saver appears on the base and it is announced 2 Press SELECT or SELECT until the desired ring time appears 3 Press SET to select the new ring time A confirmation tone sounds the system announces the n...

Страница 58: ...On and when a new message is received the alert tone will sound every 15 seconds Set the Message Alert to On or Off by using the CLOCK MENU key 1 Press CLOCK MENU five times The current setting On or...

Страница 59: ...pears on the base 2 Press SELECT or SELECT to choose or 3 Press SET A confirmation tone sounds and the system announces the new setting You can mute the Call Screen temporarily When the system is answ...

Страница 60: ...age The old messages will be played in the order in which they were received Repeating a message 1 Press to review your messages The number of stored messages is announced 2 To repeat the current mess...

Страница 61: ...s the number of messages stored in memory Deleting a message To maintain maximum record time delete the old messages 1 Press to review your messages 2 Press del at anytime during the message to delete...

Страница 62: ...ord a conversation from the handset or the base more than 2 seconds and within 10 minutes From the handset 1 During a conversation press the MENU soft key on the handset 2 Press volume or to select Re...

Страница 63: ...e three times you will hear a beep and the system will return to standby During the remote operation appears on the base 1 Call your telephone number and wait for the system to answer If the answering...

Страница 64: ...the command waiting mode You may enter another command at this time from the chart above 6 When you are finished hang up to exit the system The answering system automatically returns to standby Remote...

Страница 65: ...ring system announces the current time and the number of messages stored in the memory Messages will be played in the order in which they were received The time and day that each message was received...

Страница 66: ...ring when a call is received E X PA N D I N G Y O U R P H O N E 64 Connecting the Charger IMPORTANT If you purchase a DCX520 extra handset please register the handset to the DCT5285 series base before...

Страница 67: ...tering Handset Registering will appear in the LCD When Registration Complete is displayed the handset has been registered to the base If Registration Failed appears please try these steps again 4 Plac...

Страница 68: ...o the cradle or press the CANCEL soft key then the OK soft key to return to normal mode SUN 12 00A Handset 1 DirectLink Mode CANCEL DirectLink To DirectLink press 1 4 BACK DirectLink from Handset 1 BA...

Страница 69: ...on list within 30 seconds To select the handset or the base press volume or then press the OK soft key If you select All all handsets will be paged An intercom tone sounds 3 On the receiving handset o...

Страница 70: ...all press int com hold on the base The call will automatically be placed on hold 2 Select the handset you want to talk with by pressing the number key 1 4 To page all the handsets press tone t An inte...

Страница 71: ...tering Handset Registering appears in the display 3 When the registration is complete Registration Complete appears in the display 4 Repeat steps 1 3 for another handset s If the registration fails Re...

Страница 72: ...ery is recharged please replace the battery Please use only AA rechargeable Ni MH batteries Warning To avoid the risk of personal injury or property damage from fire or electrical shock only use the U...

Страница 73: ...perating time becomes short even after the batteries are recharged please replace the batteries A replacement Uniden adapter may be purchase at your local Uniden dealer or by contacting the Uniden Par...

Страница 74: ...you may not be able to make another outside call Can t make an internal call Make sure that the receiving handset is not already in use Make sure that the handset or the base is in the standby mode W...

Страница 75: ...on the 2nd handset or the base cannot join the conversation The answering system does not work Make sure the base unit is plugged in Make sure that the answering system is turned On Make sure that the...

Страница 76: ...completely dry reinstall the batteries and the battery cover openings on the base 5 Recharge the handset s batteries for 20 hours in the base unit before using the phone Base 1 Disconnect the AC adapt...

Страница 77: ...dangerous voltages or other risks Incorrect reassembly can cause electric shock when the appliance is subsequently used 12 Unplug this product from the wall outlet and refer servicing to qualified se...

Страница 78: ...quire a modular jack converter This type of installation is not difficult however you should contact your Uniden telephone dealer or a telephone supply store for advice about the proper adapter or con...

Страница 79: ...ach terminal equipment provides an indication of the maximum number of terminals allowed to be connected to a telephone interface The termination on an interface may consist of any combination of devi...

Страница 80: ...Dialing mode 15 Digital security code 10 69 Distinctive ringer 25 E F G H Earpiece volume 34 Expanding your phone 64 General information 71 Hands free conversation 31 Headset installation 69 I J K L...

Страница 81: ...ress 0 and enter your PIN code The answering system announces the number of messages stored in memory and the help guidance 3 To quit hang up the phone Turn on the answering system remotely 1 Call you...

Страница 82: ...Key Repeat a Message Playing incoming Messages Skipping a Message Deleting a Message Stop Operation Answering System On Memo Record Stop Greeting Message Record Stop Answer System Off Help Guidance D...

Страница 83: ...ay be covered under one or more of the following U S patents 4 511 761 4 523 058 4 595 795 4 797 916 5 381 460 5 426 690 5 434 905 5 491 745 5 533 010 5 543 605 5 574 727 5 581 598 5 650 790 5 660 269...

Страница 84: ......

Отзывы: