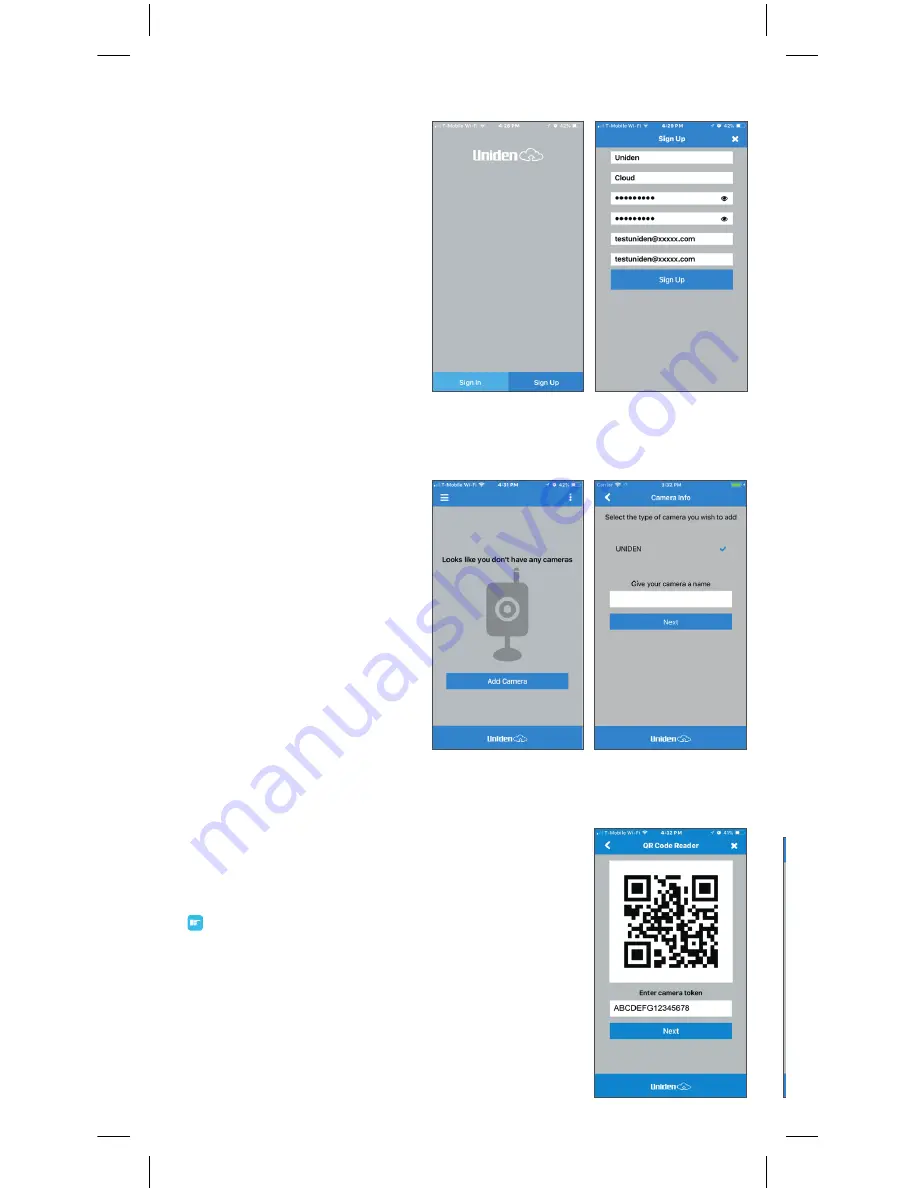
1. Click “Sign Up”
2. Fill in your information
3. Click “Add Cameras” and
give your camera a name
4. Scan Camera QR Code
Scan the camera’s QR code located either on
the camera or on camera identifier leaflet.
Important!
Keep these QR codes in a safe place
for future use
.
4
5. WiFi Setup
Enter your Wi-Fi name and password
Click “Next” to generate a Wi-Fi Connection
Code
Band Steering Information
IMPORTANT: Ensure your phone is connected to the 2.4Ghz WiFi signal of your router. The AppCam
50HD will not connect to a 5Ghz signal.
If you have a single modem/router from your internet service provider and you only have 1 WiFi
SSID (name of your WiFi you connect to) you might have a feature in your router turned on called
“band steering”.
To connect the AppCam 50HD and other 2.4Ghz devices you will need to disable this feature and
have separate 2.4Ghz and 5Ghz WiFi SSIDs.
Contact your ISP for assistance if the AppCam 50HD does not connect to your single WiFi SSID.
6. Next, hold your phone with the WiFi
Connection Code about 3-8
"
from the camera.
You will hear a “beep” if successfully scanned.
If no message is heard within 10 seconds,
click back and ensure your WiFi settings are
correct.
After the beep, wait about ~ 30 seconds
until the status indicator is
SOLID BLUE
and
you hear the message “Network connected
successfully.”
7. Enter the camera user name and
password
Username = admin
Password = admin
[Verification Code on back of camera]
Example: adminABCDEF
8. Next update any
settings you want.
Scroll down &
click “Finish”.


