Maintenance
- 86 -
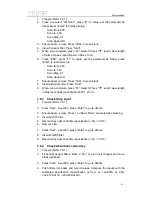
7.6.5 Check Dark Current
1. Prepare (Refer 7.6.1).
2. Press 7 to select Utility.
3. Press
“
▲
”, “Print”, to select diagnostic menu (
Note: Sometimes this
page has a bar at the top and only the serial number below, instead
of the diagnostic menu.
)
4. Press 5 to select “Check Dark Current” (even if “Check Dark Current” is
not displayed). A table of Gain, Energy, will be produced (The minimum
at Gain 0 should be greater than or equal to 1. The maximum at Gain 10
should be 2000 to 4000).
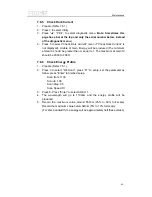
7.6.6 Check Energy Profile
1. Prepare (Refer 7.6.1).
2. Press 3 to select “WL Scan”, press “F1” to setup, set the parameter as
follow, press “Enter” to finished setup.
Scan from: 1100
Scan to: 190
Scan Step: 0.5
Scan Speed: HI
3. Press 6, Press “Enter” to select ADEX: 1.
4. The wavelength will go to 1100nm and the energy profile will be
produced.
5. Record the maximum value around 550nm (25% to 60% full scale).
Record the maximum value below 340nm (5% to 10% full scale).
(For 2nm bandwidth, the energy will be approximately half these values)
Содержание SQ Series
Страница 5: ......
Страница 8: ...Introduction 3 Figure 1 5 Model UV 4802...
Страница 12: ...Layout 7 Figure 3 2 Layout of UV 2800 Inside Bottom View...
Страница 13: ...Layout 8 39 40 41 42 43 Figure 3 3 Layout of UV 2800 Top View...
Страница 14: ...Layout 9 230V 44 45 46 47 48 49 50 51 Figure 3 4 Layout of UV 2800 Back View...
Страница 18: ...Layout 13 Figure 3 7 Layout of UV 2802 S UV 2802PC S Inside Bottom View...
Страница 19: ...Layout 14 43 44 45 46 47 Figure 3 8 Layout of UV 2802 S Top View...
Страница 20: ...Layout 15 230V Figure 3 9 Layout of UV 2802 S UV 2802PC S Back View...
Страница 23: ...Layout 18 Figure 3 11 Layout of UV 3802 Inside Bottom View...
Страница 24: ...Layout 19 44 45 46 47 48 Figure 3 12 Layout of UV 3802 Top View...
Страница 25: ...Layout 20 230V Figure 3 13 Layout of UV 3802 Back View...
Страница 28: ...Layout 23 Figure 3 14 Layout of UV 4802 Inside Top View...
Страница 29: ...Layout 24 Figure 3 15 Layout of UV 4802 Inside Bottom View...
Страница 30: ...Layout 25 43 44 45 46 47 Figure 3 16 Layout of UV 4802 Top View...
Страница 31: ...Layout 26 230V Figure 3 17 Layout of UV 4802 Back View...
Страница 35: ...Optical 30 Figure 4 3 Optical System schematic diagram of UV 4802...
Страница 49: ...Electronic System 44 Figure 5 13 Layout of Main CPU PCB...
Страница 63: ...Trouble Shooting 58 6 Trouble Shooting 6 1 Tungsten lamp off...
Страница 69: ...Trouble Shooting 64 6 8 Slit check failed Only for UV 2802S UV 2802PCS...
Страница 72: ...Trouble Shooting 67 6 13 Get dark current for a long time...
Страница 74: ...Trouble Shooting 69 6 15 Backlight OK but display nothing on LCD Display...
Страница 77: ...Trouble Shooting 72 6 18 No DC 12V on PCB SST8 412 113...


