background image


Page 

16

 of 

40


Issue: 6: 08/11/2018 

DRAFT 


8. 

Handset Control


Handset Controls are supplied with 10 buttons.  


Caution:


Ensure that no person, limbs or objects in any way interfere with the 

desired movement of the bed


8.1  10-button handset 


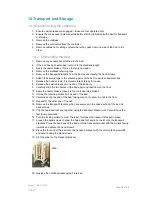
Figure 14: 10-button handset


Functions of the locking device 

Each function on the handset can be locked out individually using the key. 


The Trendelenburg and Reverse Trendelenburg functions on the keypad are locked out.  


The handset is provided with a key which enables individual functions on the handset to 

be locked out so that the patient is only able to use the functions on the bed that have 

been agreed by clinicians.  


Caution:


Store the key separately from the handset to avoid accidental activation of 

unwanted functions. 


Functions can be locked to prevent them 
being used by the patient. By default the 
Trendelburg function is locked out. 

Functions on LED 

Backrest 

Knee-break 

Back and knee-break 

Height Adjustment 

Trendelenburg 

Содержание Cura II

Страница 1: ...Cura II Cura II Supreme Community bed frames User Manual Issue 6 08 11 2018 DRAFT UBEB7002 UBEB7002S UM 6...

Страница 2: ...17 9 1 Knee break section adjustment 17 9 2 Manual calf section adjustment 17 9 3 Backrest section adjustment 18 9 4 Bed height adjustment 18 9 5 Auto contour adjustment 18 9 6 Trendelenburg and Reve...

Страница 3: ...cting the controller 29 14 2 Dismantling the bed 29 14 3 Storing the bed 30 15 Cleaning and Disinfection 30 15 1 Cleaning 30 15 2 Disinfection 30 16 Maintenance and Inspection 31 16 1 Maintenance dail...

Страница 4: ...caused by failure to follow the proper instructions as described in this User Manual Caution Before using the bed all staff must familiarise themselves thoroughly with the various parts and controls...

Страница 5: ...not be limited to The risk of trapping or pinching The risk of the patient slipping between mattress and the side rails Unintended operation of the bed Any limitation of the patient s ability to opera...

Страница 6: ...l features a fob lockout Transport brackets attach to the bed to help prevent loss Maximum user weight 215kg 34 stone Safe working load 250kg 39 5 Stone Accessories please see Accessories Section 13 i...

Страница 7: ...nd precautions that cannot for a variety of reasons be presented on the medical device itself Symbols used in this manual and on the Cura II and Cura II Supreme community bed B symbol indicates this p...

Страница 8: ...magnetic fields Always plug the bed mains plug into a separate wall socket Do not use a multi plug adaptor Route the mains cable to the wall socket in such a way that there is no mechanical tension an...

Страница 9: ...surroundings in which flammable gases or vapors e g from anaesthetics may be present Caution Danger due to actuator motor overheating Before adjusting the bed height ensure that nothing is blocking t...

Страница 10: ...User Manual is excluded from any liability of the manufacturer Caution Always carry out a function test following maintenance work and inspections When operating the actuator motors ensure that the b...

Страница 11: ...0 60 Altitude range above mean sea level 0m 3 000m The IP liquid and dust ingress rating for the control module on the Cura II and Cura II Supreme medical beds is IPX6 The Cura II and Cura II Supreme...

Страница 12: ...nsport bracket and place it motor side down on the floor figure 2 4 Repeat step 3 with the head section 5 Remove the slider bars from the transport brackets 6 Rotate the locking collar figure 3 and ca...

Страница 13: ...rol box to the footend actuator Connect cable 2 from the control box to the headend actuator Connect cable 1 to the backrest actuator Plug the mains plug into the wall socket and make sure all of the...

Страница 14: ...andset operates the correct parts of the bedframe 14 Attach the 4 mattress retaining clips over the hole on the bed frame figure 11 15 See figure 12 to see the location of where the mattress retaining...

Страница 15: ...ight 4 Are all cables correctly routed and have sufficient slack to allow for movement of the bed 5 Check there are no obstructions that may affect the bed movement 6 Apply all the castor brakes 7 Has...

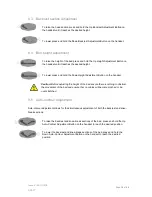
Страница 16: ...rg and Reverse Trendelenburg functions on the keypad are locked out The handset is provided with a key which enables individual functions on the handset to be locked out so that the patient is only ab...

Страница 17: ...function on the handset is operated the height or angle of the calf leg section can be adjusted To decrease the knee break angle manually raise the calf leg section to the desired position The calf le...

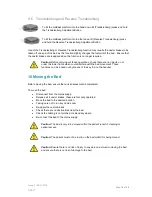
Страница 18: ...eight Adjustment Button on the handset Caution Before adjusting the height of the bed ensure there is nothing to obstruct the movement of the bed and ensure that no cables will become pinched or be ov...

Страница 19: ...s on or under the lower frame which could interfere with the bed movement These functions can be locked out by means of the key fob on the handset 10 Moving the Bed Before moving the bed ensure that a...

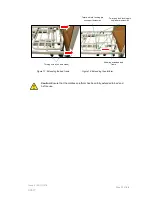
Страница 20: ...To extend the bed frame Ensure bed frame moving parts are all flat Apply brakes to head end of the bed Loosen the 4 turn hand screws at the foot end of the bed 2 per side Unlock the foot end castors W...

Страница 21: ...Figure 18 Extending the platform Caution Ensure that the mattress platform has been fully extended to bed end before use Turning screw on both sides Twist and lock locking pin on platform extension Tw...

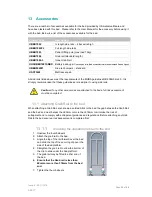
Страница 22: ...that these guidelines are read prior to using side rails Caution If any other accessories are attached to the bed a full risk assessment must be completed 13 1 Attaching Grab Rail to the bed When att...

Страница 23: ...ing side rails the consideration of safety is paramount Side rails that have been manufactured by Ultimate Healthcare carrying the product codes UBEB7002 2 have been specifically designed for the Cura...

Страница 24: ...immediately to your supplier 13 3 Attaching Full Length Side Rails to the bed This User Guide is for the installation of UBEB7002FL 2 the full length extending side rails these side rails have been s...

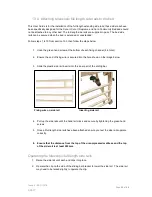
Страница 25: ...inserts starting with the bottom rail and repeat on the other side 15 Once all full length side rails have been attached ensure you return the bed frame to its standard length This will fix the side r...

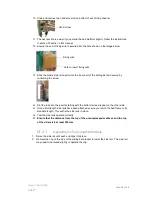
Страница 26: ...4 in total 2 Ensure the end of fixing wire is secured into the hole shown on the image below 3 Slide the plastic side rail inserts into the inner part of the sliding bar Fixing wire on side rail Inse...

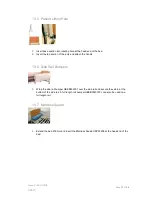
Страница 27: ...n of the pole and attach the handle 13 6 Side Rail Bumpers 1 Wrap the side rail bumper UBEB002001 over the side rail and secure the velcro at the bottom of the side rail A full length rail bumper UBEB...

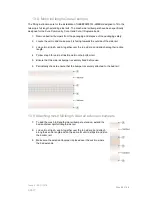
Страница 28: ...cro strips A and A together over the top side rail and attach along their entire length 4 Follow step 3 for velcro strips B and B on the bottom rail 5 Ensure that the side rail bumper is securely fixe...

Страница 29: ...tor brakes on one end of the bed only 9 Carefully slide the two halves of the bed apart and rest them on the floor 10 Apply the castor brakes these are foot only operated brakes 11 Unlock the retainin...

Страница 30: ...s the only separation from the mains Clean using a damp cloth Only use mild detergents without scouring agents to clean all metal parts and wooden and plastic surfaces Never use sharp edged tools kniv...

Страница 31: ...il they switch off automatically Check the side rails option for easy movement and damage Check the correct function of the locking device on the side rails option All moving parts on this bed are fit...

Страница 32: ...d and try again The handset doesn t function Mains power not connected Handset not connected to the controller Connect to the mains power Connect the handset to the controller following the instructio...

Страница 33: ...carried out in accordance with the valid regional environmental and disposal regulations Beds are not to be disposed of with household waste they must be taken to local waste collection depots Electr...

Страница 34: ...Bed data Overall length 2185mm Overall length extended 2385mm Overall width without side rails 932mm Overall width with removable side rails 975mm Overall width with full length side rails 1050mm Mat...

Страница 35: ...For indoor use only 100V 240V Voltage supply 50 60Hz Voltage input frequency 2 5A control pack 1A actuators Current drawn by device Intermittent periodic motor operation Maximum continuous operation o...

Страница 36: ...of charge including parts and labour For the Warranty to be valid the Customer must ensure that a the Customer notifies the Company within the Warranty Period of any defect and provides evidence of th...

Страница 37: ...details of the defect your name address and the date you purchased the Product You are required to provide proof of the date you purchased the Product a The Company will discuss with you whether a re...

Страница 38: ...Page 38 of 40 Issue 6 08 11 2018 DRAFT...

Страница 39: ...Page 39 of 40 Issue 6 08 11 2018 DRAFT...

Страница 40: ...40 Issue 6 08 11 2018 DRAFT Ultimate Healthcare Ltd Calmore Industrial Estate Nutwood Way Totton Southampton Hampshire SO40 3WW Tel 0333 321 8996 Email info ultimatehealthcare co uk www ultimatehealth...

Отзывы: