


13
After finishing the installation it’s time to turn the Ultimaker 2 Go on!
CONTROL
The display at the front side of the Ultimaker 2 Go shows all the necessary information for setting up and using your
Ultimaker 2 Go. You can navigate through menus by rotating and/or pushing the button at the right side of the display.
Rotating allows you to select or control an action; by pushing you can confirm an action. When pushing the button you
will hear a “beeping” sound to confirm the action. A blinking button means the Ultimaker 2 Go is waiting for user input.
BED LEVELING
After the “Welcome” screen, the Ultimaker 2 Go will guide you through some steps for calibrating the build plate. For
printing it is very important that the first layer is nicely squished into the glass plate and sticks well to it. If the distance
between the nozzle and build plate is too big, your print won’t stick properly to the glass plate. On the other hand, if the
nozzle is too close to the build plate it can prevent the filament from extruding from the nozzle.
NOTE: If you don’t see the configuration wizard, navigate to “Maintenance” > “Advanced” and confirm for a Factory
reset. You can use this function at any time.
Before the bed leveling can be done, the Ultimaker 2 Go will first do the “homing”. This means that it will move the print
head to the left back corner and the build plate towards the bottom, in order to set the origin point. After this, you can
follow the steps below for leveling the build plate.
1. The first step is to roughly level the build plate by rotating the button at the front of your Ultimaker 2 Go until there
is approximately 1 mm distance between the nozzle and build plate. The measurement here is not critical; just make
sure that the nozzle is close to the build plate without touching it.
2. Next, a rough adjustment will be done on the front left and right side by turning the build plate screws. Turning
the build plate screws to the left means that the build plate will get closer to the nozzle. Again there should be a
distance of approximately 1 mm between the nozzle and build plate.
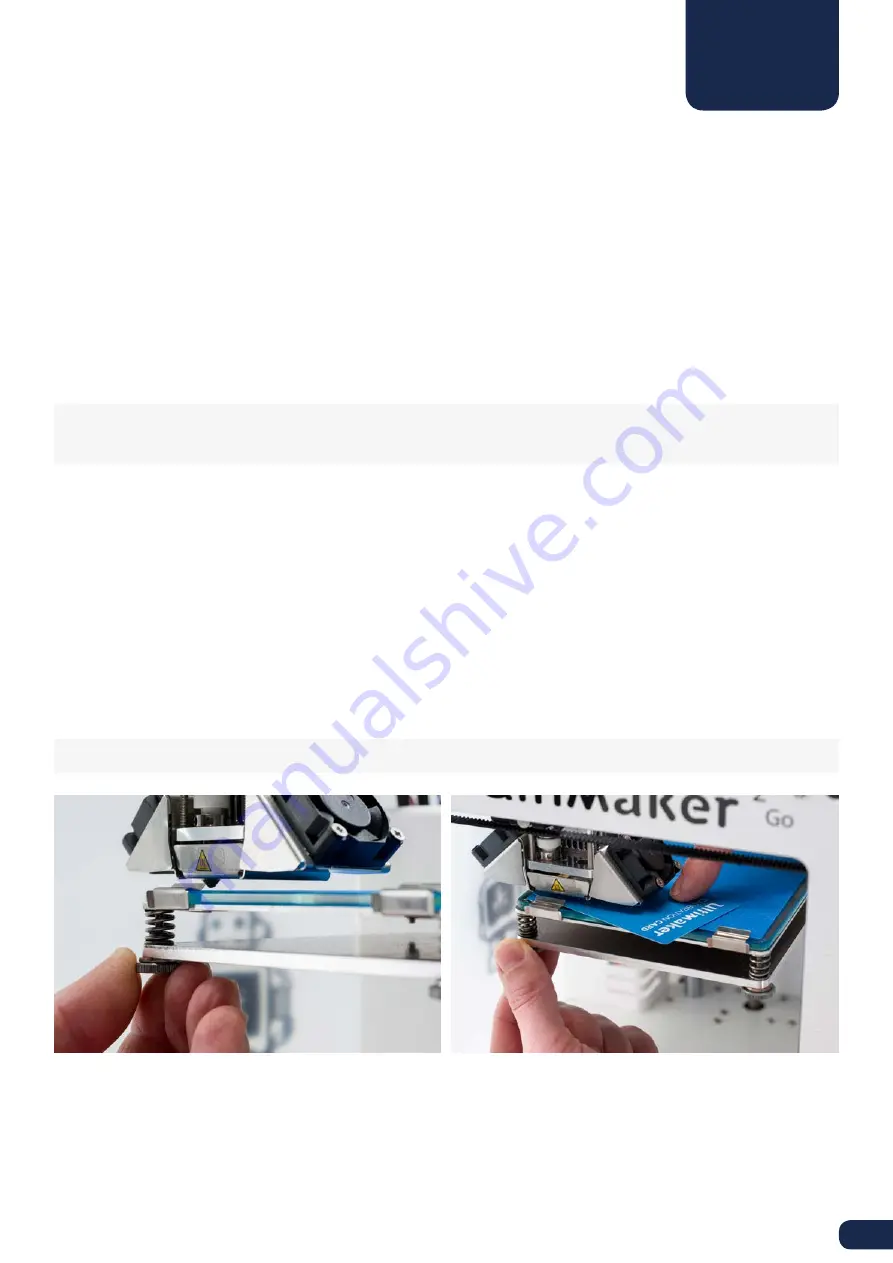
3. The last step will be fine-tuning of the build plate with the “calibration card”. Place the calibration card in between
the nozzle and build plate on all 3 points and adjust the build plate screws until you feel slight friction when moving
the card.
NOTE: Don’t push on the build plate while fine-tuning with the calibration card; this will lead to inaccuracies.
FIRST USE
Содержание 2 Go
Страница 1: ...Ultimaker2 Go THE MIGHTY MINI 3D PRINTER USER MANUAL V2 1 ...
Страница 6: ...6 11 8 9 10 ...
Страница 21: ...21 ...
Страница 34: ...www ultimaker com ...


