


65
FINISH
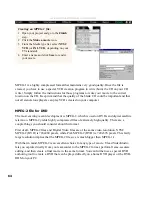
Creating an MPEG-2 file:
1
Open your project and go to the Finish
step.
2
Click the Make a movie icon.
3
From the Media type list, select NTSC
DVD (or PAL DVD, depending on your
TV standard).
4
Enter a name and click Save to render
your movie.
Recording back to DV camcorder
All movies on a computer are composed of ones and zeros and are therefore digital, but Digital
Video with uppercase for both “D” and “V” stands for a very specific format of video, just like
VHS or High-8. This format can be understood (played back, recorded) by your camcorder.
When you have the proper hardware (capture card) and software (DV codec), it can also be
understood by your computer.
The most exciting thing about DV is that it can be copied from your camcorder to your
computer, and then back to your camcorder (after editing, of course) without any loss of
quality. Ulead VideoStudio offers comprehensive support for DV in all of its manifestations on
the market. This includes, but is not limited to, Type-1, Type-2, PAL, NTSC, and even the
device control of your camcorder.
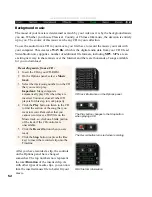
Recording a movie to your DV camcorder:
1
Turn on your camcorder and set it to Play
mode (or VTR / VCR mode). See your
camcorder’s manual for specific
instructions.
2
Select a compatible DV formatted AVI
file from the Library. If you want to use a
project, make sure you have already
rendered it using the Make a movie
button.
Note:
To check if a video clip is a DV formatted AVI file, right-click its associated thumbnail in the
Library, and then select Clip properties. (See the above illustrations.)