INSTALLATION
11
UFO
LIGHTING
MOUNTING
THE
ENCLOSURE
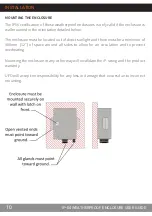
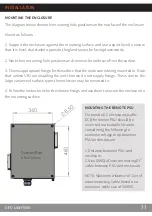
The diagram below shows the mounting hole positions on the rear face of the enclosure.
Mount as follows:
1. Support the enclosure against the mounting surface and use a spirit level to ensure
that it is level. As detailed opposite, the glands must be facing downwards.
2. Mark the 4 mounting hole positions and remove the enclosure from the surface.
3. Choose appropriate fixings for the surface that the enclosure is being mounted to. Note
that unless UFO are installing the unit then we do not supply fixings. This is due to the
large variance of surface types the enclosure may be mounted to.
4. Follow the instructions for the chosen fixings and use them to secure the enclosure to
the mounting surface.
Outside/Rear
of enclosure
MOUNTING
THE
REMOTE
PSU
For remote DC enclosures (suffix
DC) the remote PSU should be
mounted in a suitable location
considering the following to
minimise voltage drop between
PSU and enclosure:
1. Distance between PSU and
enclosure.
2. Size (AWG) of interconnecting DC
cable between PSU and enclosure.
NOTE: Maximum distance of 10m of
interconnecting cable based on a
minimum cable size of 16AWG.
Содержание IP-04
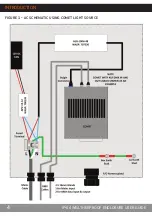
Страница 4: ...INTRODUCTION FIGURE 1 AC SCHEMATIC USING COMET LIGHT SOURCE IP 04 WEATHERPROOF ENCLOSURE USER GUIDE 4...
Страница 5: ...INTRODUCTION FIGURE 2 24V DC SCHEMATIC USING COMET LIGHT SOURCE 5 UFO LIGHTING...
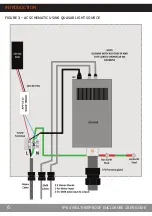
Страница 6: ...INTRODUCTION FIGURE 3 AC SCHEMATIC USING QUASAR LIGHT SOURCE IP 04 WEATHERPROOF ENCLOSURE USER GUIDE 6...
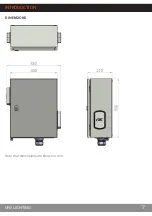
Страница 7: ...INTRODUCTION 7 UFO LIGHTING DIMENSIONS Note that dimensions are shown in mm...

