17
18
Notice:
1. If you can not search the WiFi signal to connect, turn off WiFi and turn on again
to search and connect.
2. The available WiFi control radius is 40m, please control the drone within this range.
3. Please pull the throttle stick to lowest position when you want to change the
controll method from transmitter to mobile phone or from mobile phone to
transmitter, or the drone can not be controlled alternately.
Picture 22
Picture 23
Help
In the interface, click the icon (as Picture 22) and enter help interface (as Picture 23,
24, 25).
Click
Picture 24
Picture 25
The drone works well only when the motor wires connected with the receiving
board as below.
LED Socket
Right
Left
Front
Rear
Additional Instruction of Receiving Board
Tip: Please play the video or photo after copying all aerial photography data to
computer and make sure the play software can support its format.
Basic parameter for aerial camera: Video DPI 1280*720P/30FPS;
Image Size 1280*720P.
Operation for Video Recording and Photo Taking
1. Press TF card and insert to the aerial camera as Picture 27. Please note that
the metal side of the card must up.
2. When taking photo, the moblie phone and TF card will store the picture. When
recording video, the video will only be stored in TF card. Meanwhile, you can
preview or download the video in moblie phone only when the TF card in the
camera box and the drone is connect with the transmitter.
Notice: Press Video Button to save a video when finish recording, or the video
cannot be saved.
3. Power off the drone first when finish aerial photography. Take out TF card and
insert the card to a card reader. Connect the card reader with computer. After
a while, view the aerial photography data from “my computer” -”mobile disk”.
Picture 26
Picture 27
Connect No. 1 socket of receiving board with
right-front motor wire.
Connect No. 2 socket of receiving board with
left-front motor wire.
Connect No. 3 socket of receiving board with
left-rear motor wire
Connect No. 4 socket of receiving board with
right-rear motor wire.
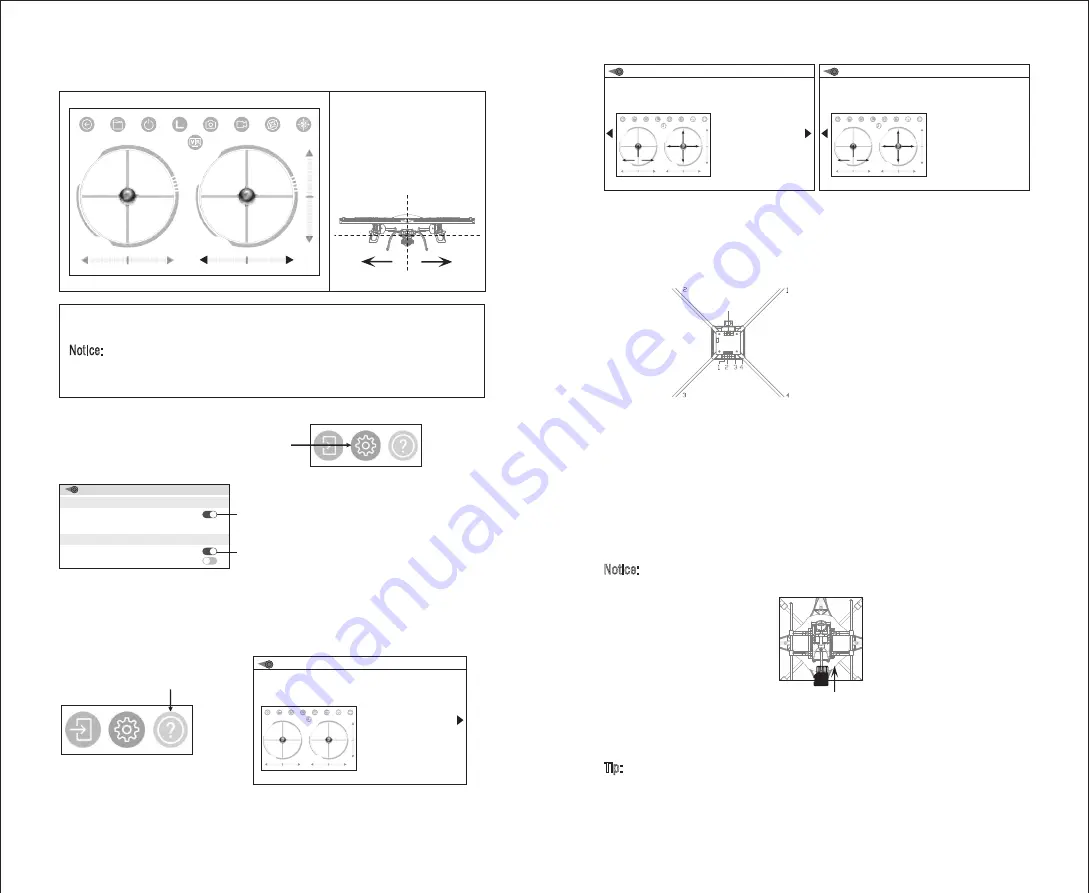
16. Left/right flying trim
Adjust the trim to right if
the drone flies to left; and
adjust the trim to left till
balance if the drone flies
to left.
21
22
Setting
In the interface, click the gear icon (Picture 20)
and you’ll see Picture 21.
Picture 20
Click
Picture 21
Trim Settings:
Turn on to store the trim setting data;
Turn off and the trim setting data will not be stored.
Video Quality:
Turn on for 480P or 720P mobile phone preview.
1. Return
2. Photo&video playback
3. Show / Hide control interface
4. Speed:Slow/ High
5. Take photo
6. Record video
7. Gravity sensor mode
8. Headless control
9. Switch for VR split mode,a VR
BOX is necessary for watching
Instruction
1
2
10
9
11
12
13
15
16
14
17
18
19
20
21
22
3
4
5
6
7
8
1
2
10
9
11
12
13
15
16
14
17
18
19
20
21
22
3
4
5
6
7
8
10. Throttle control
11/12. Left/right rotation trim
13/14/15/16. Directional control
Left/right/forward/
backward
17/18. Pitch Forward/backward
fine-tune
19/20. Left/right rotation fine-tune
21/22. Left/right roll fine-tune
Instruction
1. Turn on the product ( Four
axis aircraft ).
2. Enter the “Settings”menu
of your mobiledevice.
3. Then turn on “WiFi” and
Connect to the AP of this
Product.
4. Enter the control interface of
this APP,you would see the
real-time video from the
aircraft camera,and you
now can start your flight.
HELP
FLIGHT ATTITUDE
Prarameters auto save
Reset the parameters
INTERFACE SETTINGS
Preview720P
Preview480P


