background image

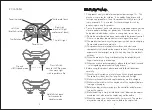
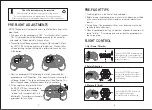
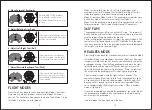
Push the LEFT STICK forward to make

the copter go up, or backward to go

down (“throttle”). The throttle will stay

where you leave it.

Push the LEFT STICK left or right

to rotate the direction the copter is 

facing (“yaw”). Release the stick to 

stop rotating.

7

8

1. The blue light are in the front of the quadcopter.
2. Before turning the quadcopter on, make sure the blades are installed 
    in the correct orientation (either clockwise or counter-clockwise as
    shown),
3. During flying, if the quadcopter tilts or is not balanacd, use the trim
    controls to make adjustment.
4. When the quadcopter battery is almost out of power, the control will
    sound “di di di”.  Please bring land and retrieve the quadcopter as
    soon as possible

1. Up / Down (Throttle)

2. Rotate Direction

PRE-FLIGHT ADJUSTMENTS

PRE-FLIGHT TIPS

FLIGHT CONTROL

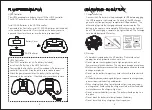
NOTE: The copter will not operate unless you follow these steps in the 
order listed. 
1. First make sure the quadcopter is OFF.  Turn the controller / receiver 
    ON.  This procedure must be followed precisely for the controller 
   and copter to “find and bind” with each other.
2. The controller will beep once and the light will blink rapidly.  Move 
    the LEFT STICK to the top and then to the bottom.  The controller 
    will stop blinking to show the throttle is calibrated.  Leave the stick
    at the bottom.

3. Now turn quadcopter ON by flipping the switch underneath the 
    quadcopter to the ON position.  After about 3 second the controller 
    will beep “di do di”. The lights on the copter will stop flashing. This 
    shows the quadcopter has become bound to the controller.
4. Put the copter on level ground.  Move
    the RIGHT STICK on the controller in 
    a circle. The controller will beep 
    “di do di” and the copter lights will 
    blink briefly.  This calibrates the copter
    gyroscopes for level flying.

Push the RIGHT STICK left to move 

left, or right to move right.

Release the stick to stop moving.

3. Move Left / Right

The Li-Po batteries may be recycled

Please discard old batteries in a proper recycling station.  

Do not throw batteries in the regular trash. If you have questions, 

please contact your local environmental agency to collect old batteries.

Содержание TIMY U846

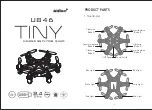
Страница 1: ...ch Counter clockwise Blade B Counter clockwise Blade B Counter clockwise Blade B Clockwise Blade A Clockwise Blade A Clockwise Blade A Blue Light White Light Red Light Blue Light White Light Red Light 1 Quadcopter headless flying quad U846 ...

Страница 2: ...least 8m long 8m wide and 5m high 2 Make sure the controller and copter batteries are fully charged 3 Make sure the throttle is all the way down all the way back before turning on the copter 4 Before you play make sure you turn the controller on before you turn on the copter 5 Make the battery is firmly installed and the all doors on the copter are closed shut otherwise the copter may not be stabl...

Страница 3: ... may cause damage or explosion Make sure all batteries are connected in the proper orientation to avoid damage or explosion Do not use the battery to impact any hard surfaces Avoid contact with metal If the battery becomes damaged bulges or appears to change shape please stop using the battery and discard it When charging the battery to avoid accident put the power supply on the ground Avoid setti...

Страница 4: ...r ON This procedure must be followed precisely for the controller and copter to find and bind with each other 2 The controller will beep once and the light will blink rapidly Move the LEFT STICK to the top and then to the bottom The controller will stop blinking to show the throttle is calibrated Leave the stick at the bottom 3 Now turn quadcopter ON by flipping the switch underneath the quadcopte...

Страница 5: ...s flying high above the ground To flip in the direction you choose first press the right stick down The controller will start beeping and enter 360 Flip Mode Push the right stick in any direction to flip in the desired direction forward backward left or right and return to normal flight Press the right stick down for 3 seconds to enter or exit Headless Mode In Headless Mode the quadcopter s direct...

Страница 6: ...on the circuit board 1 to 6 For example install motor 1 in the upper left of the quadcopter and connect the wires from motor 1 to the connector labeled M1 on the circuit board Below are spare parts for your selection which you may obtain from your local distributors Hold the left stick down for 3 seconds to enter Headless mode Installing a Motor SPARE PARTS USB Power Power Switch Blue lights Front...

Отзывы: