background image

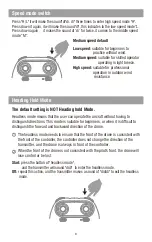
Medium speed default

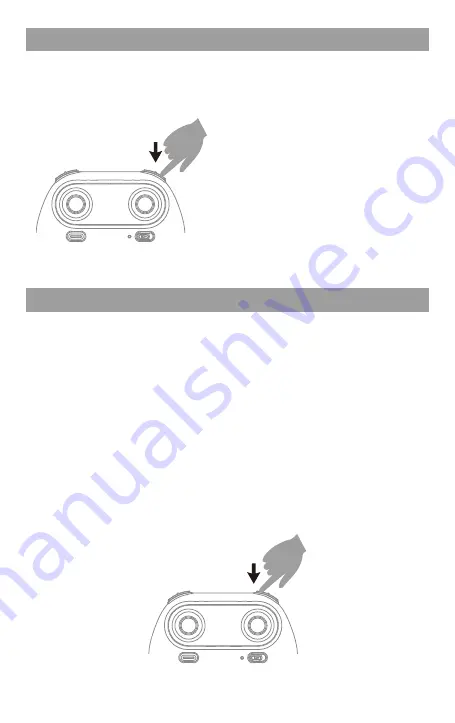
Speed mode switch

Press "H/L" it will make the sound"di"di. di" three times to enter high speed mode "H".
Press down it again, it will make the sound"di" ,this indicates to the low speed mode”L.
Press down again

 it makes the sound of ‘di’ for twice, it comes to the middle speed 

mode “M”.

Low speed:

 suitable for beginners to 

                    practice without wind.

Medium speed: 

suitable for skilled operator

                         operating in light breeze.

High speed: 

suitable for professional 

                    operation in outdoor wind 
                     resistance.

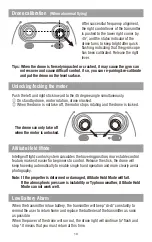
The default setting is NOT Heading hold Mode.

Headless mode means that the user can operate the aircraft without having to 
distinguish directions. This mode is suitable for beginners, or when it is difficult to 
distinguish the forward and backward direction of the drone.

The headless mode needs to ensure that the front of the drone is consistent with 
the front of the controller, the controller does not change the direction of the 
transmitter, and the drone is always in front of the controller.
When the front of the drone is not consistent with the pilot's front, the drone will 
lose control or be lost.

Heading Hold Mode

Start: 

press the button of "headless mode", 

          and the transmitter will sound "didi"  to enter the headless mode.

Off: 

repeat this action, and the transmitter makes a sound of "dididi" to exit the headless 

       mode.

8

Содержание U67

Страница 1: ...USER MANUAL U67 This product is suitable for users over 14 years old Stay away from the rotating propeller Read the important statement and safety guidelines carefully Suitable for indoor flight ...

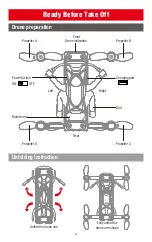
Страница 2: ...r Left Right ON OFF Power Switch Propeller B Doll Propeller A Main frame Propeller D Propeller C Unfolding Instruction Unfold the drone arm Fully unfold the drone arm shape Ready Before Take Off Drone preparation Charging port 2 ...

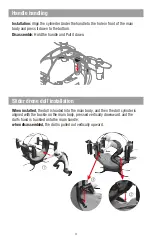
Страница 3: ...dy pressed vertically downward and the doll s hand is buckled onto the main handle when disassembled the doll is pulled out vertically upward Installation Align the cylineder Under the handle to the hole in front of the main body and press it down to the bottom Disassemble Hold the handle and Pull it down Slider drone doll installation 3 ...

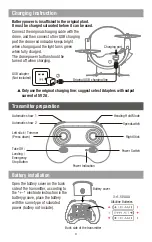
Страница 4: ...suggest select Adapters with output current of 5V 2A Charging port Original USB charging line USB adapter Not included Left stick Trimmer Press down Automatic show 1 Automatic show 2 Right Stick Speedswitch Heading Hold Mode Take Off Landing Emergency Stop Button Power Switch Power Indication Transmitter preparation Battery cover Back side of the transmitter Battery installation Open the battery c...

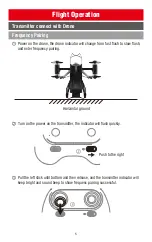
Страница 5: ...ge from fast flash to slow flash and enter frequency pairing Horizontal ground Turn on the power on the transmitter the indicator will flash quickly Pull the left stick until bottom and then release and the transmitter indicator will keep bright and sound beep to show frequenc pairing successful Push to the right 5 ...

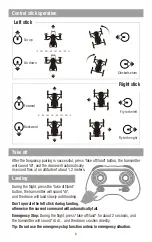
Страница 6: ...he flight press the take off land button the transmitter will sound di and the drone will land slowly until landing Emergency Stop During the flight press take off land for about 2 seconds and the transmitter will sound di di and the drone crashes directly Don t operate the left stick during landing otherwise the current command will automatically fail Control stick operation Left stick Clockwise ...

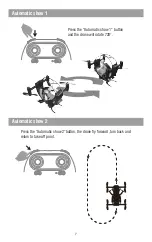
Страница 7: ...Automatic show 1 Automatic show 2 Press the Automatic show 1 button and the drone will rotate 720 Press the Automatic show 2 button the drone fly forward turn back and return to take off point 7 ...

Страница 8: ...eans that the user can operate the aircraft without having to distinguish directions This mode is suitable for beginners or when it is difficult to distinguish the forward and backward direction of the drone The headless mode needs to ensure that the front of the drone is consistent with the front of the controller the controller does not change the direction of the transmitter and the drone is al...

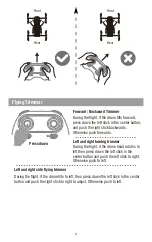
Страница 9: ...djust Otherwise push to left Forward Backward Trimmer Press down During the flight if the drone tilts forward press down the left stick in the center button and push the right stick backwards Otherwise push forwards Left and right turning trimmer During the flight if the drone head rotates to left then press down the left stick in the center button and push the left stick to right Otherwise push t...

Страница 10: ... the motor stops rotating and the drone is locked The drone can only take off when the motor is unlocked Note If the propeller is deformed or damaged Altitude Hold Mode will fail If the atmospheric pressure is instability or Typhoon weather Altitude Hold Mode can not work well Intelligent flight control system calculates the hovering position more stable control feature makes it easier for beginne...

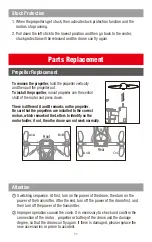
Страница 11: ...itter Improper operation caused the crash It is necessary to check and confirm the connection of the motor propeller or battery of the drone and the damage degree so that the drone can fly again If there is damaged please replace the new accessories or prone to accident There is different A and B remarks on the propeller Be sure that the propellers are installed to the correct motors which remarke...

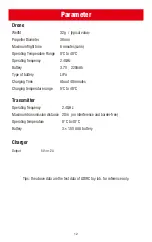
Страница 12: ...equency Battery Type of battery Charging Time Charging temperature range 32g typical value 38mm 6 minutes calm 0 C to 40 C 2 4GHz 3 7V 220mAh LiPo About 40 minutes 5 C to 40 C Drone Operating frequency Maximum transmission distance Operating temperature Battery Transmitter 2 4GHz 20m no interference and barrier free 0 C to 40 C 3 1 5V AAA battery Output Charger 5V 2A 12 ...

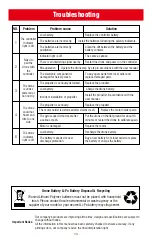
Страница 13: ...nal nearby Restart the drone and power on the controller Mis operation Operate the drone step by step in accordance with the user manual The electronic component is damaged for fiercely crash To buy spare parts from local seller and replace damaged parts The propeller is seriously deformed Replace the propeller Low battery Charge the drone battery Incorrect installation of propeller Install the pr...

Страница 14: ...paration between the equipment and receiver Connect the equipment into an outlet on a circuit different from that to which the receiver is connected WARNING Changes or modifications not expressly approved by the party responsible for compliance could void the user s authority to operate the equipment This device complies with Part 15 of the FCC Rules Operation is subject to the following two condi...

Отзывы: