


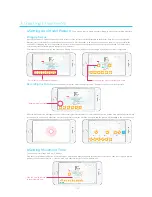


a.Setting Up a Model Posture:
There are two ways to set up a posture: Dragging servos and recording a posture.
b.Setting Movement Time
Servos IDs for the corresponding model
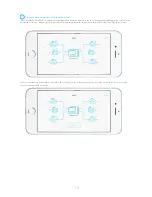
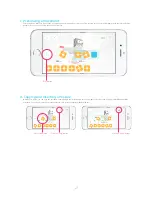
Open the Movement Programming interface, and all servos of the current model are displayed at the bottom. Each servo corresponds with
di
ff
erent joints of the model. You can drag the specific servo of a joint that needs to be moved to the movemen taxis, or you can combine the
movements of dragging the servos repeatedly. One servo in the movement axis represents only one robot posture change. The combination
of servos represents multiple posture changes at the same time.
Select the servo you want to move and enter Servo Editing. You can now configure the servo angle by rotating the control components.
A Record Movement icon will appear on the movement axis after the Jimu robot is connected. Click the icon and the Jimu robot will automatically
loosen the joint. You can now adjust the robot into the posture you want. Click the icon again and the posture will be added to the movement axis.
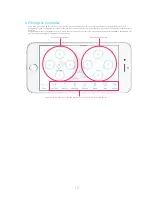
The movement time range is 80 ms - 5,000 ms.
Click the corresponding time button for the movement, and the time slider will appear at the bottom of the screen. Slide left or right to quickly
configure the movement interval, or click the "Add" and "Subtract" button for micro-adjustment.
"Record movement" icon
Click the "Setting" button
to set movement time.
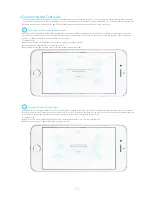
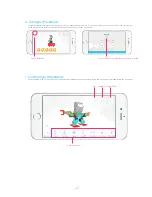
Recording the Posture:
Loosen up the robot joints. Adjust the robot posture. Then press the key to record the posture.
Dragging Servos
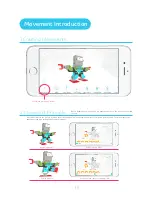
3.Creating Movements
Grag the green icons to set the servo angle
20
Содержание Jimu
Страница 1: ...APP Instructions ...


