background image

UBI EasyCoder 201 II E

UBI EasyPak 101 SA  –  Getting Started

7

PRINT YOUR FIRST LABEL
USING UBI LabelShop

Check that the serial interface cable is properly
connected between your PC and your printer.

Turn the printer ON.

Check that paper is properly loaded and that the
printhead is lowered. Press the "Feed" button for
feeding one label and to confirm that all is OK.
(If not, see how to load paper on page 8.)

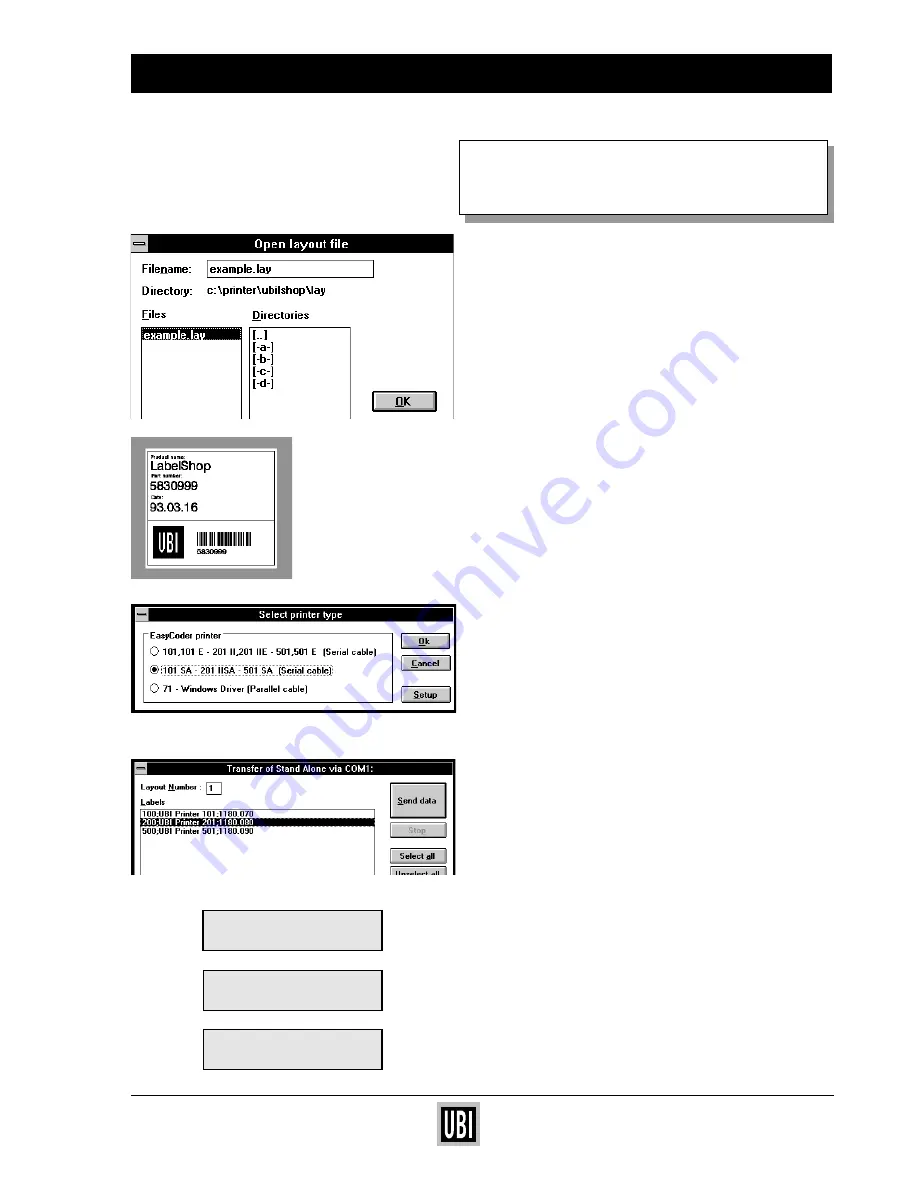
Double click on the "UBIIShop" icon to start the
program.

From the menu File, choose "Open". A dialogue
box comes up.

Select the pre-designed label layout "example.lay".
The layout will appear on your screen.

From the menu File, choose "Print setup".

Select "101 SA – 201 IISA – 501 SA" and click "OK".

From the menu File, choose "Print".

Click "Select all" to select all three labels fom the
label list and click "Send data". The three labels —
numbered 100, 200 and 500 —will be sent down to
your Stand Alone printer.

To print a label, press "1" on the printer’s keyboard
to select "Run" mode. Press "1" again to select
"Print".

Select either "100" to select label No. 100, or "200"
to select label No. 200 etc. Then press the "Print"
button and the label will be printed on your UBI
EasyCoder
 printer!

For further usage, please read your UBI LabelShop
manual and UBI Stand Alone operating instructions.

Select Mode
1:Run

2:Set

1:Print 2:Edit
3:Delete4:List

Print LBL nr
100

– – – – –

Содержание EasyCoder 101

Страница 1: ...ur printer 3 Introduction 4 Check the package contents 4 Connect power cord 5 Connect interface cable for UBI LabelShop pro gram serial 5 Install your UBI LabelShop program 6 Print your first label us...

Страница 2: ...is subject to change without prior notice and does not represent a commitment on the part of UBI Printer AB Copyright UBI Printer AB 1993 All rights reserved Published in Sweden EasyCoder LabelShop an...

Страница 3: ...ft Paper Supply Spool Right hand Door Indicator Lamps Display Window Print Button P U L L T I R E Z Power Ready Error Pause Save Feed Enter 7 8 9 4 5 6 1 2 3 0 C Ins Del Esc EasyCoder 101 SA Latch PUL...

Страница 4: ...a in mind simplicity For you this means increased productivity and greater job satisfaction CHECK THE PACKAGE CONTENTS Make sure the following items are included in your EasyPak box UBI EasyCoder 101...

Страница 5: ...rinter is turned OFF so that the 0 side of the switch is pressed down Connect the power cord into the power cord recep tacle on the back of the printer Plug the other end of the power cord into an AC...

Страница 6: ...ation dialogue box comes up on your screen You may change the file directory by clicking the Change Directory button Default is C UBILSHOP You may now change language by clicking the Language button C...

Страница 7: ...The layout will appear on your screen From the menu File choose Print setup Select 101 SA 201 IISA 501 SA and click OK From the menu File choose Print Click Select all to select all three labels fom...

Страница 8: ...Off 1 Lift the green printhead lever counter clockwise 2 Fit a new paper roll on the paper supply spool 3 Thread paper as shown in the picture 4 Remove the labels from the first 25 cm 10 of the paper...

Отзывы: