background image

www.U-LineService.com

8

02/2005

BI-98 Ice Maker

CAUTION

Plumbing installation must observe all state and local 
codes. All water connections MUST BE made by a licensed/
qualified plumbing contractor. Failure to follow 
recommendations and instructions may result in damage 
and/or harm.

WARNING

To prevent accidental electrocution, make certain 
that the floor surfaces surrounding the unit are 
dry whenever power is removed from, or applied 
to, the unit.

Water Supply Connection

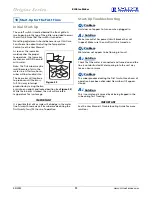
When connecting the water supply, follow these 
guidelines:

• Review the local plumbing codes before you install the 

unit.

• Connect to the cold water supply.

• The water pressure should be between 20 and 120 psi.

• Install a shut-off valve in the 1/4 inch OD water supply 

line.

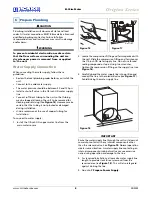
• Connect sufficient tubing to the unit so that tubing 

may be looped, allowing the unit to be removed for 
cleaning and servicing (see 

Figure 18

). However, make 

certain that the tubing is not pinched or damaged 
during installation.

• U-Line recommends the use of copper tubing for 

installation.

To connect to water supply:

1. Install the 1/4 inch OD copper water line from the 

main water source.

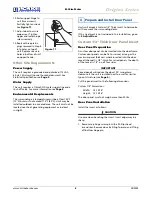
2. Locate the compression fitting and ferrule packed with 

the unit. Slide the compression fitting and ferrule over 
the 1/4-inch OD water supply line. Do not use thread 
sealing compound or tape. Using two wrenches, 
tighten the compression fitting on the supply line (see 

Figure 16

).

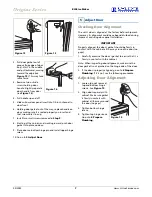
3. Carefully bend the water supply line into position and 

connect the line to the solenoid valve (see 

Figure 17

). 

Avoid kinking the water supply line.

IMPORTANT

Route the water supply line through the unit so it does not 
come into contact with any internal components other 
than the solenoid valve. See 

Figure 18

. Normal operation 

creates some vibration. A water supply line contacting an 
internal component or cabinet wall can cause excessive 
noise during operation or damage to the line.

4. For recessed installations, allow extra water supply line 

length to provide slack for easy removal from the 
recessed area (see 

Figure 18

). This will also safeguard 

against kinking the line. 

5. Go on to 

7 Prepare Power Supply

.

6 Prepare  Plumbing

Water Line

Figure 17

Figure 16

Figure 18

Содержание Origins BI-98

Страница 1: ...LineService com Phone 414 354 0300 FAX 414 354 7905 Service Parts Tech Lines Phone 800 779 2547 FAX 414 354 5696 OnlineService U Line com 2005 U Line Corporation 02 2005 BI 98 Ice Maker Installation...

Страница 2: ...oper hook up can result in substantial property damage If you are unsure of your ability to safely connect the water supply to the unit consult a licensed plumber for assistance This unit requires con...

Страница 3: ...and water connection parts Complete and mail the Product Registration Card or register online at www U LineService com Once your unit is installed keep the User Manual and this Installation Guide in a...

Страница 4: ...unit sits on a level surface as it does not have feet levelers If it is not level the ice mold will not fill evenly Product Dimensions Door Swing Clearances Information Units have a zero clearance fo...

Страница 5: ...talled Align hinge outer edge with cabinet before tightening screws 5 Relocate plastic spacer bushing on bottom of door to opposite side and place door on bottom hinge pin See Figure 8 Clean out bushi...

Страница 6: ...t Units will accept a Custom 1 4 Thick Insert to harmonize with or accent the surrounding decor If this treatment is not included in this installation go on to 5 Adjust Door Custom 1 4 Thick Door Pane...

Страница 7: ...g Door Alignment The unit s door is aligned at the factory before shipment However its alignment could have been disturbed during shipment or during door panel installation IMPORTANT Properly aligned...

Страница 8: ...he use of copper tubing for installation To connect to water supply 1 Install the 1 4 inch OD copper water line from the main water source 2 Locate the compression fitting and ferrule packed with the...

Страница 9: ...to nuisance tripping However be sure to consult your local codes See Figure 19 for recommended receptacle location WARNING SHOCK HAZARD Electrical Grounding Required Never remove the round grounding p...

Страница 10: ...lle itself It is located toward the top of the middle recessed section of the grille 3 Place the two hook hinges located on the rear bottom side of the grille onto the front lip of the unit base Swing...

Страница 11: ...bin arm is locked the unit will maintain temperature for ice storage IMPORTANT It is possible that dirt or scale will dislodge in the water line Always throw away all ice cubes made during the first t...

Страница 12: ...U Line has distinguished itself as the leader in built in undercounter ice making refrigeration and wine storage appliances Who to Call Service Information If the need for service arises contact the d...

Отзывы: