background image

QUICK START GUIDE

u-line.com

Environmental Requirements

This model is intended for indoor/interior applications only
and is not to be used in installations that are open/
exposed to natural elements.

This unit is designed to operate between 50°F (10°C) and
100°F (38°C). Higher ambient temperatures may reduce

the unit’s ability to reach low temperatures and/or reduce

ice production on applicable models.

For best performance, keep the unit out of direct sunlight
and away from heat generating equipment.

In climates where high humidity and dew points are
present, condensation may appear on outside surfaces.
This is considered normal. The condensation will
evaporate when the humidity drops.

Damages caused by ambient temperatures of
40°F (4°C) or below are not covered by the
warranty.

Electrical

SHOCK HAZARD — Electrical Grounding
Required. Never attempt to repair or perform
maintenance on the unit until the electricity has
been disconnected.

Never remove the round grounding prong from
the plug and never use a two-prong grounding
adapter.

Altering, cutting or removing power cord,
removing power plug, or direct wiring can cause
serious injury, fire, loss of property and/or life,
and will void the warranty.

Never use an extension cord to connect power to
the unit.

Always keep your working area dry.

NOTICE
Electrical installation must observe all state and
local codes. This unit requires connection to a
grounded (three-prong), polarized receptacle
that has been placed by a qualified electrician.

The unit requires a grounded and polarized 115 VAC,
60 Hz, 15A power supply (normal household current). An
individual, properly grounded branch circuit or circuit
breaker is recommended. A GFCI (ground fault circuit

interrupter) is usually not required for fixed location

appliances and is not recommended for your unit because
it could be prone to nuisance tripping. However, be sure
to consult your local codes.

See CUTOUT & PRODUCT DIMENSIONS for recommended 
receptacle location.

Door Swing

Units have a zero clearance for the door to open 90

o

, when 

installed adjacent to cabinets.

Stainless steel models require 2-1/8” (54 mm) door 
clearance to accommodate the handle if installed next to a 
wall.

CAUTION

!

5

1/4" Min.

Wall

21"

Wall

21"

16-1/2"

16-1/2"

2" Min.

90°

Door Swing

90°

Door Swing

Black and White Models

2115R Models

Stainless Models

Wall

Wall

21"

16-1/2"

2" Min.

90°

Door Swing

Stainless Steel

21"

16-1/2"

90°

Door Swing

Black, White and Wood Overlay

1/4" Min.

2115WC Models

Wall

Wall

90°

Door Swing

Integrated

Stainless Steel, Black and White

90°

Door Swing

2175R(F) & 2275WC Models

90°

Door Swing

Wall

Wall

21"

25-1/2"

90°

Door Swing

21"

25-1/2"

Stainless Steel

Wood Overlay

2175BEV

90

°

Door Swing

Wall

Wall

90°

Door Swing

Stainless Steel

2175WC Models

2-1/8" Min.

(54 mm)

1/4" Min.

(6 mm)

2-1/8" Min.

(54 mm)

1/4" Min.

(6 mm)

2-1/8" Min.

(54 mm)

1/4" Min.

(6 mm)

Black, White and Integrated

Содержание HDE215

Страница 1: ...QUICK START GUIDE DISPENSERS HDE215 30636_B ...

Страница 2: ...er two decades and is proud to have the opportunity to ship to you PRODUCT INFORMATION Looking for additional information on your product User Guides Spec Sheets CAD Drawings Compliance Documentation and Product Warranty information are all available for reference and download at u line com PROPERTY DAMAGE INJURY CONCERNS In the unlikely event property damage or personal injury is suspected relate...

Страница 3: ... charge when you register your product on u line com See complete warranty for details CONTENTS Safety and Warning 4 Environmental Requirements 5 Electrical 5 Door Swing 5 Door Adjustments 6 General Installation 8 Control Operation 15 First Use 15 Airflow Product Loading 18 Cleaning 18 Warranty 20 D e s i g n e d engineered and assembled in Milwauk e e W I U S A to be removed by end consumer only ...

Страница 4: ...t failure to follow this safety statement may result in minor or moderate personal injury property or equipment damage This unit contains R600a Isobutane which is a flammable hydrocarbon It is safe for regular use Do not use sharp objects to expedite defrosting Do not service without consulting the R600a specifications section included in the User Guide Do not damage the refrigerant circuit Servic...

Страница 5: ...d to connect power to the unit Always keep your working area dry NOTICE Electrical installation must observe all state and local codes This unit requires connection to a grounded three prong polarized receptacle that has been placed by a qualified electrician The unit requires a grounded and polarized 115 VAC 60 Hz 15A power supply normal household current An individual properly grounded branch ci...

Страница 6: ... hinge side of the door To align and adjust the door 1 Gently pry off hinge cover from top of unit 2 Loosen do not remove top and bottom hinge screws using a Torx T 25 screwdriver on the top and a 1 4 socket on the bottom 3 Align door squarely with cabinet 4 Make sure gasket is firmly in contact with cabinet all the way around the door no gaps 5 Tighten bottom hinge screws 6 Tighten top hinge scre...

Страница 7: ...n either side Install bottom hinge Install two or three screws depending on model Replace nuts if used Prepare door for reinstallation 1 Remove gasket 2 Rotate gasket 180o and press firmly into the gasket channel starting at the corners 3 Rotate door 180o to reverse Install top hinge and door 1 Remove pivot screw from hinge flip hinge over and install the pivot screw in the same hole from the oppo...

Страница 8: ...n or 5 gallon keg 6 Drip tray 7 Cleaning solution 2 ounce packet Additional cleaner ULACOFFEECLEAN is available at u line com Safety and Warning Keep nitrogen tank in an upright position and handle with care Never exceed 60 PSI Ventilate area after nitrogen leak 1 2 3 4 5 6 7 Required not included 1 Nitrogen tank with food grade nitrogen available at your local gas supplier 22 cubic feet aluminum ...

Страница 9: ...he tower is installed 1 Remove four Phillips screws secured with nuts on the inside of the refrigerator and lift off cap to reveal tower mounting hole Peel back enough film for tower to clear 2 Position gasket over mounting hole and install tower using four Phillips screws and nuts 3 Screw the handles onto the faucets and continue to assemble and connect regulator to Nitrogen tank Gasket ...

Страница 10: ...ions from Diagram A to determine the center point of the tower mounting hole 3 Remove keg refrigerator from under countertop 4 Use template to drill four mounting holes 5 Drill 3 1 8 diameter hole through countertop 6 Secure tower to countertop 7 Screw the handles onto the faucets and continue to CONNECTIONS in this User Guide Front Face of Unit 3 1 8 79 mm Hole Diameter Power Cord 2 51 mm 15 381 ...

Страница 11: ... u line com 11 Template for Countertop Installation 1 4 HOLE 3 1 8 HOLE 14 1 4 To front face of unit 7 1 2 To side of unit 1 Inch Note Verify template has printed true to scale double check hole dimensions and placement ...

Страница 12: ...r turn DO NOT OVER TIGHTEN 1 Attach black nitrogen coupler of the liquid jumper line to keg With your thumb on top of the coupler pull up on collar and press coupler down firmly onto out valve Release collar listen for a click Pull up on the coupler to ensure it is locked down 2 Attach other end of beverage hose to Y connection within dispenser tower line up and press in firmly 3 Attach hose to el...

Страница 13: ...ted to Infuser Regulator Connect Nitrogen Tank to Keg 3 Attach gray coupler of the gas jumper line to keg With your thumb on top of the coupler pull up on collar and press coupler down firmly onto in valve Release collar listen for a click Pull up on the coupler to ensure it is locked down 4 Attach other end of gas jumper line to T connector on infuser regulator line up and press in firmly 4 Attac...

Страница 14: ...el Level should be placed along top edge and side edge as shown 2 If the unit is not level adjust the legs on the corners of the unit as necessary Keg Infuser Regulator Tank Regulator Filter Assembly Turn to Adjust 3 Confirm the unit is level after each adjustment and repeat the previous steps until the unit is level When ready to use see FIRST USE section in this manual ...

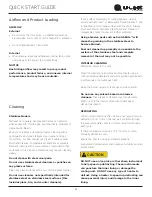
Страница 15: ... Operation section for more details If the temperature displayed is different than selected the unit is progressing towards the selected temperature Time to reach set point varies based upon ambient temperature temperature of product loaded door openings etc U Line recommends allowing the unit to reach set points before loading To dispense cold coffee make sure the components are assembled accordi...

Страница 16: ...itrogen tank turn black handle counterclockwise until it stops 3 Rotate the red regulator valve to ON Position turn counterclockwise 1 4 turn until it stops TO ADJUST PRESSURE 1 Loosen locking nut turn adjusting screw until desired pressure is reached and retighten locking nut 2 On infuser regulator pull out middle knob to unlock then turn knob until needle points at 7 turn right to increase left ...

Страница 17: ...ll The secondary regulator is set to a pressure that is either too high or low If there is less more nitro effect than desired use the black knob on the secondary regulator assembly to make a change To adjust the secondary regulator pull the black knob out until you feel a slight click This is the adjustment mode To increase the level of nitro turn this knob clockwise To decrease the level of nitr...

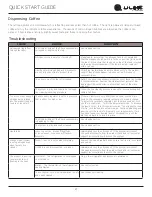
Страница 18: ...NTERIOR CLEANING Disconnect power to the unit Clean the interior and all removed components using a mild nonabrasive detergent and warm solution applied with a soft sponge or non abrasive cloth Rinse the interior using a soft sponge and clean water Do not use any solvent based or abrasive cleaners These types of cleaners may transfer taste and or odor to the interior products and damage or discolo...

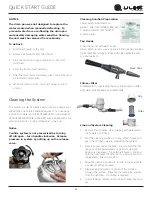
Страница 19: ... release valve Cleaning Solution Preparation Follow safety instructions on packet Mix ULACOFFEECLEAN with 2 gallons of warm 100 F 38 C potable water Tap Heads Clean the faucet with warm soapy water Remove nose cone and soak in the cleaning solution for at least five minutes Rinse with clean potable water dry and reattach Infuser Filter Disassemble by unscrewing the cap Rinse cap and filter with wa...

Страница 20: ...od or other natural disasters The product must be installed operated and maintained in accordance with your product s User Guide The remedies described above for each warranty are the only ones that U Line will provide either under these warranties or under any warranty arising by operation of law U Line will not be responsible for any consequential or incidental damages arising from the breach of...

Отзывы: