U-Line CO1175, Инструкция по использованию и уходу
Холодильник U-Line CO1175 имеет множество превосходных характеристик и спецификаций, которые можно узнать, загрузив бесплатное руководство по эксплуатации на нашем сайте. Наслаждайтесь удобством использования этого продукта, загружая руководство с manualshive.com.
Поделиться
Скачать


Отзывы:
Нет отзывов
Похожие инструкции для CO1175
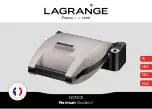
Gaufres Premium
Бренд: Lagrange Страницы: 76

PID
Бренд: Ascaso Страницы: 6

L'OR Supreme
Бренд: JDE Страницы: 18

ZBM 02
Бренд: Zass Страницы: 16

Incanto Rondo SUP021YO
Бренд: Saeco Страницы: 16

Caf 3 in 1 Coffee Maker KDC120
Бренд: Kambrook Страницы: 10

IG8127
Бренд: iGenix Страницы: 12

DUO-5
Бренд: Ascaso Страницы: 38

PicoBaristo HD8927/06
Бренд: Saeco Страницы: 84

FPSTFN7710
Бренд: Oster Страницы: 24

EXP 4600
Бренд: Orbegozo Страницы: 25

SPECIAL SELECT FSCM200BM
Бренд: Farberware Страницы: 12

CDBC
Бренд: Bunn Страницы: 36

MonoSnap Pro
Бренд: PAPERANG Страницы: 7

ECO 310.BK
Бренд: DeLonghi Страницы: 6

HD8753/11
Бренд: Philips Saeco Страницы: 60

IMPRESSA S7 avantgarde
Бренд: Jura Страницы: 28

CF097W
Бренд: SharkNinja Operating Страницы: 24


