background image

Wireless Access Point  Model 0-1591700-x          User Manual 

Page 12 of 33  

5.  If the web browser reports that it cannot find the access point, then recheck the following:- 

a)  The correct IP address has been entered into the web browser.  

b)  Ensure that the IP address of the PC is in the same subnet. 

c)  Execute a PING test from the PC to the IP address of the access point. If the test returns as 

Request Timed Out, then there is no connection between the PC and the access point. 

d)  Check that a cross-over style Ethernet cable is used between the PC and the access point. 

The cable shipped with the access point should be suitable. 

e)  The browser proxy settings are correct. 

6.  Enter the default user name of 

admin

 and the default password of 

iktpw

 into the log-in prompt. 

The password is case-sensitive and is an abbreviation of the phrase “

I


k

now 

t

he 

p

ass

w

ord”. 

Note that the password can be changed in the 

System

 > 

Administrator Settings

 screen. The 

access point will need to be reset after changing the password. If the screen shows a message 

Login Error

”, then use the Back button of the browser to return to the log-in screen. 

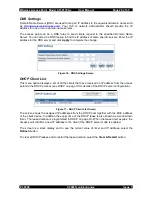
7.  The access point main/home screen should be displayed similar to the image below:- 


Figure 7 - Access Point Main Screen 

8.  This screen has a navigation bar on the left hand side and three action buttons in the top right 

hand corner. The action buttons are:- 

• 

Home

 – this always returns the web browser to the main screen 

• 

Exit

 – this button forces a log-out from the session 

• 

Reset

 – this button resets the access point and will slowly flash red to signal that the 

access point needs to be reset to implement the requested changes. This reset can be 
done after all required changes have been made. 

9. Select 

the 

System

 > 

Status

 menu to view a summary of the access point.  

10. The web browser session with the access point will timeout after about 10 minutes of no 

activity to ensure that the configuration session cannot be accidentally left open creating a 
security risk. 

 PL0356                                                     ©2003TycoElectronics                                        Issue 1 

Содержание 0-1591700-x

Страница 1: ...Wireless Access Point Model 0 1591700 x User Manual Page 1 of 33 Corporate Grade SNMP Managed Wireless Access Point Product User Guide Part Number 0 1591700 x PL0356 2003TycoElectronics Issue 1...

Страница 2: ...eed A Site Survey 7 Location Guidelines 7 WLAN Security 7 Access Point Ports 8 DC In 8 LAN 8 RS232 8 Reset 8 LED Indicators 8 Wall Mounting the Access Point 9 Desk Mounting the Access Point 9 Unit Inf...

Страница 3: ...CTS Threshold 24 Hide SSID 24 Authentication 24 Authentication Type 24 WEP Encryption 24 802 1X 25 Re authentication Time 25 Primary Radius Server Authentication Server IP 25 802 11g Menu Option 26 C...

Страница 4: ...all current WLAN modes and bands Supports high level security options 802 1x Authentication with RADIUS WPA WEP with 64 128 and 152 bit keys MAC Access Control List locking Hidden SSID option Deliver...

Страница 5: ...otential for interference 2 The radio spectrum regulatory bodies in Greece and Spain currently do not permit operation of the access point in the 5GHz band using IEEE802 11a however operation in the 2...

Страница 6: ...site at http www lan electronics com support htm Tyco Electronics Active LAN Products warrants this Wireless LAN Access Point product to be free from defects in material and workmanship under normal u...

Страница 7: ...imum In an ideal environment there should be line of sight between the access point and the client devices b If the access point and clients are separated by walls then ensure that the wall is relativ...

Страница 8: ...on the spare pairs of the structured wiring See page 32 for details RS232 This 9W D Type connector is the 9600bps serial console link that can be used during configuration and maintenance activities...

Страница 9: ...on a desk or similar surface however it is recommended that the unit is wall mounted to achieve a more professional installation and reduce the risk of accidental knocks and other damage that can happ...

Страница 10: ...s The sequence below is based on an access point having the factory default settings If the IP address settings of the access point have been changed then care will need to be taken when setting up th...

Страница 11: ...IP subnet as the access point for the configuration A suitable IP address for the PC is 192 168 1 10 The subnet mask value is 255 255 255 0 The Default gateway and DNS settings can be left blank at t...

Страница 12: ...inistrator Settings screen The access point will need to be reset after changing the password If the screen shows a message Login Error then use the Back button of the browser to return to the log in...

Страница 13: ...nts do not conflict with other WLAN devices The IP addresses of the access point and clients are in the same subnet WEP Encryption is disabled whilst testing the system 12 When the above settings have...

Страница 14: ...ver DNS Settings DHCP Client List Filtering MAC Address Filtering Wireless 11a SSID Channel WEP 802 1x Authentication 11g SSID Channel WEP 802 1x Authentication Status 801 1x Status SNMP SNMP Communit...

Страница 15: ...ord is iktpw See section 6 on page 12 for details Note that the user name cannot be changed from the web or console interfaces Idle Time Out This is the period of inactivity before the access point wi...

Страница 16: ...erver session is started on the remote computer and the IP address of that system noted The upgrade file is loaded into the main directory of the TFTP server Consult the TFTP server documentation for...

Страница 17: ...status screen to ensure that the expected upgrade number is displayed See page 18 for details Note that the IP addresses and other critical settings are all retained following the upgrade No manual in...

Страница 18: ...ether with asset information about the access point Figure 14 Access Point Status Display Screen The above screenshot shows the default settings for the access point together with the system run time...

Страница 19: ...Host Control Protocol server mode to be enabled this mode is probably not desirable for certain corporate networks where a DHCP server may already exist This DHCP enabled mode is intended for small of...

Страница 20: ...displays a list of all the clients that have received an IP address from the access point via the DHCP process see DHCP on page 19 for details of the DHCP server configuration Figure 17 DHCP Client Li...

Страница 21: ...l down box in the upper part of the screen and only one filtering mode can be active at any time Figure 18 MAC Address Filtering Screen Up to 32 separate MAC addresses can be listed in the access cont...

Страница 22: ...key settings including SSID channel power data rate and SSID hiding are presented on this interface Figure 19 802 11a Band Radio Configuration Default Settings The above screen shows the default setti...

Страница 23: ...o With the switch set to Off the radio is disable and will not respond to any signals The default is On Note that this radio must be currently be turned off when the access point is used in Spain Gree...

Страница 24: ...two Authentication modes and if WEP is required then one of these modes must be selected The options are Open System and Shared Key All stations on the network must use the same authentication type I...

Страница 25: ...an unauthorized state that allows the client to send only an EAP start message The AP replies with an EAP request identify message to obtain the clients identity The clients EAP response packet contai...

Страница 26: ...802 11g b Configuration Screen Channel The default channel for the 2 4GHz 802 11b g band is 6 There are only 3 non overlapping channels on this band 1 6 and 11 which means that channel selection is mo...

Страница 27: ...s Auto Always None The Auto mode is the default mode and delivers good performance The Always mode permanently enables the protection mode and can impact throughput The None mode permanently disables...

Страница 28: ...e screen also shows the number of transmitted and received bytes fro the session These columns can be sorted into low or high ordering by clicking on the column heading MAC Address State Tx Bytes etc...

Страница 29: ...y string it is not possible to manage the device This screen enables changes of community string value The default SNMP mode is Enabled Figure 25 SNMP Community Configuration Item This value is used a...

Страница 30: ...tions are specified here Multiple addresses can be configured to ensure that the trap message has a better probability of being received Community This is the community string for the SNMP Manager See...

Страница 31: ...ess Status menu option to identify the connected clients see page 28 for details This will list all clients associated with the access point 2 Check the IP address SSID and channel settings on the cli...

Страница 32: ...of each user as all users share the same aggregate bandwidth of approx 20Mbps for the 802 11g and 802 11a wireless networks The access point can store up to 255 MAC addresses but the suggested maximum...

Страница 33: ...able to comply with FCC regulations for IEEE802 11a Transmit Power 802 11a 200mW 23dBm Full 100mW 20dBm 50mW 17dBm 20mW 13dBm 10mW 10dBm Transmit Power 802 11b g 100mW 20dBm Full 50mW 17dBm 20mW 13dBm...

Отзывы: