


http://www.tyan.com
41
Chapter 3: BIOS Setup
3.1 About the BIOS
The BIOS is the basic input/output system, the firmware on the motherboard that
enables your hardware to interface with your software. The BIOS determines what a
computer can do without accessing programs from a disk. The BIOS contains all
the code required to control the keyboard, display screen, disk drives, serial
communications, and a number of miscellaneous functions. This chapter describes
the various BIOS settings that can be used to configure your system.
The BIOS section of this manual is subject to change without notice and is provided
for reference purposes only. The settings and configurations of the BIOS are
current at the time of print and are subject to change, and therefore may not match
exactly what is displayed on screen.
This section describes the BIOS setup program. The setup program lets you modify
basic configuration settings. The settings are then stored in a dedicated, battery-
backed memory (called NVRAM) that retains the information even when the power
is turned off.
To start the BIOS setup utility:
1.
Turn on or reboot your system.
2. Press
<
Del>
or <
F2
> during POST (
Del
on remote console) to start the BIOS
setup utility.
3.1.1 Setup Basics
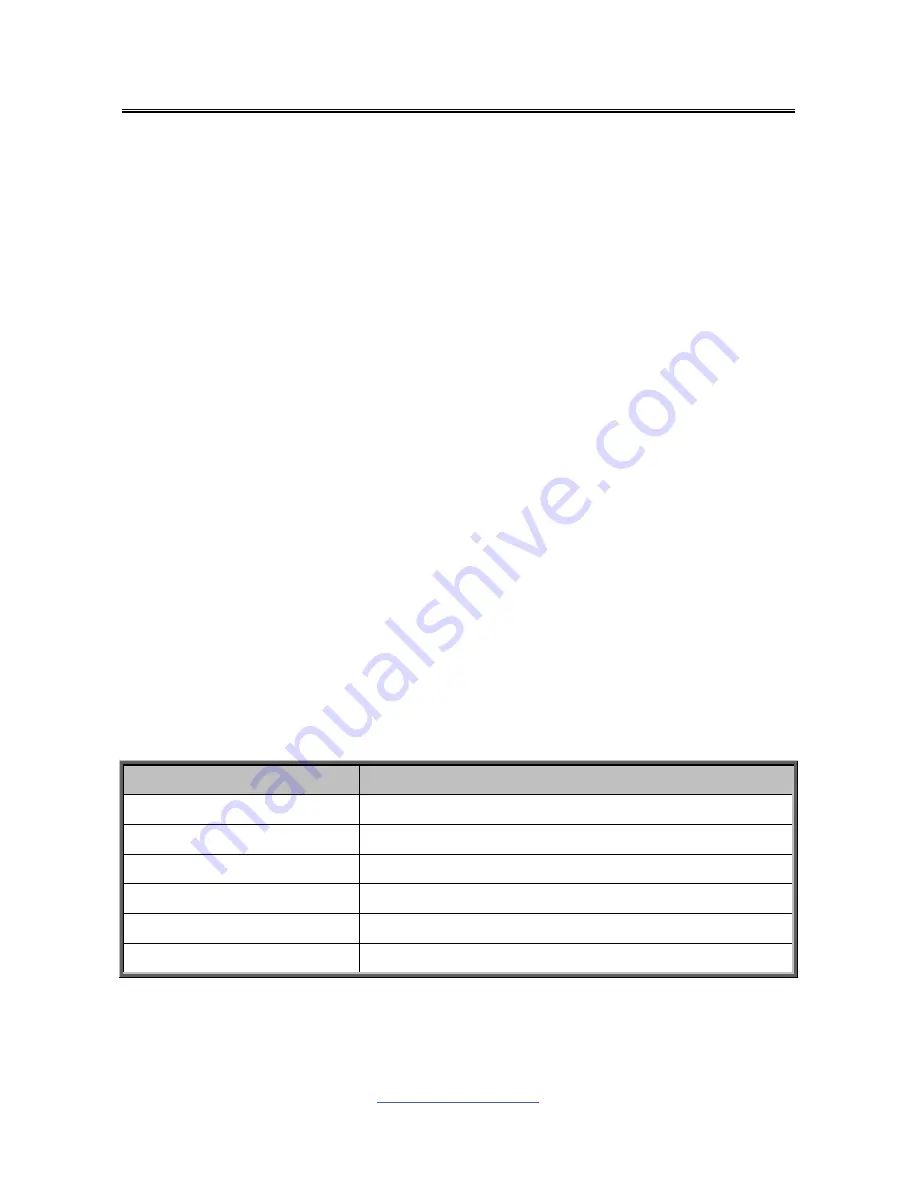
The table below shows how to navigate in the setup program using the keyboard.
Key
Function
Left/Right Arrow Keys
Change from one menu to the next
Up/Down Arrow Keys
Move between selections
Enter
Open highlighted section
PgUp/PgDn Keys
Change pages
+/- Change
options
ESC Exit
Содержание S5535
Страница 2: ...http www tyan com 2 ...
Страница 11: ...http www tyan com 11 2 2 Block Diagram S5535 Block Diagram ...
Страница 12: ...http www tyan com 12 2 3 Mainboard Mechanical Drawing ...
Страница 15: ...http www tyan com 15 J15 J16 J20 J77 J17 J83 FP AUDIO 1 ...
Страница 19: ...http www tyan com 19 J31 J27 J4 DBG HD1 ...
Страница 21: ...http www tyan com 21 J2 J1 ...
Страница 26: ...http www tyan com 26 6 Close the CPU socket cover 7 Press the socket lever down to lock the CPU in place ...
Страница 28: ...http www tyan com 28 3 Secure the heat sink screws 4 Connect the fan cable to complete the installation ...
Страница 31: ...http www tyan com 31 ...
Страница 34: ...http www tyan com 34 DIMM Location ...
Страница 62: ...http www tyan com 62 3 3 11 1 Sensor Data Register Monitoring Read only ...
Страница 92: ...http www tyan com 92 NOTE ...


