background image

2

INFORMATION AND WARNINGS

PLEASE READ THIS OWNER'S MANUAL THROUGH CAREFULLY BEFORE ASSEMBLING,
USING AND SERVICING THE TREADMILL. FOLLOW THE INSTRUCTIONS DESCRIBED IN THIS
MANUAL CAREFULLY.

THE EQUIPMENT HAS BEEN DESIGNED FOR USE AT HOME AND FOR INSTITUTIONAL
REHABILITATION. PLEASE NOTE THAT THE WARRANTY DOES NOT COVER DAMAGE DUE
TO NEGLIGENCE OF ADJUSTMENT OR MAINTENANCE INSTRUCTIONS DESCRIBED IN THIS
MANUAL. PLEASE PAY PARTICULAR ATTENTION TO THE NOTES REGARDING LUBRICATION
AND ADJUSTMENT OF THE RUNNING BELT.

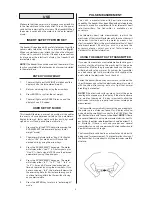
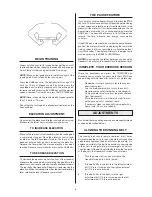
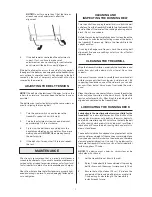
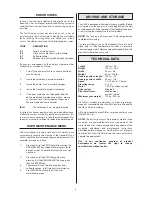
The figures referred to in the text are in the back fold.

Before connecting the device to a power source make sure that the local voltage matches that which
is indicated on the type plate (at the lower right front corner). The device operates on 230 V voltage.
Please note that the device's maximum power consumption is 10 A. The device may only be plugged
into an earthed socket.  Never use extension cords between the treadmill and your wall outlet.

Outlets, that service multiple appliances, or have fluctuating voltage of more than 5 %, may result in
erratic performance or cause damage to treadmill electronics. Using electrical power other than that
which has been specified in this manual, will ultimately void any warranty, implied or otherwise.

*

Before you start using the treadmill, make sure that it functions correctly in every way. Do not use a faulty
device.

*

Do not attempt any servicing or adjustment other than those described in this manual. The given
instructions must be followed carefully.

*

Before operating the treadmill familiarize yourself with the adjustments, displays and keys.

*

Never operate with the dust or side covers removed.

*

Make sure that the treadmill is unplugged and turned off before beginning any assembly or maintenance
procedures.

*

Always unplug the treadmill from the electrical outlet after each training session.

*

Do not pull the treadmill by its power cord.

*

Do not use outdoors.

*

Place the treadmill on a firm, level and protected surface. Allow 120 cm or 4 feet of clearance behind
the treadmill and 60 cm or 2 feet on either side and in front of the treadmill.

*

If children are allowed to use the treadmill, they should be supervised and taught to use it properly,
keeping in mind the child's physical and mental development and their personality.

*

This treadmill is equipped with a cord having an equipment earthed connector and an earthed plug. Do
not modify the plug provided with the treadmill in any way. If it will not fit your outlet, have a proper outlet
installed by a person familiar with the maintenance of electromechanical devices and authorized under the
laws of the country in question (or otherwise) to carry out maintenance and repair work.

*

Do not apply silicone as it will damage the running deck.

NOTE!

*

Before you start any training, consult a physician to check your state of health.

*

If you experience nausea, dizziness or other abnormal symptoms while exercising, stop your workout at
once and consult a physician.

*

Only one person may use the treadmill at a time.

*

Always use the handlebar when stepping on or off the treadmill and when changing speed. Do not jump
off the running belt when it is moving.

*

Keep hands clear of any moving parts. Never place hands, feet or any other objects under the tredmill.

*

Wear appropriate clothing and shoes when exercising. Make sure your shoelaces are properly tied. To
avoid injury and unnecessary wear on your treadmill, be sure your shoes are free of any debris such as
gravel and small pebbles.

*

Always clip the cord attached to the safety tether key to a part of your clothing so that the key will
be pulled from its place, stopping the treadmill, if necessary.

*

Always strech your muscles prior to and following any exercise program.

*

The treadmill must not be used by persons weighing more than 110 kg.

Содержание J 440

Страница 1: ...P 16 22 NL GEBRUIKSAANWIJZING P 23 29 I MANUALE D USO P 30 36 E MANUAL DEL USUARIO P 37 43 S BRUKSANVISNING S 44 50 FIN K YTT OHJE S 51 57 ELECTRONIC TREADMILL J 440 SERIAL NUMBER SERIENNUMMER NUMERO...

Страница 2: ...dmill from the electrical outlet after each training session Do not pull the treadmill by its power cord Do not use outdoors Place the treadmill on a firm level and protected surface Allow 120 cm or 4...

Страница 3: ...andlebar Thread the connected cable inside the hole in the sidecover and push the cover plug on the through hole so that the cable will not be damaged fig 5 LIFT CABLE Lift and tilt the treadmill on i...

Страница 4: ...es depending on the set pause time out duration This function allows you to pause the treadmill for some minutes and then continue your workout without losing the numerical data If the STOP key is pre...

Страница 5: ...ed to an active state only when it is being used for measurement To prevent malfunctioning of the transmitter it is important to dry the electrodes carefully after use USE Make sure that the power cor...

Страница 6: ...ause time out duration To continue exercising press the HARE key The treadmill will return to its last speed and resume the time distance and energy consumption counters If the STOP key is pressed twi...

Страница 7: ...elt carefully by hand to clean the entire inside face Loosen the belt adjusting screws at the back of the treadmill if necessary Return the treadmill into the upright position If running belt edges ar...

Страница 8: ...lt finding system in order that faults can be found and corrected as quickly as possible The fault finding system obviously does not cover all possible faults but it does help to identify the most lik...

Страница 9: ...reich neben und vor mindestens 60 cm und hinter mindestens 200x100 cm dem Laufbandtrainer frei ist Wenn Sie Kinder an das Trainingsger t lassen m ssen Sie deren geistige und k rperliche Entwicklung un...

Страница 10: ...ommende Flachkabel mit dem aus der Seitenabdeckung vorne rechts kommenden Flach kabel verbinden Das berstehende Kabel in die ffnung der Seitenabdeckung vorsichtig einf hren und die ffnung mit der Gumm...

Страница 11: ...rden Nach erneutem Dr cken der STOP Taste oder nach Ablauf der vorprogrammierten Speicherzeit zeigt die Anzeige zwar weiterhin die erzielten Trainingswerte an das Training kann aber nicht mehr von die...

Страница 12: ...rprogrammiert kann das Training innerhalb von 4 Minuten mit den bis dahin gespeicherten Werten fortgesetzt werden 5 Zum Schluss ENTER dr cken wodurch die Funktion K RPERGEWICHT wieder aktiviert wird H...

Страница 13: ...n gespeichert Innerhalb dieser Zeit kann das Training mit den bis dahin gespeicherten Werten fortgesetzt werden Zum Fortsetzen die HASEN Taste dr cken Das Training geht danach mit der gleichen Geschwi...

Страница 14: ...dtrainer ziehen Das Ger t auf die Seite legen Die Innenfl che des Laufbandes mit einer rauhen B rste reinigen Auf keinen Fall L sungsmittel verwenden Das Band mit den H nden weiterschieben bis die ges...

Страница 15: ...e ist jetzt in der Betriebsart ANWENDEROPTIONEN 2 Die STOP Taste niedergedr ckt halten und gleichzeitig erstens die SCANSELECT Taste und zweitens die ENTER Taste dr cken 3 In der Anzeige werden jetzt...

Страница 16: ...e laisser un enfant utiliser l appareil prenez toujours en consid ration l tat de son d veloppement physique et mental ainsi que son caract re Donnez l enfant tous les conseils n cessaires pour une bo...

Страница 17: ...u du carter et poussez le cache sur le trou afin que le c che ne soit pas endommag fig 5 CABLE DU MECANISME DE LEVAGE Basculez l appareil sur son flanc droit Faites passer le c ble du m canisme de lev...

Страница 18: ...et l inclinaison du tapis choisies restent en m moire entre 1 et 5 minutes suivant le choix effectu Apr s un second appui sur STOP ou si le temps choisi pour le maintien en m moire est d pass seules l...

Страница 19: ...exercice pendant par ex 4 minutes vous choisirez to 4 5 Appuyez enfin sur ENTER L unit des compteurs se retrouvera alors en Entr e du poids de l utilisateur MESURE DU POULS L unit des compteurs du J 4...

Страница 20: ...e maintien en m moire est d pass avant que vous n ayez repris votre exercice seules les valeurs enregistr es au cours de l exercice seront conserv es par contre tous les choix entr s par l utilisateur...

Страница 21: ...pareil dans sa position normale Si les bords du tapis sont us s v rifiez que le tapis tourne bien en ligne Si les bords du tapis sont en tr s mauvais tat prenez contact avec votre vendeur NETTOYAGE DE...

Страница 22: ...ous voulez conna tre ces valeurs par ex dans le cadre de mesures d entretien proc dez comme suit 1 Appuyez sur STOP et en m me temps sur SCAN SELECT l unit des compteurs doit tre en Entr e du poids de...

Страница 23: ...at u met de training begint of de looptrainer in orde is Gebruik de looptrainer nooit indien deze defect is Gebruik de trainer alleen indien de behuizing en de beschermkappen correct zijn aangebracht...

Страница 24: ...NET Sluit de contrastekker van het elektriciteitssnoer aan op de stekker aan de voorzijde van de trainer naast de hoofdscha kelaar Controleer voordat u de trainer inschakelt aan de hand van het typepl...

Страница 25: ...Stopt de motor en daarmee de J 440 Door deze toets eenmaalintedrukken wordtde pauze stand automatisch ingesteld Alle trainings gegevens inclusief de huidige snelheid en loophoek worden tijdelijk in he...

Страница 26: ...gelijk om binnen die 4 minuten de training te hervatten zonder dat de trainingsgegevens verloren gaan 5 Druk vervolgens de ENTER toets weer in om naar de beginstand ENTER WEIGHT terug te gaan HARTSLAG...

Страница 27: ...m de band stil te zetten De waarden en resultaten van de training blijven voor een bepaalde tijd in het geheugen De aanwijzingen voor het instellen van deze tijd vindt u onder VOORKEURINSTELLINGEN Wan...

Страница 28: ...plosmiddelen of bijtende schoonmaakmiddelen Om de gehele binnenzijde schoon te maken draait u de loopmat voorzichtig met de hand door Indien noodzakelijk kunnen de stelschroeven aan de achterzijde van...

Страница 29: ...uur en de op de band afgelegde afstand worden automatisch in het geheugen van het bedienings paneelopgeslagen Dezegegevenszijnbelangrijkinverband met het onderhoud U kunt deze gegevens op de volgende...

Страница 30: ...usare l attrezzo si deve sempre tener conto del loro sviluppo fisico e mentale e del loro temperamento Devono essere istruiti al corretto uso dell attrezzo e controllati Questo attrezzo non un giocat...

Страница 31: ...mano destro fig 5 CAVO DI INNALZAMENTO Girate il treadmill sul lato destro Posizionate il cavo come mostrato in fig 6 e attaccate il filo interno al supporto del pistone fig 7 Regolate la tensione del...

Страница 32: ...minuti dipende dalla durata della pausa Questo permette di fermare il tappeto per alcuni minuti e quindi riprendere il vostro allenamento senza perdere i dati numerici Se STOP premuto due volte o qua...

Страница 33: ...freccia quello desiderato 3 Premere SCAN SELECT Lo schermo mostra Aud 1 segnale acustico acceso o Aud 0 segnale acustico spento Scegliere con i tasti freccia il parametro desiderato 4 Premere SCAN SEL...

Страница 34: ...in impostazione peso premendo RESET o ENTER ATTENZIONE Non togliete la chiave di sicurezza durante una pausa perch questo interrompe i conteggi FINE DELL ALLENAMENTO Impugnate il corrimano e premete T...

Страница 35: ...rottura del nastro della piattaforma nonch del motore La frequenza della lubrificazione comunque dipendente anche dal peso e dallo stile di corsa dell utente Un peso corporeo abbondante e le basse vel...

Страница 36: ...zzo in luogo non umido e con minori variazioni di temperatura possibili protetto dalla polvere Staccate sempre la spina quando non in uso DATI TECNICI Lunghezza 150 cm Altezza 125 cm Larghezza 90 cm P...

Страница 37: ...detr s de la m quina y unos 60 a cada lado y delante Los padres u otros responsables de los ni os deben saber que la curiosidad y ganas de jugar naturales en los ni os pueden llevar a situaciones y c...

Страница 38: ...el manillar Enchufe el cable conectado en la cavidad de la tapa lateral y empuje el echufe cubierto en la cavidad alimetadora para que as el cable no de da e fig 5 CABLE DE INCLINACION Levante la m qu...

Страница 39: ...diendo de la duraci n de la pausa Esta funci n le permite hacer una pausa en el ejercicio durante algunos minutos y continuarlo despu s sin perder los datos guardados en la memoria Si pulsa la tecla S...

Страница 40: ...la tecla ENTER MEDIDA DEL PULSO La J 440 se fabrica con funci n de medida del pulso Quiere decirse que la m quina lleva un receptor interno compatible con los transmisores de pulso Polar El transmiso...

Страница 41: ...rcicio pulse una vez la tecla STOP Entonces se para la cinta Todos los datos del ejercicio p ej velocidad e inclinaci n de la m quina se salvan temporalmente en la memoria del contador de 1 a 5 minuto...

Страница 42: ...se disolventes Gire con cuidado la cinta a mano hasta limpiar toda su parte interior Si fuera necesario afloje los pernos de ajuste situados detr s de la m quina Vuelva a poner la m quina derecha Si o...

Страница 43: ...ida Si quiere comprobar los valores registrados por ejemplo durante el montaje haga lo siguiente 1 Cuando la pantalla del contador est en modo enter weight pulse al mismo tiempo las teclas STOP y SCAN...

Страница 44: ...cm framf r och p sidorna av och minst 200x100 cm bakom redskapet Om barn f r anv nda redskapet m ste f r ldrarna eller andra ansvariga personer beakta barnens psykiska och fysiska utveckling och fram...

Страница 45: ...n den h gra sidok pan i den vre delen som kommer ut fr n det h gra handtaget Tr d den anslutna kabeln i h let p sidok pan och s tt pluggen i h let s att kabeln inte skadas bild 5 GASFJ DERNS LYFTMEKAN...

Страница 46: ...f rinst llda v rdena Vid f rnyat tryck p STOP eller efter att den f rprogram merade tiden f rflutit visar m taren fortfarande tr nings v rdena men tr ningen kan inte l ngre forts ttas fr n dessa v rde...

Страница 47: ...nen i minnet V lj nskad tid med pilknapparna Om du t ex v ljer to 4 kan tr ningen forts ttas inom 4 minuter utan att de v rden som finns i minnet utraderas 5 Tryck till slut p ENTER M taren terg r d t...

Страница 48: ...den distansen och energif rbrukningen N r den f rprogrammerade minnestiden har g tt forts tter displayen visserligen att visa de ackumulerade v rden men tr ningen kan inte l ngre forts ttas fr n dessa...

Страница 49: ...h r tillr ckligt sp nnt SM RJNING AV L PBAND OBS Sm rjningen r den allra viktigaste av l pbandets service tg rder Sm rjning r absolut n dv ndigt alltid n r du m rker att l pbandets friktion tydligt ka...

Страница 50: ...t i m tarens minne Om du vill kontrollera dessa v rden t ex f r service g r s h r 1 N r signallampan vid texten WEIGHT t nds tryck samtidigt p STOP och SCAN SELECT M taren r nu i funktionen ANV NDAROP...

Страница 51: ...iten ett laitteen eteen ja sivuille j v hint n 60 cm ja taakse 120 cm vapaata tilaa Mik li lasten annetaan k ytt laitetta vanhempien tai muiden vastuullisten tulee ottaa huomioon lasten sek henkinen e...

Страница 52: ...aapeliin Pujota yhdistetty kaapeli sivukatteen aukosta si s n ja paina l pivientisuoja paikalleen aukon p lle jottei kaapeli vahingoittuisi laitetta k ytett ess kuva 5 KAASUJOUSI K nn juoksumatto oike...

Страница 53: ...vot sek k ytetty nopeus ja kaltevuuskulma s ilyv t mittarin muistissa 1 5 minuuttia riippuen k ytt j asetustoiminnossa valitsemastasi ajasta jolloin jatkaessasi harjoittelua arvojen laskenta jatkuu ka...

Страница 54: ...m to 4 jatkaessasi harjoittelua seuraavan nelj n minuutin aikana mittari jatkaa arvojen laskemista karttuneista arvoista 5 Paina lopuksi ENTER n pp int jolloin mittari palautuu k ytt j painon asetus t...

Страница 55: ...atkaa arvojen laskemista karttuneista arvoista yl s p in Kun haluat jatkaa harjoittelua paina J NIS n pp int jolloin matto jatkaa py rimist samalla nopeudella kuin en nen keskeytt mist Ajan matkan ja...

Страница 56: ...sen reunalevyn varaan Puhdista maton sis pinta karkealla harjalla l k yt liuottimia Py rit mattoa k dell jotta saat puhdistettua maton koko sis pinnan L ys tarvittaessa maton kireydens t ruuveja Nosta...

Страница 57: ...uttaa tunnistamaan todenn k isimpi pitk aikaisen k yt n seurauksena ilmene vi vikoja T ll in mittarin n yt lle ilmestyy jokin seuraavis ta vikakoodeista KOODI SELITYS E 1 Nopeusanturi ei tunnista mato...

Страница 58: ...58...
Страница 59: ...6 403 4017 E 69 503 125 89 A 70 503 420 A 71 501 104 74 A 72 M2x5 DIN 7985 C 73 403 4018 E 74 2x10 DIN 94 C 75 103 4013 C 76 503 1014 A 77 173 4027 L A 78 523 4017 C 79 M8x65 DIN 912 C 80 103 4007 C 8...

Страница 60: ...T U N T U R I O Y L T D P O BOX 750 FIN 20361 Turku Finland Tel 358 0 2 513 31 Fax 358 0 2 513 3323 www tunturi com...

Отзывы: