18
in chapter 4 for details.
2) Please check the loads, wiring, ventilation, utility, battery and so on after the fault occurs. Don’t try
to turn on the UPS again before solving the problems. If the problems can’t be fixed, please contact
the distributor or service people immediately.
3) For emergency case, please cut off the connection from utility, external battery, and output
immediately to avoid more risk or danger.
12. Operation of changing battery numbers
1) This operation is only available for professional or qualified technicians.
2) Turn off the UPS. If the load couldn’t be cut off, you should remove the cover of maintenance
bypass switch on the rear panel and turn the maintenance switch to “BPS” position first.
3) Switch off the input breaker, and switch off the battery breaker (only available for long-run model).
4) Remove the cabinet, and then modify the jumper on the control board to set the battery numbers
(refer to NOTE below). Then disconnect battery wire for standard model and modify the battery
pack carefully. After complete the changes, put the cabinet back.
NOTE
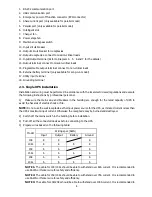
: JS3 setting on the control board: please shorts the Pin1 & Pin2 for 18 pcs batteries; shorts
the Pin3 & Pin4 for 19 pcs batteries; and shorts the Pin5 & Pin6 for 20 pcs batteries.
5) Switch on the input breaker and the UPS will enter Bypass mode. If the UPS is in maintenance
Bypass mode, turn the maintenance switch to “UPS” position and then turn on the UPS.
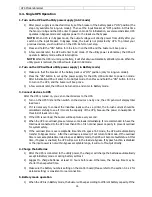
3-5. Parallel Operation
1. Parallel system initial startup
First of all, please make sure all of the UPSs are parallel models and have the same
configuration.
1) Turn on each UPS to AC mode respectively (Refer to section 3-4(1)). Then, measure
the output voltage of each UPS to check if the voltage difference between actual
output and setting value is less than 1.5V (typical 1V) with multimeter. If the
difference is more than 1.5V, please calibrate the voltage by configuring inverter
voltage adjustment (Refer to Program 15, section 3-7) in LCD setting. If voltage
difference remains more than 1.5V after calibration, please contact your local
distributor or service center for help.
2) Calibrate the output voltage measurement by configuring output voltage calibration
(Refer to Program 16, section 3-7) in LCD setting to make sure the error between real
output voltage and detected value of UPS is less than 1V.
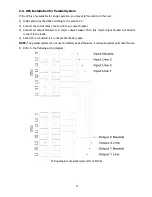
3) Turn off each UPS (Refer to section 3-4(7.)). Then, follow the wiring procedure in
section 2-4.
4) Remove the cover of parallel share current cable port on the UPS, connect each UPS
one by one with the parallel cable and share current cable, and then screw the cover
back.
5) Turn on the parallel system in AC mode:
a)
Turn on the input breaker of each UPS. After all UPSs enter to bypass mode,
measure the voltage between output L1 of each UPS and output L2 of each UPS. If
these two voltage differences are all less than 1V, that means all connections are
correct. Otherwise, please check if the wirings are connected correctly.
b)
Turn on the output breaker of each UPS.
c)
Turn on each UPS in turns. After a while, the UPSs will enter to AC mode
synchronously and then, the parallel system is completed.
6) Turn on the parallel system in Battery mode:
a)
Turn on the battery breaker (only available in long-run model) and output breaker of
each UPS.
NOTE: It’s not allowed to share one battery pack for long-run UPSs in parallel system.
Содержание NEWTECH PRO
Страница 2: ...1 ...
Страница 35: ...37 100303 XXG ...

