background image

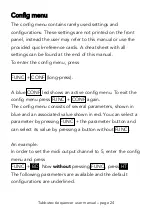
Config menu

The config menu contains rarely used settings and
configurations. These settings are not printed on the front
panel, instead the user may refer to this manual or use the
provided quick-reference cards. A cheat sheet with all
settings can be found at the end of this manual.
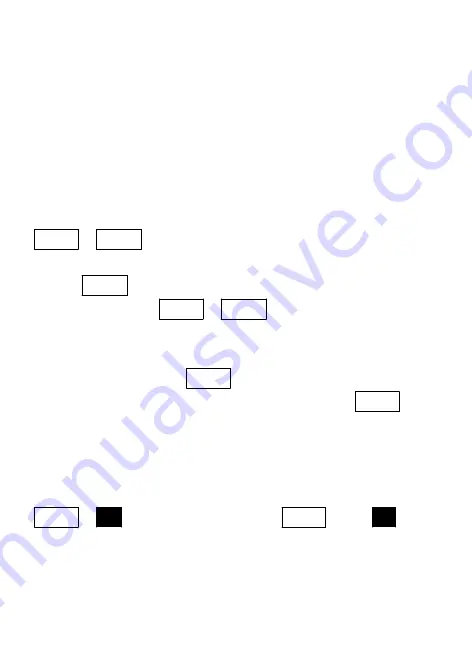
To enter the config menu, press

FUNC + CONF (long-press).

A blue CONF led shows an active config menu. To exit the
config menu press FUNC + CONF again.
The config menu consists of several parameters, shown in
blue and an associated value shown in red. You can select a
parameter by pressing FUNC + the parameter button and
can select its value by pressing a button without FUNC .

An example:
In order to set the midi output channel to 5, enter the config
menu and press

FUNC +

BD

. Now

without

pressing FUNC , press

HT

The following parameters are available and the default
configurations are underlined.

Tubbutec 6equencer user manual – page 24

Содержание 6equencer

Страница 1: ...Tubbutec 6equencer User manual...

Страница 2: ...ping or via midi Clear steps while playing Pattern length can be set individually Copy Paste and Clear patterns in song mode All features can be used while sequences are playing 8 trigger outputs with...

Страница 3: ...This page intentionally left blank not really blank because this text is here...

Страница 4: ...ern View 12 Play directions 12 Recording steps live TAP 13 CLEAR steps 14 MUTE instruments 14 Probability control 15 Song View 16 Changing the current pattern 16 Programming a new song 17 Copy and pas...

Страница 5: ...heat sheet 30 6equencer config menu overview 32 1U Version 32 3U Version 32 Technical specifications Output trigger gate voltage 5V Clock and reset input voltage 3 5V Midi TRS type A Supply voltage 12...

Страница 6: ...ght instrument channels and is pattern based Each pattern can have up to 16 steps and 16 different patterns can be programmed Multiple patterns can be chained to a song Each song consists of up to 32...

Страница 7: ...eps can be cleared while playing You can record a new song while another is playing and start the new song in sync This allows very flexible and intuitive live performances Patterns can also be copied...

Страница 8: ...this manual speaks of a red or blue led it may look purple depending on which function is selected In pattern view each of the 16 buttons is a specific step in song view each is a specific pattern By...

Страница 9: ...rently from the rest when using midi input and output see Midi It can also be used to alter the pulse lengths of other instruments 6equencer can be clocked using an analogue clock or trigger or altern...

Страница 10: ...blink in red if the step is off or alternatively if a step is on the red led briefly turns off Selecting the active instrument The currently active instrument is indicated by a blue led To change the...

Страница 11: ...em into another instrument or into another pattern It is also possible to copy and paste whole patterns in Song View See chapter Song View To copy the currently visible steps press FUNC COPY long pres...

Страница 12: ...c Pattern changes in song mode also use this underlying position so a pattern change always occurs correctly in sync Forward and Backward modes are self explaining You can switch between them by press...

Страница 13: ...ording steps live TAP While the sequencer is running TAP mode can be used to record steps live To enter TAP mode press FUNC TAP The instrument buttons can now be used to record steps When pressing the...

Страница 14: ...enter MUTE mode press FUNC MUTE The blue MUTE led will light up In mute mode the 8 instrument s leds will light up in red when active or be off if the instrument is muted Pressing each of the instrum...

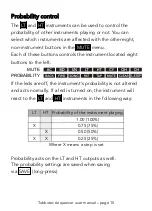
Страница 15: ...buttons to the left If the leds are off the instrument s probability is not altered and acts normally If a led is turned on the instrument will react to the LT and HT instruments in the following way...

Страница 16: ...button led visualizes one of 16 patterns Patterns which are part of the song will light up in red The current pattern is shown blinking in red and switching back to Pattern View will show this patter...

Страница 17: ...em and you can add a pattern multiple times Once you release all buttons the new song is programmed After the current pattern is finished playing the new song will start in sync The patterns used in t...

Страница 18: ...ess FUNC to exit song recording method 2 After the current pattern is finished playing the new song will start in sync The patterns used in the song are shown in red and the currently playing pattern...

Страница 19: ...to paste the copied pattern into different patterns as long as PASTE mode is active Exit PASTE mode by pressing FUNC again Clear patterns In order to clear complete patterns press FUNC CLEAR whilst in...

Страница 20: ...as a Midi interface 6equencer can also be used as an 8 channel midi interface to output triggers or gates This can simply be achieved by sending Note On and Note Off messages for the instruments see c...

Страница 21: ...o 1 8th the pulse will be 1 16th long Finally the Gate setting turns on the output when a step is set and turns it off when a step is not set This mode can be used to control envelopes for example Acc...

Страница 22: ...he second 6equencer to LINK IN of the third and so on IMPORTANT DO NOT connect the last 6equencer in the chain to the first In the config menu see below you can select serial or parallel mode or turn...

Страница 23: ...ted so more instruments can be used in parallel Combining LINK modes Link modes may be combined to create combinations of serial and parallel sequences Note that in both modes pattern lengths and song...

Страница 24: ...shows an active config menu To exit the config menu press FUNC CONF again The config menu consists of several parameters shown in blue and an associated value shown in red You can select a parameter b...

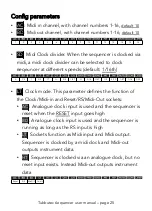
Страница 25: ...AC Analogue clock input is used and the sequencer is reset when the RESET input goes high BD Analogue clock input is used and the sequencer is running as long as the RS input is high LT Sockets funct...

Страница 26: ...ger lengths for accent OH Brightness The brightness of the leds can be adjusted in 6 levels AC CY Default is SD CH Link mode This parameter defines how 6equencer treats other 6equencers linked via the...

Страница 27: ...f Clock Mode is set to Midi I O Otherwise the connector is used as clock input and Midi reception is disabled Note On 6equencer reacts to Note On messages on the Midi In channel with the following not...

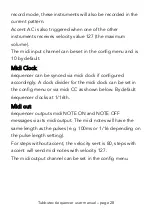
Страница 28: ...ngly A clock divider for the midi clock can be set in the config menu or via midi CC as shown below By default 6equencer clocks at 1 16th Midi out 6equencer outputs midi NOTE ON and NOTE OFF messages...

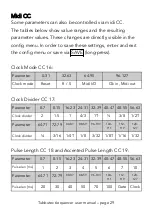
Страница 29: ...t R S Midi I O Clk in Midi out Clock Divider CC 17 Parameter 0 7 8 15 16 23 24 31 32 39 40 47 48 55 56 63 Clock divider 2 1 5 1 4 3 1T 3 8 1 2T Parameter 64 71 72 79 80 87 88 59 96 103 104 111 112 119...

Страница 30: ...nt step FUNC CLEAR Switch to song mode FUNC SONG Copy instrument track FUNC COPY long press Paste instrument track FUNC PASTE long press Song Mode specific functions Currently playing pattern led blin...

Страница 31: ...to tap Save patterns song FUNC SAV long press Mute and probability mode Set last Step FUNC L STEP Manual version 1 0 This work is licensed under CC BY NC SA 4 0 To view a copy of this license visit ht...

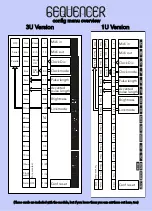
Страница 32: ...k mode Clock Div 2 1 5 1 4 3 1T 3 8 1 2T 3 16 1 4T 1 8 3 32 1 8T 1 16 1 32 for accented OFF 1ms 2ms 3ms 4ms 5ms 6ms 7ms 10ms 20ms 30ms 40ms 50ms 70ms 100ms Clock w Gate Midi in Midi out Pulse length L...

Отзывы: