19
4. POWER-ON UTILITIES
There are three power-on utilities to set up and test the printer hardware. These
utilities are activated by pressing the
FEED
or
PAUSE
button and turning on the
printer power simultaneously. The utilities are listed below:
1. Self test
2. Gap sensor calibration
3. Printer initialization
4.1 Self Test Utility
Install the label first. Press the
FEED
button and then turn on the printer power.
Do not release the
FEED
button until the printer feeds labels. The printer per-
forms the following:
1. Calibrate label pitch
2. Print out thermal print head check pattern
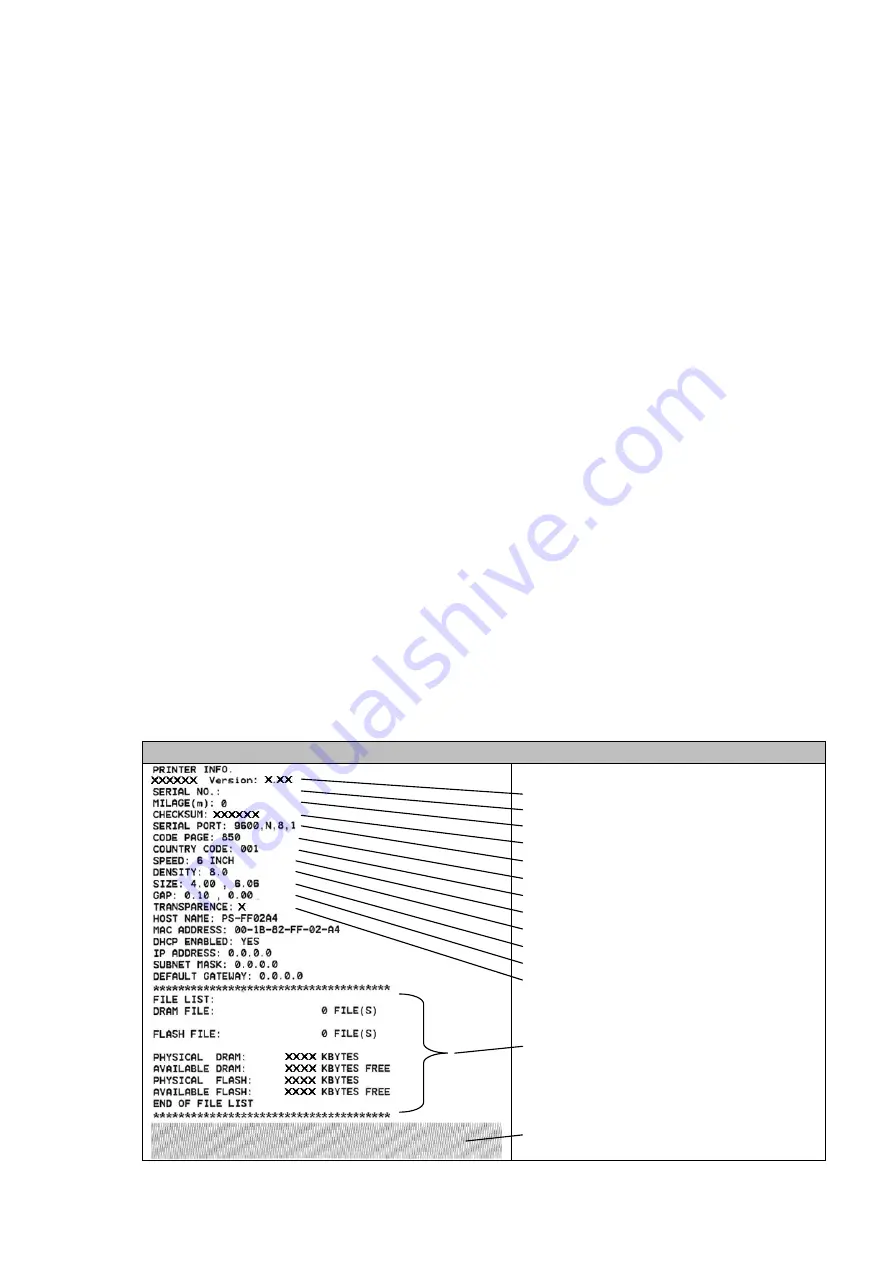
3. Print the internal settings
4. Enter dump mode
To initiate the self test mode, hold down the
FEED
button and activate the printer
power simultaneouly. The printer will calibrate the label length. If the label gap is
not detected within 7", the printer stops feeding labels and the media is regarded
as continuous paper. In self test, a check pattern is used to check the perform-
ance of the thermal print head. Following the check pattern, the printer prints its
internal settings as listed below:
Self-test printout
Model name and F/W version
Serial no.
Printed mileage (meter)
Firmware checksum
Serial port configuration
Code page
Country code
Print speed (inch/sec)
Print darkness
Label size (inch)
Gap distance (inch)
Gap/black mark sensor sensitivity
Numbers of download files
Total & available memory space
Print head check pattern


