- 34 -
6.2 Printer Function
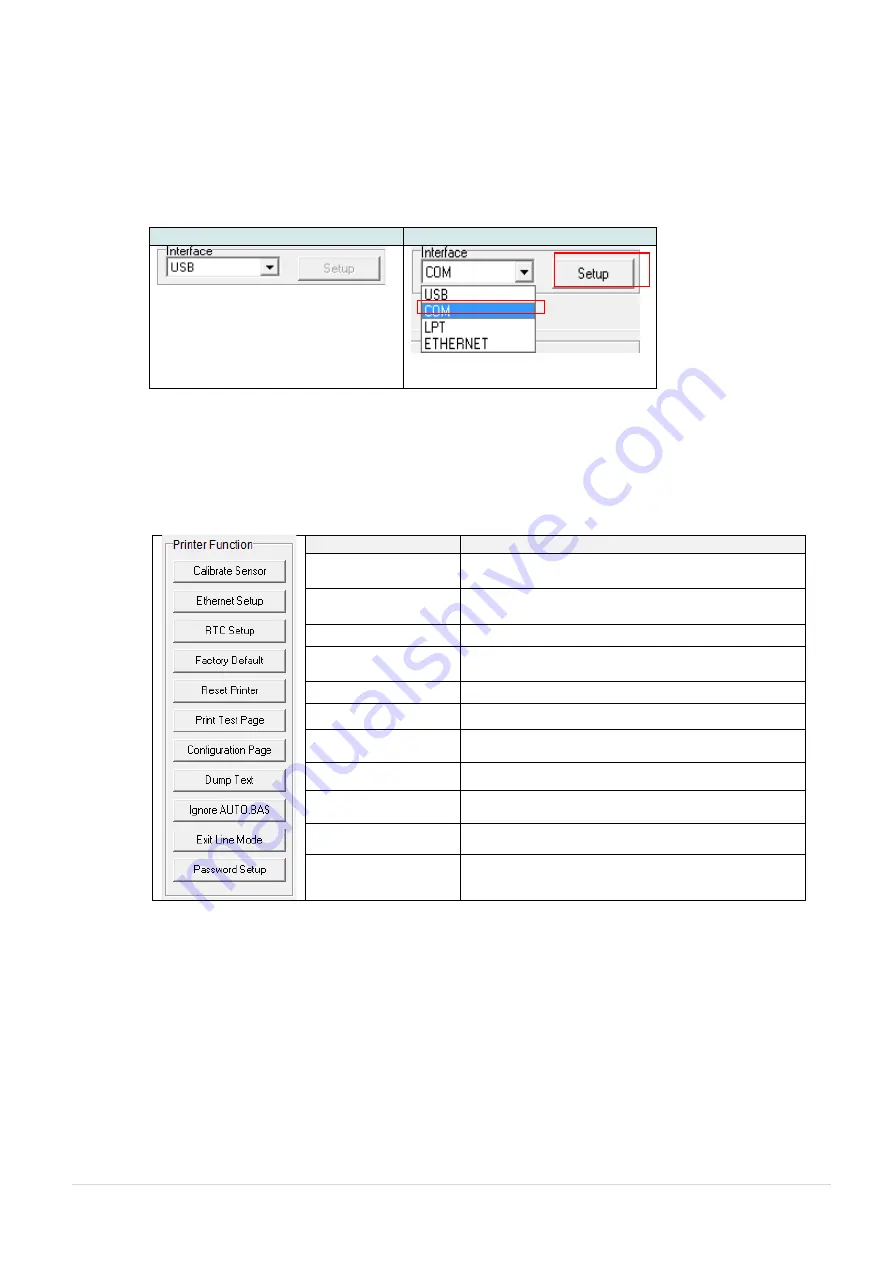
1. Connect the printer and computer with a cable.
2. Select the PC interface connected with bar code printer.
USB cable
Other cable
The default interface setting is USB
interface. If USB interface is
connected with printer, no other
settings need to be changed in the
interface field.
3. Click the “Printer Function” button to setup.
4. The detail functions in the Printer Function Group are listed as below.
Function
Description
Calibrate Sensor
Calibrate the sensor specified in the Printer
Setup group media sensor field
Ethernet Setup
Setup the IP address, subnet mask, gateway for
the on board Ethernet
RTC Setup
Synchronize printer Real Time Clock with PC
Factory Default
Initialize the printer and restore the settings to
factory default.
Reset Printer
Reboot printer
Print Test Page
Print a test page
Configuration Page
Print printer configuration
Dump Text
To activate the printer dump mode.
Ignore AUTO.BAS
Ignore the downloaded AUTO.BAS program
Exit Line Mode
Exit line mode.
Password Setup
Set the password to protect the settings
For more information about Diagnostic Tool, please refer to the diagnostic utility quick start
guide in the CD disk \ Utilities directory.
1
2
Содержание 99-151A001-0002
Страница 1: ...USER S MANUAL MX240P MX340P MX640P Series THERMAL TRANSFER DIRECT THERMAL BAR CODE PRINTER...
Страница 6: ...v Equipment name Type designation Type MX240P nit Restricted substances and its chemical symbols...
Страница 8: ...vii...
Страница 11: ......
Страница 29: ...18 Loading path for ribbon Ink coated outside wound Ink coated inside wound...
Страница 36: ...25 10 Close print head release lever and label guide bar release lever 11 Press the FEED button to test...


