background image


69 

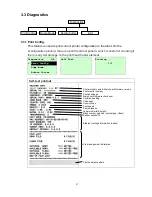
3.3.3 Rotate Cutter


In case paper is jammed in the cutter, this feature can rotate the cutter blade forward 

or reverse direction, which is helpful to remove the jammed paper easily from the 

cutter. 


Diagnostics      3/4    UP:                Fwd. 


  Print Config. 

  DOWN:              Rev.     

  Dump Mode 


Rotate Cutter 

  MENU:             Exit     


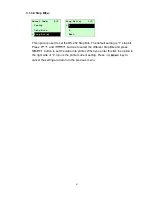
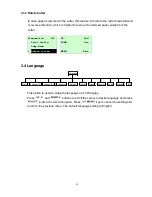
3.4 Language


English

Chinese (TC)

Chinese (SC)

Japanese

Polish

Spanish

Exit

Language

German

Italian

French

Russian


This option is used to setup the language on LCD display. 

Press 

  and 

  buttons to scroll the curser to desire language and press 

  button to select this option. Press 

  key to cancel the setting and 

return to the previous menu. The default language setting is English. 

Содержание 346M Pro

Страница 1: ...USER S MANUAL TTP 2410M Pro 346M Pro 644M Pro TTP 246M Pro 344M Pro THERMAL TRANSFER DIRECT THERMAL BAR CODE PRINTER...

Страница 2: ...se from the Monotype Corporation Windows is a registered trademark of Microsoft Corporation All other trademarks are the property of their respective owners Information in this document is subject to...

Страница 3: ...REQULATIONS FCC CFR Title 47 Part 15 Subpart B 2010 Section 15 107 and 15 109 ICES 003 Issue 4 2004 Class A AS NZS CISPR 22 2009 CLASS A GB 4953 2001 GB9254 2008 CLASS A GB17625 1 2003 A UL 60950 1 2...

Страница 4: ...3 2 LED Indicators 14 2 3 3 Front Panel Keys 15 2 4 Setting Up the Printer 15 2 5 Loading Ribbon 16 2 5 1 Loading Ribbon 16 2 5 2 Remove Used Ribbon 19 2 6 Loading the Media 20 2 6 1 Loading the Media...

Страница 5: ...5 1 Initialization 70 3 5 2 Mileage Info 71 4 Diagnostic Tool 72 4 1 Start the Diagnostic Tool 72 4 2 Printer Function Calibrate sensor Ethernet setup RTC setup 73 5 Setting Ethernet by Diagnostic Ut...

Страница 6: ...codes can be printed in any one of the four directions This printer is built in the high quality high performance MONOTYPE IMAGING True Type font engine and one CG Triumvirate Bold Condensed smooth f...

Страница 7: ...l with back light Control panel with 6 operation buttons Control panel security TCF LED indicators Real time clock Internal Ethernet print server 10 100 Mbps interface USB 2 0 full speed interface Ser...

Страница 8: ...code 2D bar code BITMAP BMP PCX Code 39 Code 93 Code128UCC Code128 subsets A B C Codabar Interleave 2 of 5 EAN 8 EAN 13 EAN 128 UPC A UPC E EAN and UPC 2 5 digits add on MSI PLESSEY POSTNET China POST...

Страница 9: ...model The printer offers the following optional features Product option feature User options Dealer options Factory options USB Host Peel off kit include liner rewind spindle and peel off sensor Inter...

Страница 10: ...644M Pro Economic model TTP 246M Pro TTP 344M Pro 1 4 Print Specifications 1 4 1 Industrial model Print Specifications 203 dpi models 300 dpi models 600 dpi models Print head resolution 203 dots inch...

Страница 11: ...8 ips selectable 2 3 4 5 6 ips selectable inches per second Up to 8 ips Up to 6 ips Max print width 108 mm 4 25 104 mm 4 09 Max print length 2286 mm 90 1016 mm 40 Printout bias Vertical 1 mm max Hori...

Страница 12: ...0 Max 1 854 mm 73 Max 1016 mm 40 Min 5 mm 0 20 Min 5 mm 0 20 Min 5 mm 0 20 Label length peeler mode Max 152 4 mm 6 Min 25 4 mm 1 Label length cutter mode Max 4 064 mm 160 Max 1 854 mm 73 Max 1016 mm 4...

Страница 13: ...86 mm 90 Max 1 016 mm 40 Min 5 mm 0 20 Min 5 mm 0 20 Label length peeler mode Max 152 4 mm 6 Min 25 4 mm 1 Label length cutter mode Max 2 286 mm 90 Max 1 016 mm 40 Min 25 4 mm 1 Min 25 4 mm 1 Gap heig...

Страница 14: ...e printer Please retain the packaging materials in case you need to reship the printer Unpacking the printer the following items are included in the carton One printer unit One Windows labeling softwa...

Страница 15: ...10 2 2 Printer Overview 2 2 1 Front View 1 LED indicators 2 LCD display 3 Front panel buttons 4 Paper exit chute 5 Lower front cover 6 Printer right side cover 1 2 3 4 6 5...

Страница 16: ...d release lever 7 Media guide bar 8 Label roll guard 9 Label supply spindle 10 Ribbon supply spindle 11 Damper 12 Media sensor lock lever 13 Z axis mechanism adjustment knob 14 Print head pressure adj...

Страница 17: ...ailability 1 3 5 4 2 11 6 7 8 10 9 Note 1 SD card slot Ethernet interface and PS 2 interface are standard interfaces for TTP 2410M Pro TTP 346M Pro TTP 644M Pro models Industrial model but optional fo...

Страница 18: ...Transcend Panasonic V1 0 V1 1 microSD 512 MB Panasonic V1 0 V1 1 microSD 1 GB Transcend Panasonic V2 0 SDHC CLASS 4 microSD 4 GB Panasonic V2 0 SDHC CLASS 6 microSD 4 GB Transcend V1 0 V1 1 miniSD 128...

Страница 19: ...on Off The printer power is turned off On The printer power is turned on On Printer is ready Blinking Pause Downloading data into printer Off Printer is ready On CARRIAGE OPEN or CUTTER ERROR Blinking...

Страница 20: ...t cursor located option 2 4 Setting Up the Printer 1 Place the printer on a flat secure surface 2 Make sure the power switch is off 3 Connect the printer to the computer with the provided USB cable 4...

Страница 21: ...16 2 5 Loading Ribbon 2 5 1 Loading Ribbon 1 Open the printer right side cover 2 Push the print head release lever to open the print head mechanism 3 Install the ribbon onto the ribbon supply spindle...

Страница 22: ...tween print head and platen 5 Wrap the ribbon onto the ribbon rewind spindle Wind the ribbon clockwise about 3 5 circles onto the ribbon rewind spindle until it is smooth and properly stretched 6 Clos...

Страница 23: ...18 Loading path for ribbon...

Страница 24: ...Ribbon 1 Break the ribbon between ribbon guide plate and the ribbon rewind spindle 2 Push the ribbon release button to release the ribbon on the ribbon rewind spindle 3 Then slide off the ribbon from...

Страница 25: ...1 Loading the Media 1 Open the printer right side cover 2 Push the print head release lever to open the print head mechanism 3 Move the label roll guard horizontally to the end of label spindle then f...

Страница 26: ...d horizontally to gently fit the width of label roll 3 Label spindle 1 Label spindle Note Replace 3 label supply spindle to fit the 1 core label by removing two screws 5 Pull label roll leading edge f...

Страница 27: ...abel The sensor location is marked by a triangle mark at the sensor housing The media sensor position is moveable please make sure the gap or black mark is at the location where media gap black mark w...

Страница 28: ...head mechanism Make sure the latches are engaged securely 9 Using the front display panel set the media sensor type and calibrate the selected sensor Please refer to section 3 1 2 Note Please calibrat...

Страница 29: ...l entrance chute 4 Pull fan fold label leading edge forward through the media guide bar damper media sensor and place the label leading edge onto the platen roller 5 Adjust the label guide by sliding...

Страница 30: ...25...

Страница 31: ...to fit the width of label roll 5 Pull label roll leading edge forward through the media guide bar damper media sensor and place the label leading edge onto the platen roller 6 Adjust the label guide...

Страница 32: ...bel is properly stretched 12 Lift up the peel off roller release lever and close the print head mechanism 13 Move the peel off sensor toward the paper exit chute 14 Peeling will automatically start Pr...

Страница 33: ...nal Rewind Option 1 Break the liner between peel off roller and the internal rewind spindle 2 Push the liner release button to release the liner on the internal rewind spindle 3 Then slide off the lin...

Страница 34: ...e internal rewind for 3 core label roll 1 core label roll 3 core label roll 3 Insert media into the printer label spindle Pull label roll leading edge forward through the media guide bar damper media...

Страница 35: ...the internal rewind for 1 core label roll 7 Using the LCD panel to set the media sensor type and calibrate the selected sensor Please refer to section 3 1 2 Note Please calibrate the gap black mark se...

Страница 36: ...31 2 6 6 Remove Labels from Internal Rewind Option 1 Slide off the labels with supply holder guides from internal rewind spindle Supply holder guides...

Страница 37: ...to adjust the pressure knob to get your best print quality For example if the label width is 4 adjust both print head pressure adjustment knobs to the same level If the label is less than 2 wide incr...

Страница 38: ...with caution The print head burn line default is set for general purpose printing media plain paper and paper thickness less than 0 20mm Poor print quality when using paper thicker than 0 20mm may be...

Страница 39: ...the file and press Enter key to execute the BAS file 7 Then you can type the words or the number of the copy from keyboard by your BAS file program Press F1 key of the keyboard to start this function...

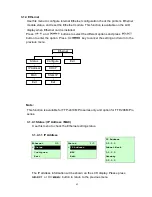
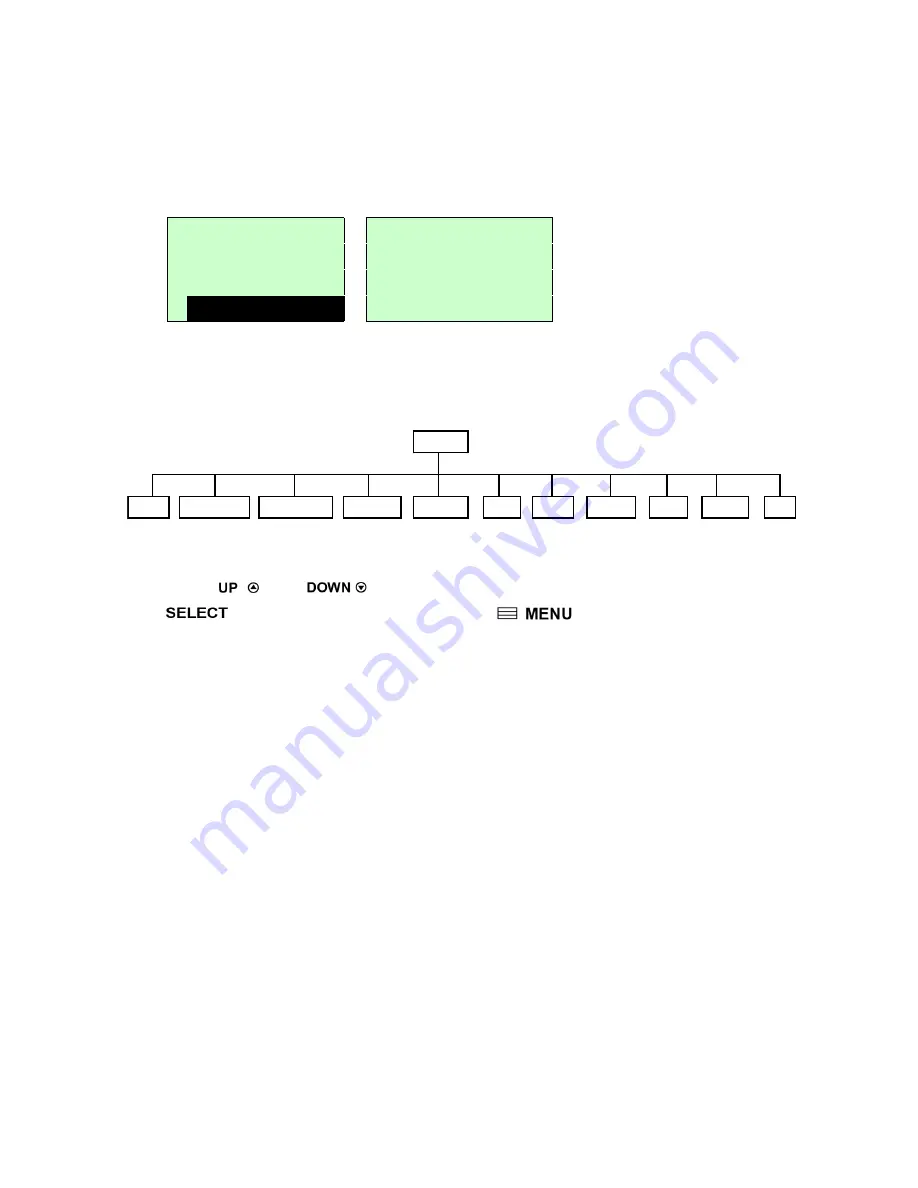
Страница 40: ...mp Mode Chinese TC Initialization Printer Setup File List Print Config English Mileage Info Exit Main Menu Setup File Manager Diagnostics Language Service Russian Polish Spanish Exit Notice The Ethern...

Страница 41: ...Configure ZPL2 Status Baud Rate Status Setup Exit Sensor Serial Comm Ethernet Printer Setup TSPL2 Notice The Ethernet function is available for TTP 2410M Pro series only and option for TTP 246M Pro se...

Страница 42: ...002 000 000 5 1 1 Batch Mode 6 2 GER 003 7 3 Cutter Mode DAN 032 FRE 031 9 5 8 4 Exit 10 6 11 7 ITA 033 SPA 034 SWE 036 12 8 SWI 038 9 10 437 039 042 850 041 11 044 12 852 13 860 14 15 863 045 865 046...

Страница 43: ...just your density based on selected media Press and to increase decrease the printing darkness Press key to enable the setting Press key to cancel the setting and return to the previous menu Note If p...

Страница 44: ...nter this list the print mode in the right side of icon is the printer current setting Press and to select the different print mode and press button to enable the setting Press key to cancel the setti...

Страница 45: ...If printing from enclosed software driver the software driver will send out the OFFSET command which will overwrite the setting set from the front panel 3 1 1 1 6 Shift X Shift Y This option is used t...

Страница 46: ...information about code page please to refer the programming manual When enter the code page list the code page in the right side of icon is the printer current setting Press the and to select the code...

Страница 47: ...an 1251 Cyrillic 1255 Hebrew 1256 Arabic 1257 Baltic 1258 Vietnam ISO Code Page ISO Code Page code page name International Character Set code page number International Character Set 8859 1 Latin 1 885...

Страница 48: ...nu Code Country Code Country Code Country Code Country 001 USA 034 Spanish Spain 044 United Kingdom 055 Brazil 002 Canadian French 036 Hungarian 045 Danish 061 English International 003 Spanish Latin...

Страница 49: ...xxx List Fonts List Setup Control Prefix Format Prefix 4 0 xxx 000 000 5 1 Peel Off 6 2 Exit 7 3 Left Position Feed Length No Motion Exit 9 5 8 4 10 6 11 7 8 12 9 10 Head Close 12 11 13 15 14 Feed Ca...

Страница 50: ...ont panel 3 1 1 2 2 Print Speed Use this option to setup print speed The each increament decreament is 1 ips Press key to raise the print speed and press key to decrease print speed Press key to set i...

Страница 51: ...ess and to select the different print mode and press button to enable the setting Press key to cancel the setting and return to the previous menu Printer Mode Description Tear Off Next label top of fo...

Страница 52: ...fonts stored in the printer s DRAM Flash or optional memory card Press button to print the list 3 1 1 2 7 List Images Print Setup 7 17 Self Test Printing List Images 1 1 List Formats List Setup This f...

Страница 53: ...0 to 9 or A to F Press the button to set the value into printer Press key to cancel the setting and return to the previous menu 3 1 1 2 11 Format Prefix This option is used to set format prefix chara...

Страница 54: ...con is the printer current setting Press and to select the different print mode and press button to enable the setting Press key to cancel the setting and return to the previous menu Selections Descri...

Страница 55: ...position vertically on the label Press the button to move the cursor from left digit to right digit and press the button to set the value from to or 0 to 1 2 Press the button to set the value into pri...

Страница 56: ...message 3 1 2 2 Calibration This option is used to set the media sensor type and calibrate the selected sensor We recommend to calibrate the sensor before printing when changing the media Exit Gap Mo...

Страница 57: ...ally When calibration is completed the LCD screen will return to the previous menu A 2 Manual In case Automatic sensor calibration cannot apply to the media please use Manual function to calibrate the...

Страница 58: ...er Intensity x Ref Level xxx 4 Then Put the label with liner under the media sensor Press the button to set the value into the printer Gap Mode Complete Intensity x Ref Level xxx 5 The gap sensor cali...

Страница 59: ...length into the printer Gap Size 0024 dot 2 Press the button to move the cursor from left digit to right digit and press the button to set the value from 0 to 9 and the dot mm inch Press the button t...

Страница 60: ...librate the bline sensor manually When enter Manual option you will see following message Please complete there steps Paper Len 00151 dot 1 Press the button to move the cursor from left digit to right...

Страница 61: ...r over 128 If the media sensor fails to do so you have to manually change the Intensity by pressing and to reach the above value Bline Mode Complete Intensity x Ref Level xxx 5 The bline sensor calibr...

Страница 62: ...ngth into the printer Bline Size 0024 dot 2 Press the button to move the cursor from left digit to right digit and press the button to set the value from 0 to 9 and the dot mm inch Press the button to...

Страница 63: ...or calibration cannot apply to the media please use Manual function to calibrate the sensor manually When enter Manual option you will see following message Please complete there steps Cont Mode Remov...

Страница 64: ...n is complete Press the button the LCD screen will return to the previous menu 3 1 3 Serial Comm Serial Comm Baud Rate Parity Data Bits Exit Stop Bit s 1200 bps None 7 1 2400 bps Odd 8 2 4800 bps Even...

Страница 65: ...ne Press and buttons to select the different parity and press button to set the value into printer When you enter this list the parity in the right side of is the printer current setting Press key to...

Страница 66: ...The default setting is 1 stop bit Press and buttons to select the different Stop Bits and press button to set the value into printer When you enter this list the option in the right side of icon is th...

Страница 67: ...ting and return to the previous menu Exit Ethernet Status Configure IP Address DHCP MAC Static IP Exit Exit Note This function is available for TTP 2410M Pro series only and option for TTP 246M Pro se...

Страница 68: ...s DHCP and Static IP 3 1 4 2 1 DHCP Ethernet 2 4 Status Configure Reset Press and buttons to select the DHCP function and press to enter Press key to cancel the setting and return to the previous men...

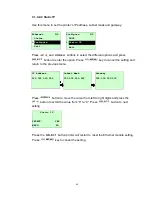
Страница 69: ...the setting and return to the previous menu Press button to move the cursor from left to right digits and press the button to scroll the value from 0 to 9 Press button to next setting Press the butto...

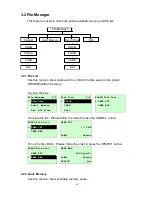
Страница 70: ...lash Card memory To show the files File Manager 1 4 File List 2 4 FLASH File List File List FLASH DEMO TTF Avail Memory CARD DEMO BAS Del All Files Exit To delete the file Please follow the order to p...

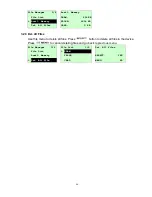
Страница 71: ...iles CARD 0 KB 3 2 3 Del All Files Use this menu to delete all files Press button to delete all files in the device Press to cancel deleting files and go back to previous menu File Manager 3 4 File Li...

Страница 72: ...on the print head heater element Diagnostics 1 4 Self Test Printing Print Config 1 1 Dump Mode Rotate Cutter Self test printout Printer model name Main board firmware version Printer serial number Pri...

Страница 73: ...back to the previous menu DOWNLOA 0D 0A 44 4F 57 4E 4C 4F 4I D TEST2 44 20 22 54 45 53 54 32 2E DAT 5 CL 44 41 54 22 2C 35 2C 43 4C S DOWNLO 53 0D 0A 44 4F 57 4E 4C 4F AD F TES 41 44 20 46 2C 22 54 45...

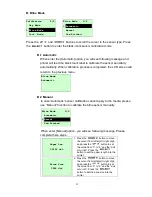
Страница 74: ...int Config DOWN Rev Dump Mode Rotate Cutter MENU Exit 3 4 Language English Chinese TC Chinese SC Japanese Polish Spanish Exit Language German Italian French Russian This option is used to setup the la...

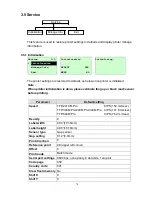
Страница 75: ...nter initialization is done please calibrate the gap or black mark sensor before printing Parameter Default setting Speed TTP 2410M Pro 6 IPS 152 mm sec TTP 346M Pro 246M Pro 344M Pro 4 IPS 101 6 mm s...

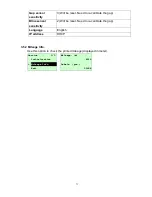
Страница 76: ...gap Bline sensor sensitivity 2 Will be reset Need to re calibrate the gap Language English IP address DHCP 3 5 2 Mileage Info Use this option to check the printed mileage displayed in meter Service 1...

Страница 77: ...this convenient tool you can explore the printer status and settings and troubleshoot the printer Note This utility works with printer firmware V6 00 and later versions 4 1 Start the Diagnostic Tool 1...

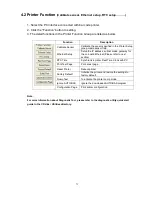
Страница 78: ...he IP address subnet mask gateway for the on board Ethernet Please refer to next section RTC Time Synchronize printer Real Time Clock with PC Print Test Page Print a test page Reset Printer Reboot pri...

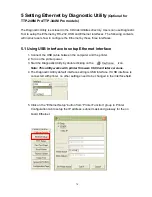
Страница 79: ...Ethernet interface 1 Connect the USB cable between the computer and the printer 2 Turn on the printer power 3 Start the Diagnostic Utility by double clicking on the icon Note This utility works with...

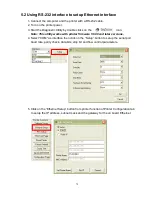
Страница 80: ...he icon Note This utility works with printer firmware V6 00 and later versions 4 Select COM as interface then click on the Setup button to setup the serial port baud rate parity check data bits stop b...

Страница 81: ...tup the IP address subnet mask and gateway for the on board Ethernet 5 Click the Discover Device button to explore the printers that exist on the network 6 Select the printer in the left side of liste...

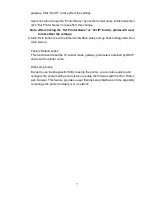
Страница 82: ...e Ethernet interface setup and go back to Diagnostic Tool main screen Factory Default button This function will reset the IP subnet mask gateway parameters obtained by DHCP and reset the printer name...

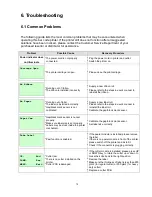
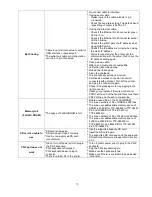
Страница 83: ...led incorrectly Gap black mark sensor is not calibrated Supply a new label roll Please refer to the steps in user s manual to reinstall the label roll Calibrate the gap black mark sensor Paper Jam Gap...

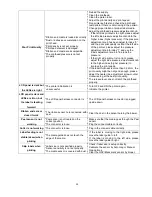
Страница 84: ...is plugging in the right connector Check your program if there is a command PRINT at the end of the file and there must have CRLF at the end of each command line Memory full FLASH DRAM The space of F...

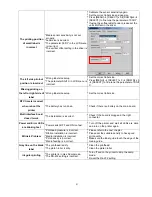
Страница 85: ...t the heater line adjustment screw counter clockwise to get the best print quality The release lever does not latch the printhead properly LCD panel is dark but the LEDs are light The printer initiali...

Страница 86: ...time is incorrect when reboot the printer The battery has run down Check if there is a battery on the main board Multi interface board doesn t work The installation is incorrect Check if the board is...

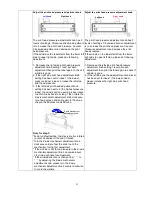
Страница 87: ...t head pressure balance ribbon film characteristics print darkness setting etc In case the ribbon wrinkle happens please follow the instructions below to adjust the printer parts Adjustable Printer Pa...

Страница 88: ...he Z axis knob is rotated counter clockwise to the end of thread Turn the Z axis mechanism adjustment knob clockwise until you feel the knob touch the mechanism for the first adjustment If the wrinkle...

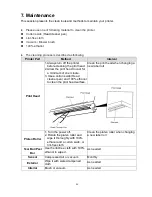
Страница 89: ...he print head to cool for a minimum of one minute 3 Use a cotton swab Head cleaner pen and 100 ethanol to clean the print head surface Clean the print head when changing a new label roll Platen Roller...

Страница 90: ...it careless please use ethanol to clean it Please use 100 Ethenol DO NOT use medical alcohol which may damage the printer head Regularly clean the print head and supply sensors once change a new ribb...

Страница 91: ...86 Revise History Date Content Editor 2012 6 18 Revise pictures of label roll guard Revise section 1 6 Cinya...

Страница 92: ...st Rd Wujie Township New Taipei City 23141 Taiwan R O C Yilan County 26841 Taiwan R O C TEL 886 2 2218 6789 TEL 886 3 990 6677 FAX 886 2 2218 5678 FAX 886 3 990 5577 Web site www tscprinters com E mai...

Отзывы: