


ECHIPAMENTE PENTRU AUTOMATIZĂRI
Electric Film S.R.L. — Aleea Scarisoara 3, Apt.42 ▪ Cluj Napoca, Cluj ▪ 400445 ▪ www.electricfilm.eu
VÂNZĂRI ▪ 0364 710319 ▪ [email protected] ▪ SUPORT TEHNIC ▪ 0788 250583
cele mai sensibile
4
2-3. Reset Button
The reset button can be found between the switch and terminal block. To reset the unit manually
apply power, insert a small plastic tool, and press lightly depressing switch. Hold for 3 seconds
and release.
The Link and Run light will go out and turn back on. The TRP-C31S will revert to the
last setting.
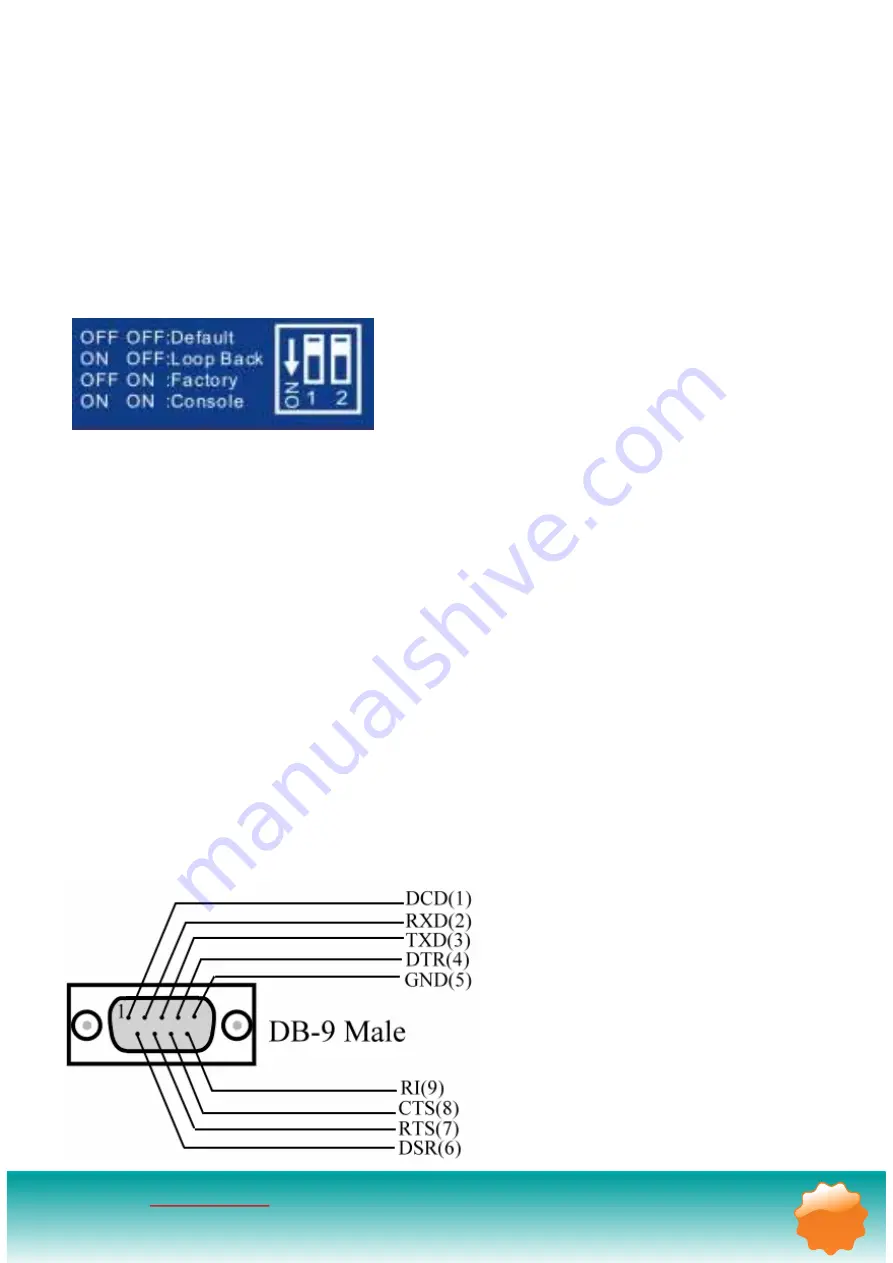
2-4. Dip Switches
A double DIP switch allows the TRP-C31S to be placed into default/ Loop Back/Factory/console
Mode.
When all these switches are moved into the ON position, theTRP-C31S enters console Mode,
allowing configuration of the TRP-C31S from a PC running a terminal program such as
Hyper-terminal. When the TRP-C31S enters console Mode, the console Mode screen will
appear in the Hyper-terminal program window
. The serial port settings must be 8-N-1 at 9600
baud.
When the DIP switches are switched to the ON OFF position, the TRP-C31S will work at Loop
back Mode, all data is sent back immediately.
When the DIP switches are switched to the OFF ON position, the TRP-C31S will revert to its
factory version firmware no matter what newer firmware has been upgraded.
When all of the DIP switches are switched back to the OFF position, the TRP-C31S will enter
default Mode (RS-232, RS-422 or RS-485).
2-5. DB-9 Pin Configuration