1-6-7
E9H11DC
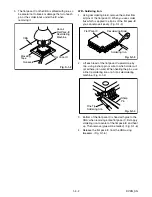
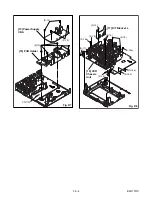
3. How to Eject Manually
Note: When rotating the gear, be careful not to damage the gear.
1. Remove the Top Cover.
2. Remove the Front Assembly.
3. Remove the Front Bracket.
4. Remove the DVD Mechanism & DVD Main CBA Assembly.
5. Unhook two places and detach the Dust Cover.
6. Rotate the gear in the direction of the arrow manually as shown below until the tray descends.
7. Pull the tray out manually and remove a disc.
View for A
Rotate this gear in
the direction of the arrow
hook
Front Bracket
Front Assembly
Dust Cover
A
Содержание ZV450TT8
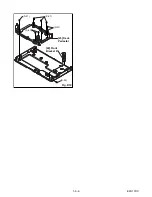
Страница 19: ...1 6 6 E9H11DC Fig D10 23 Deck Pedestal 24 Front Bracket R S 21 S 21 S 21 S 21 S 22 ...
Страница 41: ...1 12 3 Main 1 8 Schematic Diagram E9H11SCM1 ...
Страница 43: ...1 12 5 Main 3 8 Schematic Diagram E9H11SCM3 ...
Страница 44: ...1 12 6 Main 4 8 Schematic Diagram E9H11SCM4 ...
Страница 45: ...1 12 7 Main 5 8 Schematic Diagram E9H11SCM5 ...
Страница 46: ...1 12 8 Main 6 8 Schematic Diagram E9H11SCM6 ...
Страница 47: ...1 12 9 Main 7 8 Schematic Diagram E9H11SCM7 ...
Страница 48: ...1 12 10 Main 8 8 Schematic Diagram E9H11SCM8 ...
Страница 50: ...1 12 12 Front Jack Schematic Diagram E9H11SCFJ ...
Страница 57: ...1 12 19 DTV Module 1 2 Schematic Diagram E9H11SCDTV1 ...
Страница 58: ...1 12 20 DTV Module 2 2 Schematic Diagram E9H11SCDTV2 ...
Страница 63: ...1 12 25 BE9C80F01032A Tuner CBA Top View ...
Страница 64: ...1 12 26 PIN 14 OF TU5001 PIN 15 OF TU5001 WF11 WF12 PIN 4 OF TU5001 WF13 Tuner CBA Bottom View BE9C80F01032A ...
Страница 71: ...1 15 3 R4NTI Push close 0 08 V 0 02 s Push Close detection Threshold level ...
Страница 77: ...1 18 2 E9H11PEX Packing S1 A14 S2 Unit S3 Some Ref Numbers are not in sequence X1 X22 X4 X20 X5 X2 X3 S2 ...

