background image

x10

8

Ignition

A

C

A

D

B

1

2

ENGLISH

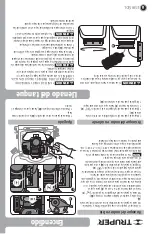
Tank filling

                          • When adding the liquid, the engine 

does not have to stop, but it must be at low speed (i.e., in 

the minimum throttle position).

                          • BEFORE USING THE SPRAYER WITH 

CHEMICALS, YOU MUST TEST THE TANK UNDER 

RUNNING WATER. If you find any leaks or malfunctioning 

parts, repair or replace before using any chemicals.

                           • Determine the proper amounts of 

chemical concentrate and water to prepare the spray 

mixture. The ratio is indicated on the label of the 

concentrated chemical container.

• Remove the tank lid and make sure the particle filter (

A

is in place.

• Pour the appropriate amount of mixture into the tank, after 

pouring hold the container down for a minimum of 30 

seconds to allow it to empty completely.

                          • Do not exceed the limit marked on the 

tank.

• Close the tank by screwing the cap clockwise until the 

tank is perfectly sealed.

• Install the unit on a firm, level surface.

• Move the throttle lever to one third of the scale (

A

).

• Press and release the choke bulb 10 times (

B

).

• Move the choke lever to the “     ” (

1

) position.

• Pull the starter 3 to 5 times (

C

) to get fuel into the 

engine, then pull the starter fast and hard to start the 

engine. Once the engine starts do not let go of the starter, 

carefully return it to its initial position to avoid damaging 

it.

• Once the engine starts slowly install the choke lever in 

the “     ” (

2

) position.

• Adjust the throttle lever (

A

) to a position suitable for 

spraying operation. 

• The machine is now ready for operation.

              • The new machine should not be operated in 

the fully open position for the first 4 hours. The speed 

should be controlled at 4 000 RPM - 5 000 RPM, thus 

allowing the motor to have a good adaptation and 

perform a reliable work.

Cold motor ignition

• Move the throttle lever (

A

) to its lowest position.

• Press the stop button (

D

), until the motor stops.

Shutdown

• Move the fuel lever to one third of the scale (

A

).

• Move the choke lever to the “      ” (

2

) position.

• Pull the starter (

C

) until the engine starts.

• Adjust the throttle lever (

A

).

Hot motor ignition

NOTE

CAUTION

CAUTION

CAUTION

CAUTION

Содержание 101568

Страница 1: ...Manual Backpack Gasoline Sprayer FUG 252 Model Code FUG 252 Applies for 101568 6 6 gal Read the user s manual thoroughly before operating this tool CAUTION ENGLISH ESPAÑOL ...

Страница 2: ...l prolong the duty life make the Warranty valid if necessary and to avoid hazards of fatal injuries please read and understand this Manual before using the tool Fuel Specifications General safety warnings for motor tools Safety Warnings for Using Sprayers Parts Assembly Fuel Supply Ignition Tank filling Operation Maintenance Troubleshooting Authorized Service Centers Warranty Policy 3 4 5 6 7 7 8 ...

Страница 3: ...fuel in the area where the gasoline is supplied or where you prepare the mixture with the oil or when operating the crop sprayer Any attempt to start the sprayer without adding oil to the fuel mixture will cause engine failure Code Description Net Weight Motor Rated Motor Power Fuel Tank Work Pressure Coupling Power Work Cycle FUG 252 101568 9 kg Backpack Gasoline Sprayer 6 6 gal 0 8 Hp 270 PSI 1E...

Страница 4: ...ixer in enclosed areas To prevent accumulation of carbon monoxide an odorless toxic gas potentially deadly Use the right personal protection equipment Using eye protection anti dust masks non skid safety shoes helmet hearing protection and safety gloves considerably reduce the risk of injury Turn off the mixer before adjusting changing accessories or storing Double check the mixer motor switch is ...

Страница 5: ...pray hot solutions or solutions that can become hot with the sprayer Do not attempt to spray gasoline flammable liquids caustic alkalis or corrosive acids with the sprayer Chemicals Before operating the sprayer After using the sprayer Never leave the sprayer unattended Take care of the sprayer from knocks and falls especially when it is pressurized Do not exceed the level indicated on the tank whe...

Страница 6: ...r straps Back padded support Pressure Regulator Spark plug Air filter Allen Key Spark plug wrench Wrench 2 Hoses Y connector Handles with valve Long range pistol Spears Cone spray nozzles Double fan spray nozzles Exhaust Jack line Tank filling cap Fuel tank cap Fuel tank Throttle lever Pump Stop button Fuel tank ENGLISH ...

Страница 7: ...eck and clean the gaskets Immediately install the fuel tank cap and tighten it by hand Wipe up any spilled fuel On a new engine smoke emissions are normal during and after first use ENGLISH Before starting to operate the equipment its parts and accessories must be properly assembled and in the correct position Connect the end A1 of the hose to the pump The long reach gun F can be connected to the ...

Страница 8: ...e throttle lever to one third of the scale A Press and release the choke bulb 10 times B Move the choke lever to the 1 position Pull the starter 3 to 5 times C to get fuel into the engine then pull the starter fast and hard to start the engine Once the engine starts do not let go of the starter carefully return it to its initial position to avoid damaging it Once the engine starts slowly install t...

Страница 9: ... that the spray is not concentrated in one spot Failure to do so may result in chemical damage Remember that the operator must face into the wind The lance or gun should form a level angle of about 15 During spraying the spray tube should oscillate continuously between left and right to increase the spraying range The advanced steps should match the oscillation speed Spraying Protective equipment ...

Страница 10: ...ring 6004Z Damage to the piston The regulated pressure is not enough The elastic force of the regulating spring is not enough Corrosion resistant steel ball worn Pressure regulating valve seat worn Worn piston Piston clearance not adequate Inlet and outlet valves are worn Spraying parts are clogged The holes in the spraying nozzle are worn out The spraying parts are clogged Press 10 times as indic...

Страница 11: ...DE PASAJE ROBLEDO COL CENTRO C P 43600 TULANCINGO HGO TEL 775 753 6615 775 753 6616 SUCURSAL GUADALAJARA AV ADOLFO B HORN 6800 COL SANTA CRUZ DEL VALLE C P 45655 TLAJOMULCO DE ZUÑIGA JAL TEL 33 3606 5285 AL 90 FIX FERRETERÍAS AV PASEO DE LA REPÚBLICA 3140 A COL EX HACIENDA DE LA HUERTA C P 58050 MORELIA MICH TEL 443 334 6858 FIX FERRETERÍAS CAPITÁN ANZURES 95 ESQ JOSÉ PERDIZ COL CENTRO C P 62740 C...

Страница 12: ...tablishment where you purchased it or at any Truper Service Center listed in the annex to the warranty policy and or in www truper com Transportation costs resulting from compliance of this warranty will be covered by For questions or comments call 800 690 6990 Made in China Imported by Truper S A de C V Parque Industrial 1 Parque Industrial Jilotepec Jilotepec Edo de Méx C P 54257 Warranty policy...

Страница 13: ...ducto en Corregidora 22 Col Centro Alc Cuauhtémoc CDMX C P 06060 o en el establecimiento donde lo compró o en algún Centro de Servicio Truper de los enlistados en el anexo de la póliza de garantía y o en www truper com Los gastos de transportación que resulten para su cumplimiento serán cubiertos por Para dudas o comentarios llame al 800 690 6990 Hecho en China Importado por Truper S A de C V Parq...

Страница 14: ...79 80 88 CENTRO DE SERVICIO ECLIPSE CALLE PRINCIPAL MZ 1 LT 1 COL SANTA FE C P 39010 CHILPANCINGO GRO TEL 747 478 5793 FERREPRECIOS S A DE C V LIBERTAD ORIENTE 304 LOCAL 30 INTERIOR DE PASAJE ROBLEDO COL CENTRO C P 43600 TULANCINGO HGO TEL 775 753 6615 775 753 6616 SUCURSAL GUADALAJARA AV ADOLFO B HORN 6800 COL SANTA CRUZ DEL VALLE C P 45655 TLAJOMULCO DE ZUÑIGA JAL TEL 33 3606 5285 AL 90 FIX FERR...

Страница 15: ...n La presión regulada no es suficiente La fuerza elástica del resorte de regulación no es suficiente Bola de acero resistente a la corrosión desgastada Asiento de la válvula reguladora de presión desgastado Pistón desgastado La distancia del pistón no es suficiente Las válvulas de entrada y salida estás desgastadas Las piezas de pulverización están tapadas Los orificios de la hoja de pulverización...

Страница 16: ... se concentre en un solo punto De lo contrario podría provocar un daño por químicos Recuerde que el operador debe orientarse hacia el viento La lanza o pistola debe formar un ángulo nivelado de unos 15 Durante la pulverización el tubo de pulverización debe oscilar continuamente entre la izquierda y la derecha para aumentar el rango de pulverización Los pasos avanzados deben coincidir con la veloci...

Страница 17: ...ivelada Mueva la palanca de aceleración a un tercio de la escala A Oprima y suelte el bulbo cebador 10 veces B Mueva la palanca del ahogador a la posición 1 Jale el arrancador de 3 a 5 veces C para que el combustible entre al motor después jale rápido y con fuerza el arrancador para arrancar el motor Una vez que el motor arranque no suelte el arrancador regréselo con cuidado a su posición inicial ...

Страница 18: ...mpruebe que todas las conexiones estén firmes y cuenten con su respectiva arandela de goma Siga las normas de seguridad para el manejo de combustible página 5 Espere a que el motor se enfríe por completo antes de abastecer el combustible Coloque el equipo sobre una superficie plana Limpie alrededor de la tapa del tanque de combustible para evitar su contaminación Afloje lentamente la tapa del tanq...

Страница 19: ...inado para espalda Regulador de presión Bujía Filtro de aire Llaves allen Llave para bujía Llave 2 Mangueras Conector Y Mangos con válvula Pistola de largo alcance Lanzas Boquillas pulverizadoras de cono Boquillas pulverizadoras de abanico doble Escape Piola Tapa de llenado del tanque Tapa del tanque de combustible Tanque de combustible Palanca del acelerador Bomba Botón de paro Tanque de combusti...

Страница 20: ...calentarse con el fumigador No intente rociar gasolina líquidos inflamables alcalinos cáusticos o ácidos corrosivos con el fumigador Químicos ADVERTENCIA ADVERTENCIA ADVERTENCIA ADVERTENCIA ADVERTENCIA ADVERTENCIA Antes de operar el fumigador Después de operar el fumigador PELIGRO ATENCIÓN Jamás deje el fumigador sin atender Cuide el fumigador de golpes y caídas especialmente cuando esté presuriza...

Страница 21: ...de monóxido de carbono gas inodoro tóxico y potencialmente mortal Utilice equipo adecuado de protección personal Usar protección para los ojos mascarillas antipolvo zapatos de seguridad antideslizantes casco protección para los oídos y guantes de seguridad reduce considerablemente el riesgo de lesiones Apague el equipo antes de hacer ajustes cambiar sus accesorios o guardarlo Asegúrese de que el i...

Страница 22: ...onde se abastezca de la gasolina ni donde prepare la mezcla con el aceite ni al operar el fumigador Cualquier intento de arrancar el fumigador sin añadirle aceite a la mezcla de combustible provocará fallas en el motor Código Descripción Peso neto Motor Potencia nominal del motor Tanque de combustible Presión de trabajo Poder de acoplamiento Ciclo de trabajo FUG 252 101568 9 kg Fumigador a gasolin...

Страница 23: ...cio Autorizados Póliza de Garantía 3 4 5 6 7 7 8 8 9 9 10 11 12 Í ndice 2 Guarde este Instructivo para futuras referencias Los gráficos de este Instructivo son para referencia pueden variar del aspecto real de la herramienta FUG 252 Para poder sacar el máximo provecho de la herramienta alargar su vida útil hacer válida la garantía en caso de ser necesario y evitar riesgos o lesiones graves es fund...

Страница 24: ...uctivo de Lea este Instructivo por completo antes de usar la herramienta Fumigador a gasolina tipo mochila FUG 252 Modelo Código FUG 252 Este Instructivo es para 101568 6 6 gal 25 L ATENCIÓN ESPAÑOL ENGLISH ...

Отзывы: